Advertisement
Quick Links
WARNING
Carefully read, understand and follow the
instructions provided in this manual, and
keep it in a safe place for future reference. If you
have any doubt whatsoever regarding the use
or care of your helmet, please see your retailer
for assistance or advice. Failure to follow the
warnings and instructions provided herein can
result in the failure of the helmet to protect you
in an accident, resulting in a head injury or death.
RIDILL
OWNER'S MANUAL
Ridill-V01a-110718
Advertisement

Related Manuals for Shark RIDILL


Summary of Contents for Shark RIDILL
- Page 1 RIDILL OWNER’S MANUAL WARNING Carefully read, understand and follow the instructions provided in this manual, and keep it in a safe place for future reference. If you have any doubt whatsoever regarding the use or care of your helmet, please see your retailer for assistance or advice.
-
Page 2: Table Of Contents
• 5 year guarantee ................1 9 • Legally required information ............2 0 WARNING! The United-States have a spe- Thank you for purchasing this SHARK RIDILL helmet. cific regulation, the helmets ECE approved only cannot be used in these territories without We are certain that you will be completely sa- the complementary DOT FMVSS 218 approval. -
Page 3: Anatomy Of The Helmets
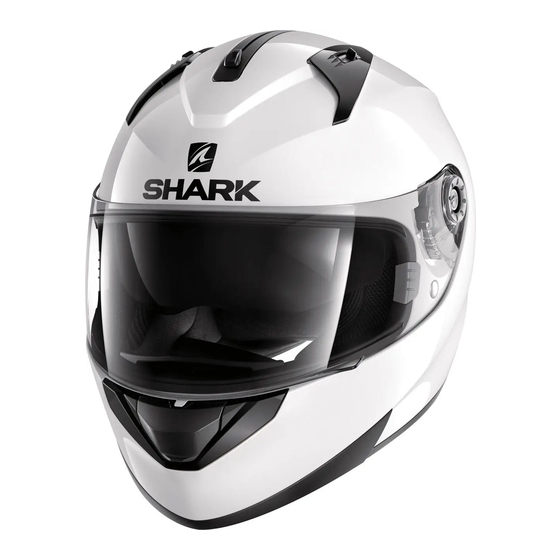
ANATOMY OF THE HELMET 1) Visor 2) Sun shield 3) Sun shield mechanism handle 6 - “Precise Lock“ chinstrap buckle 4) Upper ventilation 5) Lower ventilation 6) Chin strap buckle (according to versions and countries) 7) Base seal 8) Visor seal 6 - Double-D ring chinstrap buckle... -
Page 4: A Helmet In Your Size
A HELMET IN YOUR SIZE WARNING! No helmet can protect shapes, this size reference can only be the wearer from all foreseeable considered as a guide. For maximum pro- high or low speed impacts. However, for tection, it is necessary to check that the maximum protection, the helmet must be helmet is well suited for the shape of your of proper fit and the chin strap must be... - Page 5 A HELMET IN YOUR SIZE a smaller size. See figure If you have any questions about properly 3. Grasp the back of the helmet at the sizing your helmet, see your retailer for base and attempt to pull the helmet assistance.
-
Page 6: Chin Strap
CHIN STRAP CHIN STRAP Choose your SHARK RIDILL helmet and attach the holding system. When the “Precise Lock” is Depending on the various versions and the adjusted to the medium position, the chin strap country concerned, your SHARK RIDILL helmet must be correctly tensioned under the chin to is equipped with a chin strap with a “Precise... - Page 7 CHIN STRAP ntil WARNING! Never use the strap loop to the chin strap with the double-D rings. secure your helmet to your head. In order to Repeat the steps above. Never ride with the chin strap be properly fastened, you must thread the strap loose, improperly fastened or improperly positioned.
-
Page 8: Visor
VISOR REMOVAL Removing the visor: the helmet (2). Repeat the operation on Press on the centre of the button (1) the other side. while pushing the visor to the front of leaving your eyes and face unprotected. In addition, your head could be pulled to the WARNING! If you are not sure that side, causing you to lose control of your you properly replaced the visor, do not use... - Page 9 VISOR RE PLACE Fitting the visor: the plate (3). With your hand flat on the With the visor in open position, place the visor push until it clicks into place (3). visor buttons in the slides provided on WARNING! Tinted or dark visors WARNING! If your visor no longer pro- should never be used at night or vides you with clear visibility after...
- Page 10 SUN SHIELD REMOVAL REMOVAL A/ Removal - Move the sun shield to the lower position - Move the sun visor as indicated by the ar- row to release the hook (Fig. A1). - Pull the sun shield delicately downward and unclip the sun shield at the sides on each side (Fig.
- Page 11 SUN SHIELD REPLACE REPLACEMENT Carry out the previous operation in reverse order: - Move the handling button to the lower position. - Clip the sun shield on at one side and then the other (Figs. A1–B1). - Using a screwdriver or similar pointed instrument, apply pressure to the central fixing button and then clip the sun shield back on by lifting it slightly (Fig.
-
Page 12: The Sun Shield
PARA SOLE un changement brusque de visibilité (tunnel par Il casco SHARK RIDILL è provvisto di parasole inte- exemple). Dans tous les cas où la visibilité est grato a comando esterno. - Page 13 THE SUN SHIELD Warning! If your visor and/or sun shield no longer provide you with excellent visibility The RIDILL is equipped with an Integral sun after a period of service, it is absolutely essential shield with external controls. for you to replace them. We advise you always to ride with perfect visibility.
-
Page 14: Textile Parts
TEXTILE PARTS REMOVAL WARNING! If you have any doubt what- 1/ Ensure that the 2 sides of the chin strap are not joined by the fastening buckle; soever regarding the removal or replace- 2/ Remove the cheek pads from their support by de- ment of the interior padding, DO NOT USE YOUR taching the snaps and release the 2 sides of the chin HELMET. - Page 15 TEXTILE PARTS REPLACE correctly positioned (D-E-F) ; Follow the instructions for the removal, starting 5/ Always make sure that there is no crease of from the end: the chin straps under the cheek pads. 1/ Insert the front part in its base, make you sure that the 3 clips are properly grasped (a) ;...
-
Page 16: Cleaning
TEXTILE PARTS - CLEANING THE TEXTILES CLEANING THE INTERIOR The RIDILL make it easy for you to appre- The interior textile parts are washable; it is im- ciate fully the performance of your helmet. portant to follow the instructions below scru-... -
Page 17: Ventilations
VENTILATIONS tial with LOWER VENTILATION. To open (1) or close (2) the lower ventila- The principal function of this air intake tion, press the button as indicated. is to direct a flow of fresh air over the inte- rior surface of the visor in order to limit the risk of misting. - Page 18 VENTILATIONS sati If d ried incu This 1) a 2) a (glu UPPER VENTILATION. tongue is pushed backwards and closed when 3) u the tongue is pushed forwards (2). The upper air intake (Fig. A) allows air to enter onto ding the upper part of the head and thus renew the air in the head section.
- Page 19 5) ageing due to normal wear of the inner fabrics or foams, If SHARK is unable to carry out the repair for technical reasons the appearance of the external parts, or the visor (scratches, or because a component is not available, SHARK undertakes marks, etc.)
- Page 20 Do not apply any paint, stickers, petrol or any other solvent to this helmet. Only the visors, which have been appro- ved N°E11-050439 and marketed under SHARK’s reference VZ67 can be used with this helmet. This visor is made of injected polycarbonate.To keep the good optical quality of the visor and...
Need help?
Do you have a question about the RIDILL and is the answer not in the manual?
Questions and answers