Table of Contents
Advertisement
Quick Links
Advertisement
Table of Contents

Related Manuals for NEXIQ Technologies Brake-Link


Summary of Contents for NEXIQ Technologies Brake-Link
- Page 1 NEXIQ Brake-Link™ Haldex Trailer ABS Application Operator’s Manual...
- Page 2 IDSC Holdings LLC. Haldex is a registered trademark of Haldex Group. Brake-Link™ and NEXIQ Technologies are trademarks of IDSC Holdings LLC. 2003−2009 IDSC Holdings LLC. All Rights Reserved.
-
Page 3: Table Of Contents
Navigation Icons ................... 5 General Icons ..................5 Connecting Components ............... 6 Navigating Brake-Link™..............8 Home Button..................8 Enter Button..................8 Menu Buttons..................9 Direct Access Buttons................. 10 Light-Emitting Diodes (LEDs) ............. 12 NEXIQ Brake-Link™ Haldex Trailer ABS Application Operator’s Manual... - Page 4 Tests....................36 Testing Valves................. 37 Testing Sensors ................40 Modify ....................43 Edit Parameters ................43 Tire Scale Factor ................43 Distance to Service................48 Reset Trip Distance................. 51 Clear Configuration ................. 53 NEXIQ Brake-Link™ Haldex Trailer ABS Application Operator’s Manual...
- Page 5 Data List Parameters - 2S/1M ............. 58 Data List Parameters - 2S/2M ............. 59 Data List Parameters - 4S/2M ............. 60 Haldex Trailer ABS Fault Codes......61 Haldex Trailer ABS Fault Codes..........62 NEXIQ Brake-Link™ Haldex Trailer ABS Application Operator’s Manual...
- Page 6 Anti-lock Braking Systems (ABS). This tool also provides a variety of utilities and configuration options. The end-user documentation is therefore divided into a set of task-oriented operator’s manuals. This manual details the Haldex Trailer ABS Application . NEXIQ Brake-Link™ Haldex Trailer ABS Application Operator’s Manual...
-
Page 7: Getting Started
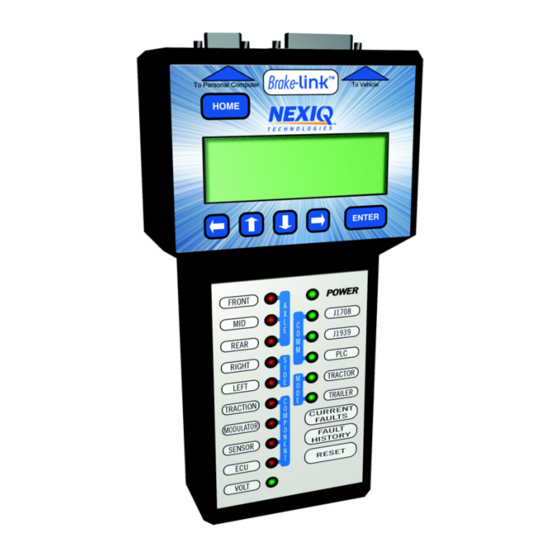
• Getting Started Chapter Getting Started Brake-Link™ is a multi-faceted, hand-held, ABS diagnostic tool that offers a variety of utilities, diagnostic applications, and configuration options. Figure 1.1 Brake-Link™ Component connection procedures and navigation vary depending on the utility or application you’re using. The connection and navigation sections in this manual are specific to the Haldex Trailer ABS Application . -
Page 8: Safety Warnings & Cautions
Read and understand this manual before operating your Brake-Link™. NEXIQ Technologies recommends having an assistant drive the vehicle while you use the Brake-Link™ to perform vehicle road testing. Never leave the vehicle unattended while testing. Certain Electro-Static Discharge (ESD) and/or Electrical Fast Transient (EFT) events may lock up the Brake-Link™. -
Page 9: Using This Manual
• Menu items : Whenever the manual instructs you to select from a list of menu items, it presents the desired choice with this format. • Screen titles : Once you select a menu item, Brake-Link™ presents the selected item’s screen. The screen title appears in bolded type. -
Page 10: Navigation Icons
Navigation Icons Brake-Link™ offers two methods of navigation: menu and direct access buttons. See “Navigating Brake-Link™”, on page 8. If a task can be performed with both methods, the manual provides separate instructions for each method. Topic introductions indicate when there are two sets of instructions and the following icons help you to easily locate the desired set. -
Page 11: Connecting Components
The brake controllers supported by this application transmit information over the vehicle’s power lines. If the trailer is connected to the tractor, attach Brake-Link™ to the tractor’s Deutsch connector; otherwise, attach to the trail- er’s power line with the J560 PLC Cable Set. - Page 12 To connect Brake-Link™ components and power-up: Attach the Power/Data Cable DB15 Connector to the data port (labeled To Vehicle) on the Brake-Link™; tighten the thumbscrews. Plug the Data Cable Atari End into the Atari End on the vehicle interface cable (i.e. Deutsch adapter or J560 PLC Cable Set).
-
Page 13: Navigating Brake-Link
BEN DIX /KB/ EATO N A BS MER ITO R WA BCO ABS Enter Button Press the button to select a menu item, confirm a response, or instruct Brake-Link™ to proceed to the next step. NEXIQ Brake-Link™ Haldex Trailer ABS Application Operator’s Manual... -
Page 14: Menu Buttons
A dashed line displays after the last option indicating the end of the menu or list. • press to select the option the blinking cursor is on; • press to exit your selection and return to the previous menu or screen. NEXIQ Brake-Link™ Haldex Trailer ABS Application Operator’s Manual... -
Page 15: Direct Access Buttons
• Getting Started Chapter Direct Access Buttons The direct access buttons reside on the lower portion of the Brake-Link , and are grouped by functionality. These buttons operate differently depending on the application you’re using and/or controller you’re diagnosing. This section provides an overview for how the direct access buttons are used within the Haldex Trailer ABS Application. - Page 16 Clear Faults Clear active/stored faults from the ECU View Data Lis t To view Data List parameters View Data List To view Data List parameters View ECU Information To view ECU information NEXIQ Brake-Link™ Haldex Trailer ABS Application Operator’s Manual...
-
Page 17: Light-Emitting Diodes (Leds)
• Getting Started Chapter Light-Emitting Diodes (LEDs) Once the Brake-Link™ establishes power, the POWER LED illuminates. Then, once the Haldex Trailer ABS Application is loaded, the PLC and TRAILER LEDs illuminate, and remain lit while the application is being used. -
Page 18: Using Haldex Trailer Abs Application
Using the Haldex Trailer ABS Application Features, page 16 rake-Link™ features the Haldex Trailer ABS Application for diagnosing Haldex Trailer Anti-lock Brake System issues. This chapter provides instructions for using the Haldex Trailer ABS Application . NEXIQ Brake-Link™ Haldex Trailer ABS Application Operator’s Manual... -
Page 19: Registering Ecu & Selecting Navigation Method
ECU, as well as details on selecting a nav- igation method. To register the ECU & select a navigation method: Connect Brake-Link™ to the tractor or trailer and power-up (see “Con- necting Components”, on page 6). Brake-Link™ boots up and presents the Select Application screen. - Page 20 If you see the message, ECU NOT RESPONDING: • the ECU is not an appropriate Haldex Trailer ECU. • the ECU or Data Bus is not working properly. — If you select menu navigation, Brake-Link™ presents the Haldex Trailer ABS Application main menu.
-
Page 21: Using The Haldex Trailer Abs Application Features
• Configuration • Auxiliary Codes • Catalog Number • Build Date (Julian) • Serial Number • Software Version The rest of this section describes retrieving ECU information using each navi- gation method. 16 NEXIQ Brake-Link™ Haldex Trailer ABS Application Operator’s Manual... - Page 22 Using the Haldex Trailer ABS Application Features menu navigation View ECU Information via Connect Brake-Link™ to the tractor or trailer and power-up (see “Con- necting Components”, on page 6). Brake-Link™ boots up and presents the Select Application screen. S ELEC T AP PLI CATI ON...
- Page 23 • Using Haldex Trailer ABS Application Chapter Brake-Link™ auto-detects the Haldex Trailer ABS ECU, then presents the ECU sensor/modulator configuration and indicates whether there are active and/or stored faults. PLC SEL ECT 2S/1 M ACTI VE FAU LTS YE S...
- Page 24 Using the Haldex Trailer ABS Application Features button navigation View ECU Information via Connect Brake-Link™ to the tractor or trailer and power-up (see “Con- necting Components”, on page 6). Brake-Link™ boots up and presents the Select Application screen. S ELEC T AP PLI CATI ON...
-
Page 25: Faults
A code that appears in the stored list, but isn’t in the active list after cycling power or road testing the vehicle, typically indicates an intermittent problem. This section explains how to use each option provided on the FAULTS menu. 20 NEXIQ Brake-Link™ Haldex Trailer ABS Application Operator’s Manual... -
Page 26: Viewing Active Faults
View active fault codes via Connect Brake-Link™ to the tractor or trailer and power-up (see “Con- necting Components”, on page 6). Brake-Link™ boots up and presents the Select Application screen. S ELEC T AP PLI CATI ON... - Page 27 (in decimal only) If more than one active fault is detected, ↑ and/or ↓ arrows Note: will be displayed beside Line 4, indicating that additional fault(s) may be viewed by pressing the key. 22 NEXIQ Brake-Link™ Haldex Trailer ABS Application Operator’s Manual...
- Page 28 Select Application button navigation View active fault codes via Connect Brake-Link™ to the tractor or trailer and power-up (see “Con- necting Components”, on page 6). Brake-Link™ boots up and presents the Select Application screen. S ELEC T AP PLI CATI ON...
- Page 29 Refer to Appendix B for a complete listing of all Haldex Trailer ABS fault codes. Press to return to the CONTINUE BY PRESSING BUTTONS prompt or to return to the Select Application screen. 24 NEXIQ Brake-Link™ Haldex Trailer ABS Application Operator’s Manual...
-
Page 30: Viewing Stored Faults
View stored fault codes via Connect Brake-Link™ to the tractor or trailer and power-up (see “Con- necting Components”, on page 6). Brake-Link™ boots up and presents the Select Application screen. S ELEC T AP PLI CATI ON... - Page 31 Line 4, indicating that additional fault(s) may be viewed by pressing the key. Note: Refer to Appendix B for a complete listing of all Haldex Trailer ABS fault codes. 26 NEXIQ Brake-Link™ Haldex Trailer ABS Application Operator’s Manual...
- Page 32 Select Application button navigation View stored fault codes via Connect Brake-Link™ to the tractor or trailer and power-up (see “Con- necting Components”, on page 6). Brake-Link™ boots up and presents the Select Application screen. S ELEC T AP PLI CATI ON...
- Page 33 Refer to Appendix B for a complete listing of all Haldex Trailer ABS fault codes. Press to return to the CONTINUE BY PRESSING BUTTONS prompt or to return to the Select Application screen. 28 NEXIQ Brake-Link™ Haldex Trailer ABS Application Operator’s Manual...
-
Page 34: Clearing Stored Faults
This section explains how to clear stored faults with each method of navigation. menu navigation Clear stored fault codes via Connect Brake-Link™ to the tractor or trailer and power-up (see “Con- necting Components”, on page 6). Brake-Link™ boots up and presents the Select Application screen. - Page 35 YES , then press Brake-Link™ displays a Faults Cleared message. Press to return to the Faults Menu . Press to return to the main menu or to return to the screen. Select Application 30 NEXIQ Brake-Link™ Haldex Trailer ABS Application Operator’s Manual...
- Page 36 Using the Haldex Trailer ABS Application Features button navigation Clear stored fault codes via Connect Brake-Link™ to the tractor or trailer and power-up (see “Con- necting Components”, on page 6). Brake-Link™ boots up and presents the Select Application screen. S ELEC T AP PLI CATI ON...
- Page 37 Brake-Link™ displays a Faults Cleared message. Press to return to the CONTINUE BY PRESSING BUTTONS prompt. Press to return to the Navigation Selection screen or return to the Select Application screen. 32 NEXIQ Brake-Link™ Haldex Trailer ABS Application Operator’s Manual...
-
Page 38: Data List
ECU configuration. menu navigation Access the Data List via Connect Brake-Link™ to the tractor or trailer and power-up (see “Con- necting Components”, on page 6). Brake-Link™ boots up and presents the Select Application screen. S ELEC T AP PLI CATI ON... - Page 39 OF F SOL ENO ID 13 .8 v Note: Brake-Link™ displays data values in either English or metric units, depending on the ECU configuration. Press the key to scroll through the list. A dashed line appears once you have reached the end of the list.
- Page 40 Using the Haldex Trailer ABS Application Features button navigation Access the Data List via Connect Brake-Link™ to the tractor or trailer and power-up (see “Con- necting Components”, on page 6). Brake-Link™ boots up and presents the Select Application screen. S ELEC T AP PLI CATI ON...
-
Page 41: Tests
OF F SOL ENO ID 13 .8 v Note: Brake-Link™ displays data values in either US or metric units, depending on the ECU configuration. Press the key to scroll through the list. A dashed line appears once you have reached the end of the list. -
Page 42: Testing Valves
1, valve tests are not available. menu navigation: Test selected modulator valve via Connect Brake-Link™ to the tractor or trailer and power-up (see “Con- necting Components”, on page 6). Brake-Link™ boots up and presents the Select Application screen. S ELEC T AP PLI CATI ON... - Page 43 Press the key to select TEST VALVES , then press . The Valve Selection screen displays. Y EL LOW VAL VE C HAN NEL BLU E V ALVE CHA NNE L 38 NEXIQ Brake-Link™ Haldex Trailer ABS Application Operator’s Manual...
- Page 44 The list of available valves differs depending on the ECU configuration. See Figure 2.1, on page 37 for a complete listing. Brake-Link™ begins testing the selected valve. A series of X’s will display at the bottom of the screen, indicating the test’s progress status.
-
Page 45: Testing Sensors
The following table lists the available speed sensors for each Haldex ECU. ECU Configuration Speed Sensors 2S/1M R1A, R1B 2S/2M B2A, Y2B 4S/2M B2A, Y2B, B3A, Y3B Figure 2.3 Speed Sensors for Haldex ECUs 40 NEXIQ Brake-Link™ Haldex Trailer ABS Application Operator’s Manual... - Page 46 Using the Haldex Trailer ABS Application Features menu navigation Test sensor valve via Connect Brake-Link™ to the tractor or trailer and power-up (see “Con- necting Components”, on page 6). Brake-Link™ boots up and presents the Select Application screen. S ELEC T AP PLI CATI ON...
- Page 47 T ES T V ALVE S SEN SOR SEQ UENC E T EST Press the key to select TEST VALVES , then press Brake-Link™ displays all available wheel sensors with speed values of <1. SPE ED R1A <1 mph SPE ED R1B <1 mph...
-
Page 48: Modify
Changing the unit will cause the units to change for other parameters as well. To modify the Tire Scale Factor parameter: Connect Brake-Link™ to the tractor or trailer and power-up (see “Con- necting Components”, on page 6). Brake-Link™ boots up and presents the Select Application screen. -
Page 49: Tire Scale Factor
Tire Scale Factor , then press . Brake-Link™ displays the current tire scale factor. TI RE S CALE FA CTOR TIR E S F 502 re v/mi [EN TER] TO CON TINU E 44 NEXIQ Brake-Link™ Haldex Trailer ABS Application Operator’s Manual... - Page 50 Press the keys to set the value of the digit(s). Note: Pressing the button increases the number; pressing button decreases the number. Press NEXIQ Brake-Link™ Haldex Trailer ABS Application Operator’s Manual...
- Page 51 YES , then press . The screen displays the following warning message. TRI P DI ST & SER V D IST WIL L BE RES ET ARE YOU SUR E? [NO ] 46 NEXIQ Brake-Link™ Haldex Trailer ABS Application Operator’s Manual...
- Page 52 Using the Haldex Trailer ABS Application Features Press the key to select YES , then press Brake-Link™ returns to the to the Modify Selection screen. T IR E SC ALE FAC TOR DIS TANC E T O SE RVIC E...
- Page 53 Chapter Distance to Service To modify the Distance to Service parameter: Connect Brake-Link™ to the tractor or trailer and power-up (see “Con- necting Components”, on page 6). Brake-Link™ boots up and presents the Select Application screen. S ELE CT A PPLI CATI ON...
- Page 54 RES ET T RIP DIS TANC E CLE AR C ONF IGUR ATIO N Press the key to select DISTANCE TO SERVICE , then press . Brake-Link™ displays the current distance to service value. 5 2000 .2 mi SER V DIST 99 9.8 mi...
- Page 55 D IS TAN CE T O SE RVI CE RES ET TRIP DIS TAN CE CLE AR CONF IGUR ATI ON Press to return to the main menu or press to return to the screen. Select Application 50 NEXIQ Brake-Link™ Haldex Trailer ABS Application Operator’s Manual...
-
Page 56: Reset Trip Distance
The RESET TRIP DISTANCE feature allows you to set the current trip distance back to “0”. To reset Trip Distance: Connect Brake-Link™ to the tractor or trailer and power-up (see “Con- necting Components”, on page 6). Brake-Link™ boots up and presents the Select Application screen. - Page 57 CLE AR CONF IGUR ATI ON Press the key to select RESET TRIP DISTANCE , then press . Brake-Link™ prompts you to confirm that you want to set the trip distance to 0. RES ET T RIP DIS TANC E T O ZE RO...
-
Page 58: Clear Configuration
The CLEAR CONFIGURATION feature clears the current ECU configuration, allowing the configuration to be changed. To clear configuration: Connect Brake-Link™ to the tractor or trailer and power-up (see “Con- necting Components”, on page 6). Brake-Link™ boots up and presents the Select Application screen. - Page 59 C LE AR CONF IGUR ATI ON Press the key to select CLEAR CONFIGURATION , then press . Brake-Link™ prompts you to confirm that you want to reset the ECU configuration. CLE AR C ONFI GUR ATIO N 4S/2 M...
- Page 60 Using the Haldex Trailer ABS Application Features Press the key to select YES , then press Brake-Link™ prompts you to power the ECU off then on. FO R N EW C ONFI G, T URN OFF THE N RE APPL Y PO WER TO ECU...
-
Page 61: Haldex Trailer Abs Data List Parameters
Data List Parameters - 2S/1M, page 58 Data List Parameters - 2S/2M, page 59 Data List Parameters - 4S/2M, page 60 his appendix provides listings for all data list parameters for each Haldex ECU configuration. NEXIQ Brake-Link™ Haldex Trailer ABS Application Operator’s Manual... -
Page 62: Data List Parameters - 2S/1M
200 - 700 rev/ mi or rev/ Odometer 0.0 - 10737418.2 mi or Trip Distance TRIP DIST 0.0 - 21474836.5 mi or Distance to SERV DIST -10737418.2 - mi or Service 21474836.5 58 NEXIQ Brake-Link™ Haldex Trailer ABS Application Operator’s Manual... -
Page 63: Data List Parameters - 2S/2M
200 - 700 rev/ mi or rev/ Odometer 0.0 - 10737418.2 mi or Trip Distance TRIP DIST 0.0 - 21474836.5 mi or Distance to SERV DIST -10737418.2 - mi or Service 21474836.5 NEXIQ Brake-Link™ Haldex Trailer ABS Application Operator’s Manual... -
Page 64: Data List Parameters - 4S/2M
200 - 700 rev/ mi or rev/ Odometer 0.0 - mi or 10737418.2 Trip Distance TRIP DIST 0.0 - mi or 21474836.5 Distance to SERV DIST -10737418.2 - mi or Service 21474836.5 60 NEXIQ Brake-Link™ Haldex Trailer ABS Application Operator’s Manual... -
Page 65: Haldex Trailer Abs Fault Codes
Haldex Trailer ABS Fault Codes, page 62 his appendix provides a table containing the current Sub-system ID and Failure Mode Indicator (SID/FMI) descriptions for Haldex ABS fault codes, for each ECU configuration. NEXIQ Brake-Link™ Haldex Trailer ABS Application Operator’s Manual... - Page 66 SPEED SENSOR YEL S2B 2S/2M, 4S/2M SENSOR GAP TO LARGE SPEED SENSOR BLU S3A 4S/2M SENSOR GAP TO LARGE SPEED SENSOR YEL S3B 4S/2M SENSOR GAP TO LARGE INCORRECT EXCITER RING TOOTH COUNT 62 NEXIQ Brake-Link™ Haldex Trailer ABS Application Operator’s Manual...
- Page 67 WARNING LAMP SIGNAL FROM OTHER DEVICE SENSOR WIRING CROSSED OVER AXLE RED VALVE CHANNEL 2S/1M SLOW WHEEL RECOVERY BLU VALVE CHANNEL 2S/2M SLOW WHEEL RECOVERY BLU VALVE CHANNEL 4S/2M SLOW WHEEL RECOVERY NEXIQ Brake-Link™ Haldex Trailer ABS Application Operator’s Manual...
- Page 68 DUMP OPEN CIRCUIT RED VALVE CHANNEL 2S/1M HOLD SHORT CIRCUTI BLU VALVE CHANNEL 2S/2M HOLD SHORT CIRCUIT BLU VALVE CHANNEL 4S/2M HOLD SHORT CIRCUIT YEL VALVE CHANNEL 2S/2M HOLD SHORT CIRCUIT 64 NEXIQ Brake-Link™ Haldex Trailer ABS Application Operator’s Manual...
- Page 69 BLU VALVE CHANNEL 2S/2M HOLD SHORT TO B+ BLU VALVE CHANNEL 4S/2M HOLD SHORT TO B+ YEL VALVE CHANNEL 2S/2M HOLD SHORT TO B+ YEL VALVE CHANNEL 4S/2M HOLD SHORT TO B+ NEXIQ Brake-Link™ Haldex Trailer ABS Application Operator’s Manual...
- Page 70 REPLACE AS REQUIRED DEFECTIVE ABS ECU REPLACE AS REQUIRED DEFECTIVE ABS ECU REPLACE AS REQUIRED DEFECTIVE ABS ECU REPLACE AS REQUIRED DEFECTIVE ABS ECU REPLACE AS REQUIRED DEFECTIVE ABS ECU REPLACE AS REQUIRED 66 NEXIQ Brake-Link™ Haldex Trailer ABS Application Operator’s Manual...
- Page 71 REPLACE AS REQUIRED DEFECTIVE ABS ECU REPLACE AS REQUIRED DEFECTIVE ABS ECU REPLACE AS REQUIRED DEFECTIVE ABS ECU REPLACE AS REQUIRED DEFECTIVE ABS ECU REPLACE AS REQUIRED DEFECTIVE ABS ECU REPLACE AS REQUIRED NEXIQ Brake-Link™ Haldex Trailer ABS Application Operator’s Manual...
- Page 72 • Haldex Trailer ABS Fault Codes Appendix 68 NEXIQ Brake-Link™ Haldex Trailer ABS Application Operator’s Manual...
Need help?
Do you have a question about the Brake-Link and is the answer not in the manual?
Questions and answers