
Related Manuals for Bushnell Onix 364000


Summary of Contents for Bushnell Onix 364000
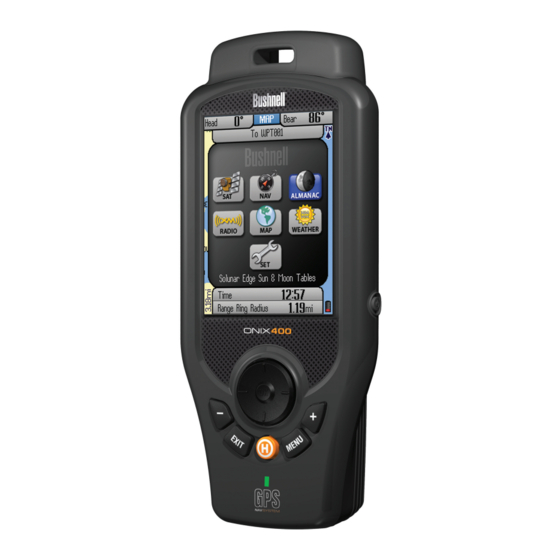
- Page 1 ONIX 400 GPS/XM RADIO RECEIVER Quick Start Guide Model # 364000 Lit # 98-0973/09-08 English...
-
Page 2: Warnings And Notices
Software remain with Bushnell. You acknowledge that the Software is the property of Bushnell and is protected under the United States of America copyright laws and international copyright treaties. You further acknowledge that the structure, organization and code of the Software are valuable trade secrets of Bushnell and that the Software in source code form remains a valuable trade secret of Bushnell. - Page 3 The Almanac Page and Solunar Edge Technology The Bushnell ONIX 400 features a unique Almanac page, which uses patented Solunar Edge technology developed by Speedtech® Instruments to provide a significantly more accurate predictor of animal and fish activity than standard “sun & moon tables”, providing the most reliable activity predictions for your location.
- Page 4 An Almanac screen uses data from internal sun and moon tables to predict animal activity levels at different times of the day- for any date and location. Bushnell’s exclusive SafeTrack™ battery conservation feature extends your battery life while maintaining GPS contact, so you can check your current location anytime without the restart delay typical of other GPS receivers.
-
Page 5: Included Parts List
• ONIX 400 GPS/XM Receiver • Lithium Ion Battery Pack • 128MB MicroSD Card • AC Charging Cord • USB Cable battery charging, cleaning & maintenance • The internal Lithium Ion battery pack must be charged before the ONIX can be used for the first time. Make sure the MicroSD card is inserted in the card slot first, then attach the battery pack by lining it up with the opening on the bottom of the unit, pushing it straight onto the unit until flush with the surface, then sliding the battery down towards the end with the USB and accessory ports, until it locks securely into place (to remove the battery, press the soft release area (see yellow arrow below) at the curved end of the battery, then slide it up and lift directly away... - Page 6 controls and Ports identification Helical Satellite Antennas and Lanyard Attachment 5-Way Button Pad: Used to navigate on screen, select from menu options, and create waypoints. Press Up/Down arrows to select items in a menu, Right arrow to view submenus (if available), Left arrow to exit the menu.
-
Page 7: Main Menu
the seVen Pages of the oniX400 1. SAT (Satellite)-this page allows you to monitor the signal strength of multiple GPS satellites, confirming when you have a “lock”-adequate number and quality of satellites to ensure good reception. 2. NAV (Navigation)- a basic display of the digital compass. View your current heading and true or magnetic north at any time by switching to this page. -
Page 8: Power Menu
tiPs for maXimiZing battery life in the oniX 400 The ONIX400 uses the latest technology and incorporates exclusive features to provide the most efficient combination of battery life and functionality. The rechargeable Lithium Ion battery pack provides an extended capacity of power to run both your GPS and XM Satellite Radio features simultaneously. -
Page 9: Getting Started
1. You must charge the battery pack before using the ONIX400. Attach the battery pack (first, verify that the MicroSD card is installed in its slot), referring to the instructions and photos on pg. 5. Plug the AC charger cord into the accessory port (pg. 6), then into an AC outlet (110-120 volt/60 cycle). 2. - Page 10 (center button) to view that page. The current page you are on is always indicated in the box at the top of the display, just below the “Bushnell” logo. Let’s take a tour of the various pages and the options they provide:...
- Page 11 eXPloring the Pages : the maP Page Note: Your XM Weather subscription must be activated, and XM reception turned on, before it is possible to display any weather information. The Weather Info options are (Fig. 4): a) Animate (view weather history in motion) b) Quick Radar (lower detail precipitation map, updated every 2 minutes) c) Radar Summary (data series updated every 15 min.
- Page 12 eXPloring the Pages : using the info boxes • (not on the options list) Info Boxes-the wide rectangular Info Boxes at the bottom of the Page displays (along with two small Nav data boxes at the top of the screen) allow you to keep an eye at all times on a wide variety of information, all user selectable-they let you to “customize”...
- Page 13 eXPloring the Pages : using the info boxes because “No Information” is selected for display there. Simply select something else, and you can have up to a maximum of 4 Info Boxes in the lower part of your Map screen (Fig. 9). 7.
- Page 14 eXPloring the Pages : the naV Page & almanac Page The NAV Page The NAV page provides a standard compass display, with arrows to indicate your last heading and/or current bearing, along with magnetic or true north indication and other optional navigation related data, depending on the display preferences the user has set up.
- Page 15 eXPloring the Pages : the almanac Page animals and fish seem to exhibit higher or lower levels of activity related to the position of the sun and moon (think of its effect on tides). The graph at the bottom of the Almanac page displays the estimated level of animal or fish activity based on the stored data.
- Page 16 eXPloring the Pages : the Xm Weather & radio Pages The XM Weather Page After selecting the XM Weather Page you will see a display showing the various weather conditions and weather related information for a selected location (Fig. 21). Use the OK or HOT buttons to change the “When” or “Where” for the weather info.
- Page 17 eXPloring the Pages : the sat and set Pages The SAT Page (Fig. 25) As seen earlier in “Getting Started” , the SAT page view is used to identify the quality or strength of the satellite signals being received by the unit. The Info Boxes on the bottom of the satellite page are used to identify your location, shown as Location (latitude, longitude) and Altitude (above sea level).
-
Page 18: Setting Waypoints
: setting Waypoints • Display-allows adjustment of display Brightness and Breadcrumbs color preference (used for the dots on the map indicating your active trail). • Sounds-options to mute all sounds, set volume, and mute or select different tones for: key beep, destination arrival and warning sound. - Page 19 (Fig. 34, next page). The process for setting up a custom Map Area is outlined on the next page. More information about utilizing the “My Map Areas” features can be found at: http://www. bushnell.com/gps/ by clicking the Product Support link.
- Page 20 : creating a map area Let’s take a look at the basics of setting up and using your Map Areas... How to Define a New Map Area (Using “Fence Posts”): • Click the HOT button to get the HOT menu, then press “+” to switch to the “My Stuff”...
- Page 21 When you are on the MAP or NAV page, all basic navigation actions are easily controlled by Bushnell’s exclusive “HOT button” . The HOT button is also used to select the view options for the current display Page. Let’s take a look-from the MAP page, click the HOT button to view the “HOT Menu”...
- Page 22 : the hot button menu 2) All Waypoints-pick from list of all stored waypoints (shown in order beginning with the closest) 3) POI (Point of Interest)-gas stations, hospitals, airports, etc. 4) Places-built into the base map-city names, etc.
- Page 23 : the my stuff menu “Add Fence Post” . If you continue to set additional points, you will see more options appear in the Measuring menu (Fig. 43). You can clear all ruler guides and start over, or select “Close Region” to turn three or more points into a Map Area and measure its area in square yards or miles.
- Page 24 SafeTrack™ Battery Conservation Mode SafeTrack is a Bushnell exclusive feature that extends and conserves battery power, without the wait to re-establish GPS satellite contact after a full power down. When you are in SafeTrack mode, the display screen will Fig 48.
- Page 25 : editing text and icons As long as you are actively using the GPS and pressing buttons (within time limit set in SafeTrack options (Fig. 49), the screen display will stay active-but the unit is still in SafeTrack mode.
- Page 26 aPPendiX: how to Personalize your Xm channel monitor and scoreboard When you are on the XM Radio Page, press the HOT button to view the XM Radio HOT button menu (Fig. 31) that helps you build a list of your favorites from among 170+ XM entertainment channels, and also keep up with the scores of your favorite teams by setting up your personal “Scoreboard”...
- Page 27 Exit to return to the XM HOT button menu. Select “My Browser” and press OK. Press the “-” button once to select the “Sports” tab. This is your customized, personal Bushnell Scoreboard. The red banner at the top of the Scoreboard shows all your selected sports categories, conferences, etc. It will scroll through all available data for everything you checked earlier, and nothing that is not checked (Fig.
- Page 28 Downloading, Uploading and Storing Satellite (Aerial) Photos and Topo Maps Now that you are familiar with your Bushnell ONIX series GPS, you are ready to take advantage of many of the easy to use exclusive Bushnell features. In conjunction with your Bushnell GPS unit, you have two additional tools that make your ONIX the most functional GPS for your next outdoor excursion–...
-
Page 29: Troubleshooting
Support” tab at the top of the main page, then “Software Updates” in the left frame. Component PC System Requirements (to use the “PC Companion” software with Bushnell ONIX GPS products) 500 megahertz (MHz), Pentium III processor or higher 64 megabyte (MB) RAM or higher... -
Page 30: Fcc Compliance Statement
· Consult the dealer or an experienced radio/TV technician for help. The ONIX does not contain any user-serviceable parts. Repairs should only be made by an Authorized Bushnell repair center. Unauthorized repairs or modifications could result in permanent damage to the equipment, and will void your warranty and your authority to operate this device under Part 15 regulations. - Page 31 Lenexa, Kansas 66214 For products purchased outside the United States or Canada please contact your local dealer for applicable warranty information. In Europe you may also contact Bushnell at: This warranty gives you specific legal rights. You may have other rights which vary from country to country.
- Page 32 For further questions or additional information please contact: Bushnell Outdoor Products 9200 Cody, Overland Park, Kansas 66214 Customer Service (800) 423-3537 • www.bushnell.com ©2008 Bushnell Outdoor Products...
Need help?
Do you have a question about the Onix 364000 and is the answer not in the manual?
Questions and answers