Table of Contents
Advertisement
Quick Links
SKU No. 1006232239
1006232238
USE AND CARE GUIDE
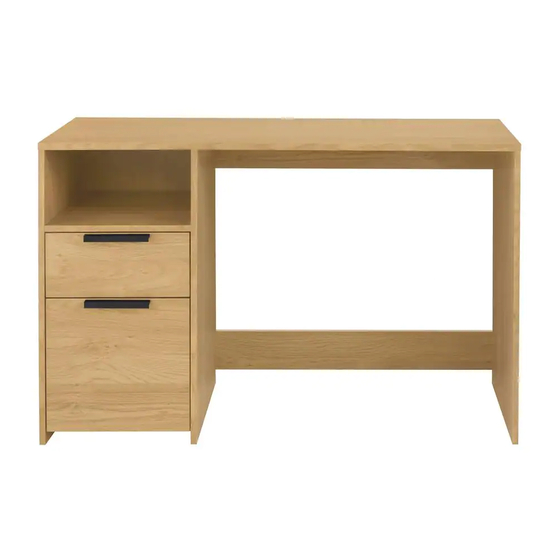
47.24 In. Rectangular Wood 2 Drawer Computer Desk
Questions, problems, missing parts?
Before returning to the store, call Customer Service.
8 a.m. – 7 p.m., EST, Monday – Friday, 9 a.m. – 6 p.m., EST, Saturday
1-877-527-0313
HOMEDEPOT.COM
THANK YOU
We appreciate the trust and confidence you have placed in StyleWell through the purchase of this Computer Desk.
We strive to continually create quality quality products designed to enhance your home. Visit us online to see our full line of products available for
your home improvement needs. Thank you for choosing StyleWell!
Advertisement
Table of Contents

Related Manuals for StyleWell 1006232239


Summary of Contents for StyleWell 1006232239
- Page 1 THANK YOU We appreciate the trust and confidence you have placed in StyleWell through the purchase of this Computer Desk. We strive to continually create quality quality products designed to enhance your home. Visit us online to see our full line of products available for...
-
Page 2: Safety Information
Table of Contents ................... Table of Contents Pre-assembly (continued) ........Safety Information ..........CAM Fastening system ............Warranty ..............Assembly 7-17 ..........Troubleshooting 1 Year Warranty ......................What is Covered ............Maintenance ..........What is Not Covered Care and Cleaning ........... -
Page 3: Pre-Assembly
Pre-assembly PLANNING ASSEMBLY Remove all Packaging materials, staples and packing straps from the carton. Refer to Parts List and Hardware List, and ensure parts and hardware are correct before assembly. Contact customer service for missing parts. Plece all wooden parts on a clean, at, and soft surface (e.g.carpet or reg) to prevent scratch and damage to parts TOOLS REQUIRED Slotted Phillips... -
Page 4: Hardware Included
Pre-assembly HARDWARE INCLUDED NOTE: Hardware not shown to actual size. Part Description Size Quantity Screw 5 x 50 mm Screw 4 x 30 mm Locking pin 7 x 39 mm Dowel 8 x 30 mm Dowel 6 x 30 mm 15 x 12 mm Locking nut 3.5 x 14 mm... - Page 5 Pre-assembly (continued) PANELS INCLUDED Part Description Size Quantity Top panel 1200 x 500 mm Drawer front support 363 x 110 mm Drawer back support 363 x 110 mm 499 x 742 mm Right side Left side 499 x 742 mm Middle panel 499 x 742 mm Shelf...
- Page 6 CAM Fastening system Assembly Disassembly HOMEDEPOT.COM Please contact 1-877-527-0313 for further assistance.
- Page 7 Assembly Side & Middle panel assembly Metal parts & dowel preparation DD x 2 Large CC x 4 DD x 2 CC x 3 DD x 1 Un nished edge AA x 4 FF x 3 Large Un nished edge It takes 2 adults to safely assemble this step AA x 4...
- Page 8 Assembly Left side & Bottom panel assembly Metal parts & dowel preparation DD x 2 CC x 4 DD x 2 DD x 2 DD x 4 Large Un nished edge FF x 4 Large Finished edge CC x 4 DD x 10 FF x 4 HOMEDEPOT.COM...
-
Page 9: Top Assembly
Assembly Large Un nished edge It takes 2 adults to safely assemble this step FF x 4 Top assembly CC x 11 KK x 2 LL x 2 CC x 11 FF x 4 LL x 2 KK x 2 HOMEDEPOT.COM Please contact 1-877-527-0313 for further assistance. - Page 10 Assembly Un nished edge FF x 11 Large It takes 2 adults to safely assemble this step Back panel and leg levelers assembly Un nished surface 90˚ GG x 10 JJ x 4 II x 4 FF x 11 GG x 10 JJ x 4 II x 4 HOMEDEPOT.COM...
- Page 11 Assembly Small drawer assembly ) Drawer front preparation ) Attaching Drawer bottom & Back Un nished surface BB x 4 CC x 4 ) Attaching drawer sides ) Attaching handle MM x 2 HH x 4 NN x 1 BB x 4 CC x 4 HH x 4 MM x 2...
- Page 12 Assembly Large drawer assembly ) Attaching Drawer bottom & Back ) Drawer front and side preparation CC x 4 Un nished surface BB x 4 EE x 1 EE x 1 ) Attaching handle ) Attaching drawer sides MM x 2 HH x 4 NN x 1 BB x 4...
- Page 13 Assembly Inserting drawers Insert drawer into cabinet and close. the drawer slide release lever will lock as drawer is closed. Make sure drawer aligns properly and rides smoothly on the side mount drawer slides. NOTE: When removing the drawer,tip up and press down the safety release tab to remove the drawer from the body.
- Page 14 Assembly Attaching the file runner OO x 2 OO x 2 HOMEDEPOT.COM Please contact 1-877-527-0313 for further assistance.
-
Page 15: Safety Notice
Assembly Fixing to wall Drill a hole and insert Wall pulg. Fixing the unit onto the wall use screw. NOTE: Make sure that the screws and wall plugs being used are suitable for supporting your unit. Safety notice The consumer product safety commission recommends anchoring furniture in homes where children live or visit. In order to protect you and your family the manufacturer of this product has included an easy to install safety device. -
Page 16: Troubleshooting
Troubleshooting Problems Solutions Drawer cannot be attached to product Check if drawer two side boards slides are assembled backwards. Check drawer attched frame silde bearing pull outside before assembly. Drawer can not pull in or pull out smoothly Please refer to drawer assembly section. Drawer cannot be removed When removing the drawer, tip-up the safety release tab to remove the drawer from the body. - Page 17 Questions, problems, missing parts? Before returning to the store, call Customer Service 8 a.m. – 7 p.m., EST, Monday – Friday, 9 a.m. – 6 p.m., EST, Saturday 1-877-527-0313 Retain this manual for future use.
Need help?
Do you have a question about the 1006232239 and is the answer not in the manual?
Questions and answers