Advertisement
Quick Links
Advertisement

Related Manuals for 100FIT 190A


Summary of Contents for 100FIT 190A
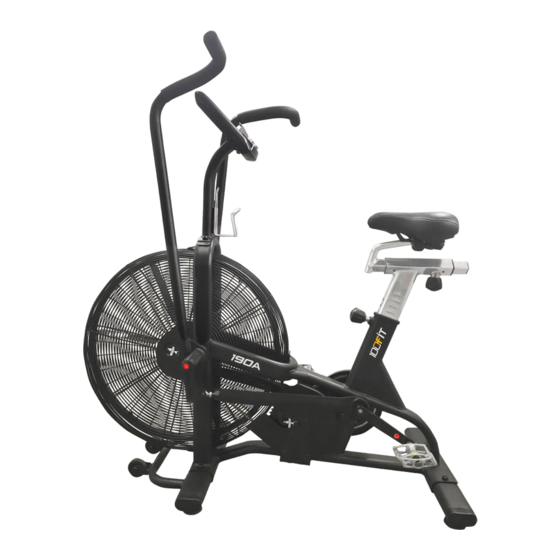
- Page 1 OWNER’S MANUAL AIR BIKE MODEL 190A...
-
Page 2: Table Of Contents
CONTENTS ..................... IMPORTANT INFORMATION .................. EXPLODED-VIEW ASSEMBLY DRAWING ......................... ASSEMBLY PARTS ..................... ASSEMBLY INSTRUCTIONS ..................COMPLITED EXOLOSION DRAWING ..........................PARTS LIST ................CONSOLE INSTRUCTION MANUAL... -
Page 3: Important Information
IMPORTANT INFORMATION SAFETY 1. Please keep this manual in a safe place for your reference when necessary. 2. Please do not assembly or use this equipment until you read this manual thoroughly & carefully. The safety and efficiency only can be achieved when the equipment is assembled, maintained and used properly. - Page 4 using them only after they return to good conditions. 16. Pay attention to the absence of a free wheel system which will cause serious risk. 17. Adjusting the resistance knob to change the resistance. 18. Lock the equipment when stop using. MAINTENANCE 1.
-
Page 5: Exploded-View Assembly Drawing
EXPLODED-VIEW ASSEMBLY DRAWING... -
Page 6: Assembly Parts
ASSEMBLY PARTS NAME NAME Main frame Spring knob Handle bar-left Pedal-left Handle bar-right Pedal-right Front stabilizer bolt Rear stabilizer Spring washer Saddle post Flat washer Saddle sliding set Adjusting pad Console support post Flat washer console Nylon nut saddle Sensor wire Flat washer Cross screw knob... -
Page 7: Assembly Instructions
ASSEMBLY INSTRUCTIONS Step 1: --Attach the rear stabilizer (5) to the main frame (1) and fix it with flat washers (22), spring washers (21) & bolts (20) tightly by hex wrench (32). --Then attach the front stabilizer (4) to the main frame (1) and fix it with flat washers (22), spring washers (21) &... - Page 8 STEP 2 Insert the handle bar (left & right) to the main frame as shown first, then screw it in clockwise and tighten it securely by spanner (34)
- Page 9 STEP 3 -- Put the handle bar –left (2) into the connecting bar –left (31), then tighten the handle bar-left (2) with flat washer (26) & nylon nut (27) securely by multifunction spanner (33). then install the handle bar- right(3) together with the connecting bar –right(31) in the same way as above. STEP 4 --Fix the pedal (18) which is marked "L"...
- Page 10 STEP 5 Insert the sensor wire (28) with a supportive hard wire into the console support post (8) and take the sensor wire (28) out. Finally you can remove the supportive hard wire away. Then fix the console support post (8) on the main frame (1) tightly with flat washers (16) & bolts (15) by hex wrench (32). Fix the bottle holder (13) on the main frame tightly with cross screws (14) by multifunction spanner (33).
- Page 11 STEP 7 -- Fix the Saddle (10) to the saddle sliding set (7) as shown tightly by socket spanner (108). Then you can loosen the knob (12) to slide the saddle (10) to a desired position and tighten it by the knob (12). --If the saddle post ‘s height is not right for you, then you can loosen the spring knob(17) and pull out, then select a desired height to align the hole, and then fix it tightly by the spring knob (17).
-
Page 12: Complited Exolosion Drawing
Caution: Now the equipment is completed assembled, if you find it is not leveled on the floor you can adjust it by the adjusting pads(23) . Make sure you have tightened all the screws and nuts well before beginning your workout. COMPLETE EXPLOSION DRAWING... -
Page 13: Parts List
PARTS LIST... - Page 14 NAME QTY. NAME QTY. Main frame Rivet nut Handle bar-left Sensor holder base Handle bar-right Screw ST4.2×16H Front stabilizer Lock nut Rear stabilizer Saddle post bearing Saddle sliding set circlip¢42 Console support post Joint bearing M10 console Nut M10×1.5 Saddle Crank-left Flat washer Crank-right...
- Page 15 bushing Blocking piece Nut 3/8""-26x4.5t Spring washer Chain cover-right Screw ST4.2×19H Chain cover-left Spacer bush Front cover-left Flat washer Front cover-right bearing Screw M5×10H Lock nut screw Fixed gear wheel Circlip ¢20 foam Wire protective plug Socket spanner INSTRUCTION MANUAL OF SI8210-67...
- Page 16 Display function: Item Description TIME .Display user workout time. .Display range 0:00 ~ 99:00 SPEED .Display user workout speed. .Display range 0.0 ~ 99.9 DISTANCE .Display user workout distance. .Display range 0.0 ~ 999.0 CALORIES .Display calories consumption during workout . .Display range 0 ~ 99990 HEART RATE .Display user heart-rate during workout .
- Page 17 Picture 1 Picture 2 User data setting-- Use joggle wheel to select USER group from U1~U4, press MODE to confirm. Set Gender/ Age/ Height/ Weight, the come to workout page. Picture 3 Picture 4 Picture 5 Picture 6 Workout mode selection Use joggle wheel to select workout mode as: Target Time Target Distance Target Calories Target Watt...
- Page 18 图七 Picture 7 Target Time 1. Use joggle wheel to set Target TIME (preset value=10:00), press STRAT/STOP to workout in Target Time mode. 2. TIME begins to count down from Target value, DISTANCE/ CALORIES/ RPM/ SPEED/ WATT/ RPM & HEART RATE will display value accordingly.
- Page 19 Picture 10 Picture 11 Target Calories 1. Use joggle wheel to set Target CALORIES (preset value=100), press STRAT/STOP workout in Target Calories mode. 2. CALORIES begins to count down from Target value, TIME/DISTANCE/RPM/SPEED/WATT/RPM & HEART RATE will display value accordingly. 3.
- Page 20 5. Press STRAT/STOP button to stop workout, STOP icon is blinking, all value will remain. 6. During workout, it is invalid to press RESET /Joggle wheel /ENTER button. 7. In STOP mode, press RESET button, monitor return to function setting page. Picture 14 Picture 15 Target Watt...
- Page 21 WATT is over 10% than Coach WATT, Coach figure will fall behind one position; While the discrepancy is within plus or minus ±10%, Coach and USER are in same position. 6. Press START/STOP button to stop workout, STOP icon is blinking, all value will remain. 7.
Need help?
Do you have a question about the 190A and is the answer not in the manual?
Questions and answers