Table of Contents
Advertisement
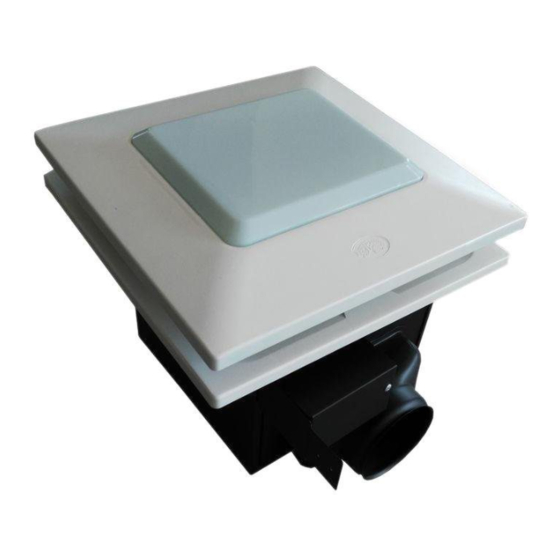
Model # TY-50-L (HD)
USE AND CARE GUIDE
VENTILATION FAN
READ AND SAVE THESE INSTRUCTIONS
Questions, problems, missing parts? Before returning to the store,
call Hampton Bay Customer Service
8 a.m.-6 p.m., EST, Monday-Friday
1-877-527-0313
HAMPTONBAY.COM
THANK YOU.
We appreciate your trust and confidence in Hampton Bay with your purchase of this ventilation fan. At Hampton Bay we make
quality products to help you improve your home and give you peace of mind about your choice. Don't forget to visit our website for
other Hampton Bay products. We hope you enjoy this new addition to your home and thanks again for choosing Hampton Bay.
Advertisement
Table of Contents

Subscribe to Our Youtube Channel
Related Manuals for HAMPTON BAY TY-50-L (HD)


Summary of Contents for HAMPTON BAY TY-50-L (HD)
- Page 1 THANK YOU. We appreciate your trust and confidence in Hampton Bay with your purchase of this ventilation fan. At Hampton Bay we make quality products to help you improve your home and give you peace of mind about your choice. Don’t forget to visit our website for...
-
Page 2: Table Of Contents
Table of Contents Table of Contents ............2 Installation ..............7 Safety Information............2 Troubleshooting ............11 Warranty ..............3 Care and Cleaning............. 11 Pre-Installation ............4 Specifications ............12 Planning For Successful Installation ......4 TY-50-L (HD) Ultra Silent Ventilation Fan ....12 Installation Options ........... -
Page 3: Warranty
Safety Information (continued) NOTE: Make sure duct work size is a minimum of WARNING: Not suitable for use as a range hood. the discharge. Do not reduce. Reducing the duct size can increase fan noise. CAUTION: For general ventilating use only. Do not IMPORTANT: You may want to consult with a use to exhaust hazardous or explosive materials professional electrician regarding the wiring of your... -
Page 4: Pre-Installation
Pre-Installation PLANNING FOR SUCCESSFUL Do not install ventilation fan in areas where the duct INSTALLATION work will require configuration as shown. When installing the ventilation fan in a new construction site, install the main body of the fan and duct work during the rough i n construction of the ‑... -
Page 5: Tools Required
Pre-Installation (continued) TOOLS REQUIRED Safety Phillips Electrical Hammer Level goggles screwdriver tape Drill MATERIALS REQUIRED Duct Duct Duct Duct vent clamp tape piping HARDWARE INCLUDED NOTE: Hardware shown to actual size. Part Description Quantity Short screw (M4x12) Long wood screw (ST4x30) Screw (M4x6) Quick connect www.hamptonbay.com... -
Page 6: Package Contents
Pre-Installation (continued) PACKAGE CONTENTS Part Description Fan body Installation bracket IV Installation bracket II Installation bracket I Installation bracket III Light box Dual-grill... -
Page 7: Installation
Installation Determine joist width □ Measure the distance from the center of the two ceiling joists where you will be installing the ventilation fan. □ Use the table to determine the header bar installation. □ For configuration 1, proceed to step 2. □... - Page 8 Installation (continued) Configuration 3, preparation Configuration 3, initial install □ Connect bracket I (D) to bracket II (C) using two □ Use long wood screws (BB) to loosely attach the M4x6 screws (CC). main body of fan (A) to the ceiling joist in the four locations shown.
- Page 9 Installation (continued) Connect wiring from house to Using quick connect WARNING: Wiring must comply with all applicable electrical codes. Turn OFF power before removing or installing WARNING: Follow all local electrical and safety codes. connectors. WARNING: COPPER TO COPPER ONLY. Do not use on CAUTION: Never place a switch where it can be reached Aluminum wire.
- Page 10 Installation (continued) Connect wiring from box to switch WARNING: Follow all local electrical and safety codes. □ Connect wires to switch using the quick connect (DD) or wire nuts (not provided). Wiring Diagram L i g h t u n i t □...
-
Page 11: Troubleshooting
Troubleshooting CAUTION: Do not install in locations where the air temperature will exceed 104°F (40°C). Problem Possible Cause Corrective Action Fan will not turn on □ Power off □ Make sure the power supply is on □ Faulty switch □ Test or replace the switch □... -
Page 12: Specifications
Specifications TY-50-L (HD) ULTRA SILENT VENTILATION FAN Model No. TY-50-L (HD) Air direction 50 cfm Voltage 120 V Hertz 60 HZ Duct diameter 4 in. (10.16 cm) Noise 0.5 Sone Power consumption (Fan) 20 W Power consumption (Lights) 13 + 4 W Speed 900 rpm Air deliver at 0.1"... -
Page 13: Service Parts
Service Parts TY-50-L (HD) SERVICEABLE PARTS 50-008 50-009 Part number Description Quantity Quick connectors 50-001 Quick connectors 80-001 Long wood screws 50-002 Short screw (M4x12) 50-003 Short screw (M4x6) 50-004 Dual-grill 50-009 Complete assembled fan and housing 50-006 Complete suspension brackets 50-007 Light box 50-008... - Page 14 Questions, problems, missing parts? Before returning to the store, call Hampton Bay Customer Service 8 a.m.-6 p.m., EST, Monday-Friday 1-877-527-0313 HAMPTONBAY.COM Retain this manual for future use.
Need help?
Do you have a question about the TY-50-L (HD) and is the answer not in the manual?
Questions and answers