Table of Contents
Advertisement
Quick Links
Advertisement
Table of Contents

Related Manuals for Arlo Go 2


Summary of Contents for Arlo Go 2
- Page 1 Go 2 WiFi/LTE Security Camera User Manual...
-
Page 2: Table Of Contents
Go 2 can connect via mobile or WiFi ....................8 Install a SIM card into your Go 2 Camera ..................9 Use the Arlo app to set up your Go 2 Camera ................10 Check the LED ............................ 11 Check your Go 2 Camera’s mobile signal strength ..............12 Optimize mobile broadband connectivity for your Go 2 Camera ........... - Page 3 Restart the camera from the Arlo app ................... 51 View device information ........................51 Remove a device from your account ..................... 51 SD Card Storage Install a micro SD card in your Go 2 Camera ................52 Contents User Manual...
- Page 4 Use Arlo with IFTTT ........................... 63 11. Troubleshooting Scan a QR code during setup ......................64 Arlo doesn’t discover your camera during setup ................ 65 Firmware updates ..........................66 Go 2 Camera is offline ........................67 Troubleshoot Arlo Geofencing ......................68 Can’t see video streams ........................
-
Page 5: Get To Know Your Arlo Go 2 Camera
1. Get to Know Your Arlo Go 2 Camera Arlo Go 2 delivers security you can take anywhere. Connect to LTE or to WiFi, view or record HD video day or night, and protect remote locations with 2-Way Audio or the built-in siren. To access the mobile broadband network, your Go 2 Camera requires an activated SIM card. -
Page 6: Meet Your Go 2 Camera
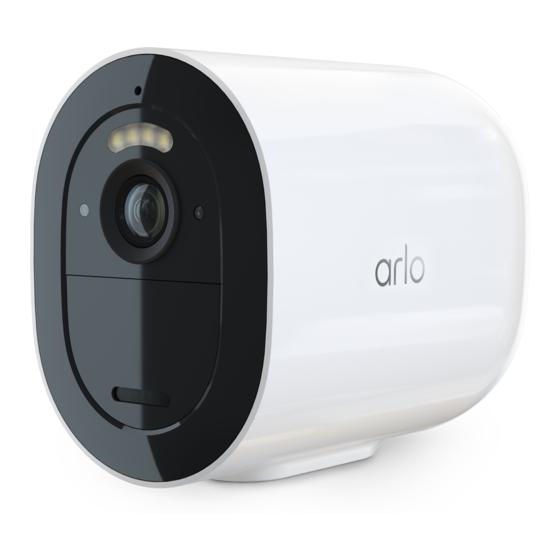
Your Go 2 Camera includes these components. Microphone Spotlight Camera lens Status LED Light sensor Screw mount hole Speaker Sync button Weather-resistant SIM card slot camera housing Micro SD card slot Charging port Release button Get to Know Your Arlo Go 2 Camera User Manual... -
Page 7: Accessories
Arlo Go 2 LTE/WiFi Security Camera Features Connect to LTE or directly to WiFi. To access the mobile broadband network, your Go 2 • Camera requires an activated SIM card. • See more at night. View critical details in color night vision for better identification with an integrated spotlight. -
Page 8: Get Started
Your Go 2 Camera is in a location where WiFi is unavailable or the WiFi signal is weak, such as a cottage, cabin, large property, farm, or marina. • You travel and want to bring your Go 2 Camera with you in your RV, on road trips, or on hunting trips. •... -
Page 9: Install A Sim Card Into Your Go 2 Camera
Unless you change its settings to specify Cellular Network, your Go 2 Camera prioritizes finding and connecting to a WiFi network. If you want Go 2 to always connect to the mobile network, select Cellular Network in the Arlo app. This prevents your Go 2 from constantly attempting to find the WiFi network it connected to before, which can affect battery life. -
Page 10: Use The Arlo App To Set Up Your Go 2 Camera
The SD card slot is located next to the SIM card slot. For information about using an optional SD card, see Install a micro SD card in your Go 2 Camera on page 7. Replace the battery. 8. Slide the camera back inside the camera housing until it clicks. -
Page 11: Check The Led
Detects the activated SIM card in your camera and attempts to access the mobile network associated with the SIM card. • Prompts you to scan one or more QR codes displayed in the app with your Go 2 Camera. •... -
Page 12: Check Your Go 2 Camera's Mobile Signal Strength
• Fast blinking blue: The camera’s charging cable is plugged in to a power adapter or the camera is connected to the optional Arlo Solar Panel VMA5600 (sold separately). • Single blink or double blink amber every 60 seconds: The battery charge is low. A single blink every 60 seconds indicates a low battery charge. -
Page 13: Mount Your Arlo Go 2 Camera
• Make sure that your Arlo Go 2 is at least 6.5 feet (2 meters) away from any major electrical equipment, large metal or concrete objects, or other sources of signal interference. - Page 14 6. While holding the wall plate, use a Phillips-head screwdriver to fasten a screw into each hole. 7. Screw your Go 2 Camera clockwise into the screw mount. 8. Tilt and swivel to adjust the angle of the camera. 9. Twist the thumb screw and the grip clockwise to tighten the camera position.
-
Page 15: Test Motion Detection
Arlo Go 2 LTE/WiFi Security Camera Test motion detection You can use the motion detection test to find the right motion sensitivity setting for your camera. 1. Open the Arlo app. 2. Tap Settings > My Devices. 3. Select your camera. - Page 16 Arlo Go 2 LTE/WiFi Security Camera To monitor motion occurring farther away, such as on a lawn, aim the camera higher to frame the area within the lower two-thirds of the image. It’s best to position the camera so that motion is moving from side-to-side across its field of view rather than directly toward or away from the camera.
-
Page 17: Arm Your Camera To Detect Motion
When your camera is armed, it detects motion. You can control when your camera is armed using these features: • Arm or disarm all your Arlo cameras and devices. See Arm or disarm all your Arlo devices page 38. •... -
Page 18: Lte And Wifi Network Connections
3. LTE and WiFi network connections When you set up your Go 2 Camera, the Arlo app guides you through connecting the camera to the mobile LTE network and, optionally a WiFi network. LTE mobile network access To access the LTE mobile network, your Go 2 Camera requires an activated SIM card inside the Arlo Go 2 Camera. -
Page 19: Specify The Mobile Network Access Point Name (Apn)
In most situations, the access point network (APN) settings are automatically set up and you don’t need to enter them for the activated SIM card in your Go 2 Camera. If your mobile network provider instructs you to enter the APN settings, you can use the Arlo app to do so. -
Page 20: Tips For Optimal Wifi Performance
Connect your mobile device to a 2.4 GHz WiFi network during setup During setup, if you’re using a WiFi connection, the smartphone or tablet you’re using must connect to the same WiFi network as the Arlo Go 2 Camera. LTE and WiFi network connections User Manual... - Page 21 5 GHz WiFi band. During setup, connect your phone to your 2.4 GHz WiFi network, then connect your Go 2 Camera to that same 2.4 GHz WiFi network. Find your 2.4 GHz WiFi network name and password Your phone might connect to your 5 GHz WiFi network most of the time.
- Page 22 Arlo Go 2 LTE/WiFi Security Camera This is commonly indicated by a 2, 2.4, or 2G at the end of the network name. 5. If prompted, enter the password for the network. When you’re connected to the WiFi network, the word Connected appears under the network name.
-
Page 23: Access Your Arlo Account
4. Access your Arlo account Once you set up your Arlo account, you can access it by using the Arlo app on a smartphone or tablet, or from a computer using a web browser. If you’re using a computer, enter https://my.arlo.com/#/login... -
Page 24: Use Face Or Fingerprint Authentication
4. Tap the switch next to Enable. 5. Select your verification method. Note: Your Arlo account email is an automatic back-up option. 6. Follow the instructions in the app to complete your two-step verification setup. Add a phone number or device to two-step verification 1. -
Page 25: Customize Your Profile
5. Slide the toggle Face ID to the right (on) or left (off). Customize your profile You can enter your name, add a profile photo and home address, and opt-in or opt-out of Arlo news and support updates. Add a profile picture 1. -
Page 26: Change Your Arlo Password
6. Upload your preferred profile picture. 7. Tap Save at the bottom of the page. Edit profile settings You can enter your name, add a profile photo and home address, and opt-in or opt-out of Arlo news and support updates. 1. Open the Arlo app. -
Page 27: Grant Access To Friends
Your password is reset. Grant access to friends You can add friends to your Arlo account. Friends can view live streams from your cameras; record video clips; view, share, mark as favorite, and delete clips from your library; and take snapshots. - Page 28 Selecting Allow Access Rights allows this friend to change your account and camera settings. 8. Tap Send Invite. An email message is sent inviting your friend to create an Arlo account. This friend’s name is displayed with the status Pending. When the friend accepts your invitation, the status changes to Accepted.
- Page 29 Arlo Go 2 LTE/WiFi Security Camera 3. Under ACCOUNT, tap Grant Access. 4. Select the friend, and tap Edit 5. Tap Delete Friend. 6. Tap Yes. Access your Arlo account User Manual...
-
Page 30: Use Your Go 2 Camera
5. Use Your Go 2 Camera When you open the Arlo app, the Devices page displays your camera feeds. Tap to turn the siren on and off manually 3m ago Tap Play to stream the Tap to view device settings for... -
Page 31: View Your Camera Feeds
Arlo Go 2 LTE/WiFi Security Camera View your camera feeds 1. Open the Arlo app. 2. Tap Play on the camera feed. The camera feed updates and camera feed icons display. 3. To stop viewing and listening to the live feed, tap Stop Pan and zoom video You can pan and zoom your video feed. -
Page 32: Turn The Camera Spotlight On And Off Manually
Arlo Go 2 LTE/WiFi Security Camera Turn the camera spotlight on and off manually When your camera is armed and detects motion at night the spotlight turns on automatically. You can also adjust the spotlight behavior and turn it on and off. -
Page 33: Motion Detection Activity Zones
If you’re using an Android device, tap the slider to OFF and then rotate the image. Motion detection activity zones You can designate zones within the camera view where you want the camera to detect and record motion. An Arlo Secure subscription is required. Add an activity zone 1. Open the Arlo app. -
Page 34: 2-Way Audio
1. Open the Arlo app. 2. Tap the camera feed image. 3. Tap the microphone icon . 4. The first time you use 2-Way Audio, allow Arlo to use your phone’s microphone. 5. Tap the microphone button. 2-Way Audio is activated. -
Page 35: Turn The Camera's Siren On And Off Manually
Recordings are encrypted with your user name and password. You can access your recordings from the Arlo app on your mobile device or by using a web browser to visit https://my.arlo.com/#/login. You can download recordings from the cloud and save them. - Page 36 Arlo Go 2 LTE/WiFi Security Camera A green circle indicates the selected day. A green dot below the date indicates each day on which a video clip was recorded. 3. Tap a highlighted date. Recordings from that date display below the calendar.
- Page 37 3. Tap a recording. 4. Tap Share. 5. Share the file. Donate recordings for research You can donate video or snapshot files to Arlo to use for research and development of Arlo products. 1. Open the Arlo app. 2. Tap Library.
-
Page 38: Modes, Rules, And Alerts
6. Modes, Rules, and Alerts You can arm or disarm your Arlo cameras and devices, and you can set up a schedule to automatically arm each device. When your camera is armed, it detects motion. Modes and rules let you tell your Arlo system what to do automatically in different situations. For example, you can set your Arlo system to record a video when it detects motion and send you an email alert. -
Page 39: Select A Mode
This is great for a party when you don’t need to be notified of friends in your backyard. You can mute notifications from the Arlo app. If you use Arlo Secure, you can also activate Mute Notifications directly from push notifications. -
Page 40: Rules For Modes
Arlo Go 2 LTE/WiFi Security Camera Rules for modes Each mode uses one or more rules to control your Arlo system. You can set these options. Trigger device. The trigger device is the camera that detects motion. You can adjust the •... -
Page 41: Use A Rule To Activate The Camera's Siren
Arlo notifications on your phone, you must install the Arlo app on your phone. Note: If you log out of the Arlo app on your smartphone or mobile device, you will stop receiving push notifications. 1. Open the Arlo app. -
Page 42: Schedule When Your Camera Is Armed
Arlo Go 2 LTE/WiFi Security Camera 5. Under Alert, tap Push Notification to turn alerts on and off for your mobile device. 6. Under Alert, tap Email Alerts to turn email notifications on and off. 7. To specify an email address, tap Edit next to Email Alerts and enter the email address. -
Page 43: Set Up Arlo Geofencing
Geofencing is a virtual fence around a location called a zone. You can use Arlo Geofencing to arm, disarm, or resume schedule modes when your mobile device is in zone or out of zone. To set up geofencing, you must use your mobile device and allow the Arlo app to use your location. - Page 44 4. Tap Geofencing 5. Allow the Arlo app to use your mobile device’s location. Geofencing works only if Arlo can locate your mobile device. The Location Address page displays your current address. 6. To change the radius setting, tap Radius and select a radius size.
-
Page 45: Geofencing With Multiple Mobile Devices
• (Required when your friend wants to participate in geofencing.) Your friend is logged in to the Arlo app on his or her mobile device and the GPS or location service is enabled on your friend’s mobile device. Modes, Rules, and Alerts... -
Page 46: Custom Modes
Set up Arlo Geofencing on page Custom modes You can add modes in addition to the modes that come with the Arlo app and give the new modes custom names, such as Vacation. You can create one rule for each mode. You can create multiple rules within the same mode, so that each camera performs different actions and sends different alerts. - Page 47 9. Select an action device and tap Next. This is the Arlo device that performs an action when the trigger device detects motion. You can select the same Arlo device you’re using as a trigger or a different Arlo device.
-
Page 48: Change Your Settings
7. Change Your Settings Once you set up your Arlo account, you can access it by using the Arlo app on a smartphone or tablet, or from a computer using a web browser. If you’re using a computer, enter https:// my.arlo.com/#/login... -
Page 49: Video Settings
5. Tap to select Best Video, Optimized, or Best Battery Life. Change the Low Light settings The Go 2 Camera includes an integrated spotlight. This spotlight is set to automatically turn on when your camera detects motion at night. The spotlight improves video quality and allows your camera to record video in color at night rather than in traditional black and white. -
Page 50: Adjust The Audio Settings
• Spotlight. Toggle the spotlight on and off. When the Spotlight setting is set to the On position, the spotlight automatically turns on when your Arlo camera detects motion at night. Color. Toggle color video recording at night on and off. -
Page 51: Adjust The Flicker Setting
Arlo Go 2 LTE/WiFi Security Camera Adjust the flicker setting The combination of certain artificial light sources and the camera shutter speed might cause flickering in the recorded video. The default setting is Auto, but you can change the flicker adjustment. -
Page 52: Sd Card Storage
8. SD Card Storage You can insert a micro SD card (sold separately) into the micro SD card slot in your Go 2 Camera and store your Arlo recordings either in the cloud or on the SD card. If your camera isn’t connected to the internet, recordings continue to be saved on the micro SD card. -
Page 53: View The Sd Card Status
The Arlo app also notifies you if the card needs to be formatted or is full. View available SD card storage The Arlo app notifies you if the SD card is getting full, but you can also view the available storage. -
Page 54: Turn Sd Card Recording Off And On
The overwrite setting toggles off and on. Format a micro SD card The Arlo app displays a message to let you know if you need to format the SD card. The Go 2 Camera can format the SD card. 1. Open the Arlo app. -
Page 55: Remove A Micro Sd Card
8. Pull the camera until it separates from the housing. 9. Remove the SD card by pressing in on the edge of the card until it ejects. Arlo SD card recording is disabled until you install an SD card. Micro SD card... -
Page 56: View Videos On A Micro Sd Card
Arlo Go 2 LTE/WiFi Security Camera View videos on a micro SD card To view Arlo videos saved on a micro SD card, you must remove the micro SD card from your Go 2 Camera and use a micro SD card reader. (See Remove a micro SD card on page 55.) -
Page 57: Arlo Rechargeable Battery
9. Arlo Rechargeable Battery Your camera comes with an Arlo Rechargeable Battery. The battery is partially charged and can be fully charged indoors using the charging cable that came in the package or by using other Arlo accessories, which are sold separately. -
Page 58: Charge Your Camera Battery Indoors
Charge your camera battery indoors You can charge the battery without removing it from the camera. 1. Snap the magnetic indoor charging cable onto the Go 2 Camera’s charging port. The charging cable works with most AC power adapters. 2. Connect an AC power adapter to the charging cable and plug it in. -
Page 59: Safe Handling And Usage Guidelines For Removable And Rechargeable Batteries
• DO NOT get the battery or the Arlo device wet. Even though they might dry and appear to operate normally, the circuitry can slowly corrode and defeat its safety circuitry. -
Page 60: Optimize Your Camera's Battery Life
You can check the strength of the WiFi signal from the Arlo app. • Your Arlo camera lets you choose the quality level of the video it records. Cameras set to high-quality video recording use more battery power than cameras set to low-quality video recording. -
Page 61: Arlo Connect
Tell Amazon Alexa, “Alexa, enable Arlo skill” to receive instructions in your Alexa app to link your Arlo account with your Alexa account. In the Alexa app, search for the Arlo Skill and select Enable Skill to link your Arlo account •... -
Page 62: Add Your Camera To The Google Assistant App
Set up Alexa to notify you when the camera detects motion You can use either of these methods: • In the Smart Home section of the Alexa app, turn on Announcements for your Arlo camera. • Create an Alexa Routine from the Alexa app main menu. -
Page 63: Use Arlo With Ifttt
For more information, see Google Assistant Help: Control smart home devices. Use Arlo with IFTTT You can use the Arlo app with IFTTT (If This Then That), a free cloud-based service that connects smart home devices and applications. To add Arlo to your IFTTT app, visit ifttt.com/arlo. -
Page 64: Troubleshooting
11. Troubleshooting Scan a QR code during setup During setup, the camera must scan a QR code from the Arlo app when you’re setting up the LTE connection or adding the camera to your 2.4GHz WiFi network. If your camera doesn’t emit a chime sound after scanning the QR code, then the QR code wasn’t successfully... -
Page 65: Arlo Doesn't Discover Your Camera During Setup
• Your mobile device and Go 2 Camera are within the WiFi signal range of your WiFi router. If you want to use a WiFi connection during setup, we recommend placing your Go 2 Camera within 10-15 feet (3-4.5 meters) of your WiFi router. -
Page 66: Firmware Updates
Automatic firmware updates If your Go 2 Camera is connected to only the LTE network (not WiFi), then the Go 2 firmware updates use cellular data to download. Minor firmware updates, which occur roughly once every three months, use about 14 MB of data. -
Page 67: Go 2 Camera Is Offline
Check the LED on page 11. • Verify whether your Go 2 Camera is set up for LTE only or LTE/WiFi. Arlo Go 2 is designed to work with either LTE or WiFi connectivity. For more information, see Control whether your... -
Page 68: Troubleshoot Arlo Geofencing
See the following sections for help troubleshooting network connections. Troubleshoot streaming with an LTE only connection Your Arlo Go 2 Camera requires an activated SIM card with a mobile data plan to access the mobile network. Troubleshooting... - Page 69 Arlo registers your device for push notification when you log in. If you used the logout option instead of exiting the app, you must log back in to the app. You receive Arlo alerts even if your device is sleeping.
- Page 70 7. If you made changes, tap Save. Check the Arlo app notification settings on an iOS device Make sure that you allow the Arlo app to receive push notifications. The Arlo app push notifications can be disabled on iOS and Android devices.
-
Page 71: Reset The Camera
Arlo Go 2 LTE/WiFi Security Camera Reset the camera Factory resetting your Arlo Go 2 Camera returns it to default settings and removes the camera from your account. This means that you must follow the Arlo app setup process to use your camera after a factory reset. - Page 72 1. Open the Arlo app. 2. Tap Settings > My Devices and select the camera. 3. Tap Remove Device. 4. Tap Yes to confirm that you want to remove the Arlo Go 2 Camera from your account. Troubleshooting User Manual...
- Page 73 PN 202-50035-01 Trademarks © Arlo Technologies, Inc. Arlo, Arlo logo, and Every Angle Covered are trademarks of Arlo Technologies, Inc. Apple is a trademark of Apple Inc., registered in the US and other countries. App Store is a service mark of Apple Inc. Google Play and the Google Play logo are trademarks of Google LLC.
Need help?
Do you have a question about the Go 2 and is the answer not in the manual?
Questions and answers