Advertisement
Quick Links
Advertisement

Subscribe to Our Youtube Channel
Related Manuals for Teradek CTRL.3


Summary of Contents for Teradek CTRL.3
- Page 1 CTRL.3 Quick Start Guide...
-
Page 2: Table Of Contents
TABLE OF CONTENTS Physical Properties ......2 Power and Connect ......3 Pair Controller and Receiver ....3 Camera Run/Stop ........ 3 Controller Menu Operation ....4 Lens Mapping ........5 Lens Data Overlay ........ 7 FIZ Limits ..........8... -
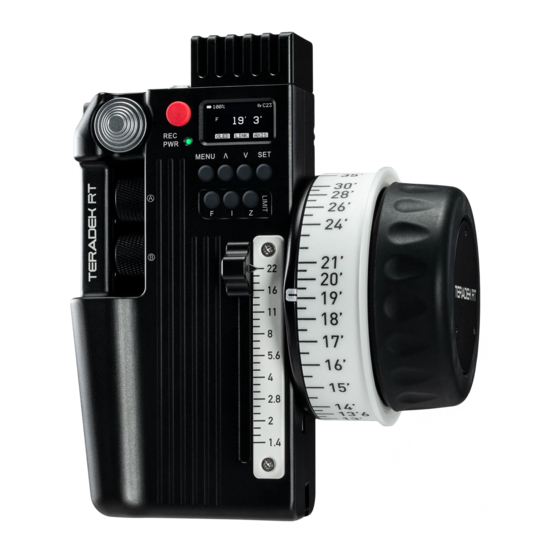
Page 3: Physical Properties
OLED Menu screen Knob COMPATIBLE DEVICES To take advantage of the features and functionality that CTRL.3 has to offer, you will need to pair the controller with a compatible Teradek RT receiver and configure up to three Teradek RT motors. MDR.X... -
Page 4: Power And Connect
POWER AND CONNECT Connect power to the receiver’s PWR port (N). Attach the motor(s) to the rods/lens. Connect the motor(s) to the receiver using a 4-pin connector. If connecting two or more motors, use a 4-pin to 4-pin connector to daisy-chain them together. The motor(s) will then begin calibrating. Insert an LP-E6 battery in the controller, then press the REC/PWR button to turn on the controller. -
Page 5: Camera Run/Stop
CAMERA RUN/STOP Connect a camera cable from the CAM/Control port on the receiver to the camera, then navigate to MENU>CAMERA on the CTRL.3 to indicate which camera you have connected. Press the REC button on the controller to start/stop recording on the camera. -
Page 6: Lens Mapping
BEHAVIOR, or DELETE the map. Use the following steps to create a lens map. Enter the CTRL.3 menu, then navigate to LENS>LENSMAP>CREATE. Select the lens brand, then create a name to identify the lens map. - Page 7 For prime lenses you will be prompted to create an Iris table. For zoom lenses, you will be prompted to create a focal length table, then an iris table after. Make sure a motor is attached to the corresponding ring, and both the motor and controller are set to the same class (Focus, Iris, Zoom). Move the controller knob so that the motor adjusts the lens ring to the smallest mark.
-
Page 8: Lens Data Overlay
LENS DATA OVERLAY SmallHD monitors include a Lens Data Overlay feature that displays your CTRL.3 lens map on the monitor. Below are steps to enable the Lens Data Overlay feature. Update your CTRL.3 controller and SmallHD monitor to the latest firmware. -
Page 9: Fiz Limits
FIZ LIMITS CTRL.3 limit buttons allow you to set a limit range for either the Focus, Iris, or Zoom controls. Setting limits restricts the motor from adjusting the lens past a set limit. Move the input to the high or low end of the limit you want to set. - Page 10 Teradek regularly releases new firmware versions to improve performance, add new features, or to fix vulnerabilities. Visit https://www.teradek.com to update your device with the latest firmware. NEED MORE HELP? SUPPORT: http://support.teradek.com → Contains tips, information and all the latest firmware &...
- Page 11 © 2019 Teradek, LLC. All rights reserved. v1.0...
Need help?
Do you have a question about the CTRL.3 and is the answer not in the manual?
Questions and answers