
Subscribe to Our Youtube Channel
Related Manuals for STATESMAN BSF60WH


Summary of Contents for STATESMAN BSF60WH
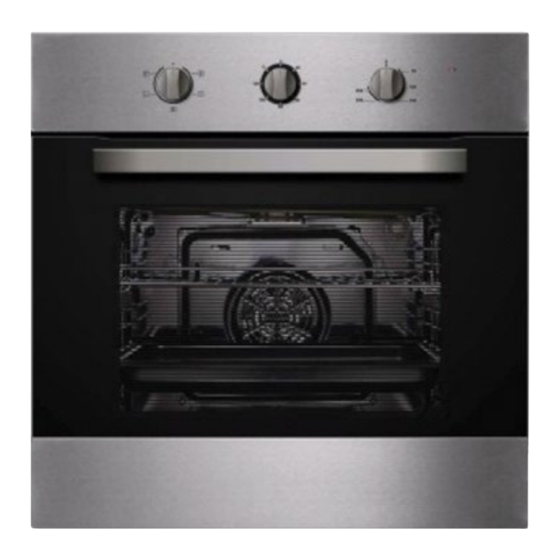
- Page 1 BSF60WH / BSF60SS BUILT IN ELECTRIC FAN OVEN Instruction Manual Please read these instructions carefully before use and retain for future reference...
-
Page 2: Safety Instructions
SAFETY INSTRUCTIONS Important: This appliance is not intended for use by persons including children with reduced physical, sensory or mental capabilities, or lack of experience and knowledge, unless they have been given supervision or instruction concerning use of the appliances by a person responsible for their safety. -
Page 3: Specifications
SPECIFICATIONS Voltage 220-240V Total Power Consumption 2100W Grill Power Consumption 2000W Fuse Protection 13 Amps Cable Length Cable Type 3G1.5 mm² H05vv-F Energy Rating Interior Lamp Wattage INSTALLATION This product must be installed by the manufacturers authorised service agent or an equally qualified person. • Ensure that a safe distance is left between the appliance and the ktichen units / furniture • Surfaces must be heat resistant to a minimum of of 120°C Fitting the Oven into the Kitchen Unit 1. The oven must be lifted by a minimum of 2 persons. - Page 4 Securing the oven to the cabinet 1. Fit oven into cabinet recess 2. Open the oven door 3. Secure the oven to the kitchen cabinet with 2 distance holders ‘A’ which fit the holes in the oven frame and fit the 2 wood screws ‘B’. IMPORTANT If the oven is to work properly, the kitchen housing must be suitable. The panels of the kitchen unit next to the oven must be made of a heat resistant material. Ensure that the glues of the units are made of veneered wood can withstand temperatures of at least 120°C. Plastics or glues that cannot withstand such temperatures will melt and deform the unit. Once the oven has been lodged inside the units, electrical parts must be completely insulated. This is a legal safety requirement. All guards must be firmly fixed into place, so that it is impossible to remove them without using special tools. Remove the back of the kitchen unit to ensure an adequate current of air circulates around the oven. The hob must have a rear gap of at least 45mm. Electrical Connection - The appliance is supplied with a 13 amp cable pre-fitted. • This product must be installed by the manufacturers authorised service agent or an equally qualified person. Before starting any work on electrical installation please turn off the electricity supply at the mains. Ensure that the fuse rating is correct.
- Page 5 Changing the Supply Cable • The supply cable must correspond to the to the correct specification and power consumption (See Technical Specification on page 2) • Open the terminal block cover with a screwdriver. • Pass the supply cable through the cable clamp under the terminal and fix the supply cable using the screw provided. • Correctly connect the cable according to the diagram below. • Close the terminal black cover once complete. Before First Use When you have unpacked the oven, make sure that is has not been damaged in anyway. If you have any doubts at all, do not use it: contact a professionally qualified person. Keep packing materials such as plastic bags or polystyrene of the reach of children because these are dangerous.
- Page 6 Function Control Mechanical Timer Thermostat Control To set the time of cooking by turning the Set the temperature by turning the timer knob to desired time per your food temperature control. If the unit is not in use, cooking guide. After the cooking time is always set the control to “0”. up, the timer will go off.
- Page 7 Accessories 2 Wire shelves: For roasting and grilling. 1 Universal Pan: For cooking large quantities of food, also for collecting fat/spillage and meat juices Cooking Guidelines • Please refer to the information given on the food packaging from guidance on cooking temperatures and times. • You should always pre-heat the oven and do not place food inside the cavity until the operating indicator light has switched off. If you choose not to pre-heat the oven then cooking times should be extended by at least 10 minutes. • You should always pre-heat the oven if you are baking. • Make sure that frozen foods have thawed thoroughly unless the food packaging states that the item can be cooked from frozen. • Any accessories that are not required should be removed from the oven before cooking. • Place cooking trays ion the centre of the oven and leave gaps between the shelves to allow air to circulate. • Do not open the oven door if not necessary. The internal light will allow you to monitor the progress without opening the door. • Keep the oven door during all cooking functions including grilling.
- Page 8 Ventilation When cooking is finished, if the cavity temperature is above 70°C the cooking fan will continue to work for 15 minutes after the oven stops cooking. This is normal operation and does not indicate a fault. Bulb replacement The lamp in the light has a high temperature resistance (240V~25W) For replacement, proceed as follows: 1. Disconnect power from the mains outlet or switch off the circuit breaker of the mains outlet. 2. Unscrew the covering glass and replace the bulb with a new one of the same specification. 3. Screw the covering glass back in place. This appliance must be removed from the mains power supply before you attempt to remove or replace the appliance lamp.
- Page 9 Removing the Side Racks To thoroughly clean the oven it may be necessary to remove the side racks. • Remove the oven shelves and the enamel baking tray from the cavity. • Unscrew the bolt on the bottom of each rack with a screwdriver and then unhook each side rack at the top. Pull them away from the cavity. • To reassemble the side racks, hook the upper struts into the relevant holes in the cavity and then secure the lower bolts.
-
Page 10: Service And Spare Parts
SERVICE AND SPARE PARTS Should you experience any difficulty in using your Statesman appliance at any time, you may contact your Statesman Retailer or call our Customer Service Department on: 0844 848 5861 Please have the following details ready; • Model Name/ Model Number • Serial Number • Date of Purchase • Where Purchased • Customer Name and address including post code • Contact Telephone Number • Accurate description of the fault Spare Parts information can be obtained by calling our Spare Parts Department on: 0844 848 5862 Disclaimer Updates to hardware components are made regularly. Therefore some of the instructions, specifications and pictures in this documentation may differ slightly from your particular situation. All items described in this guide are for illustration purposes only and may not apply to your particular situation. No legal right or entitlements may be obtained from the description made in this manual.
Need help?
Do you have a question about the BSF60WH and is the answer not in the manual?
Questions and answers