
Subscribe to Our Youtube Channel
Related Manuals for STATESMAN BSM60SS


Summary of Contents for STATESMAN BSM60SS
- Page 1 BSM60SS / BSM60WH BUILT IN MULTI-FUNCTION ELECTRIC FAN OVEN Instruction Manual Please read these instructions carefully before use and retain for future reference...
-
Page 2: Table Of Contents
CONTENTS Safety Instructions Specifications Installation 3 - 5 Control Panel Symbol Functions Operating Instructions 8 - 11 Timer Functions Safety Lock Cooking Guidelines Bulb Replacement Removing Oven Door Cleaning and Maintenance Disposal Service and Spare Parts... -
Page 3: Safety Instructions
SAFETY INSTRUCTIONS Important: This appliance is not intended for use by persons including children with physical, sensory or mental impairment, or lack of experience and knowledge, unless they have been given supervision or instruction concerning use of the appliances by a person responsible for their safety. -
Page 4: Specifications
SPECIFICATIONS Voltage 220-240V Total Power Consumption 2100W Grill Power Consumption 2000W Fuse Protection 13 Amps Cable Length Cable Type 3G1.5 mm² H05vv-F Energy Rating Interior Lamp Wattage Installation This product must be installed by the manufacturers authorised service agent or an equally qualified person. - Page 5 Securing the Oven to the Cabinet 1. Fit oven into cabinet recess 2. Open the oven door 3. Secure the oven to the kitchen cabinet with 2 distance holders ‘A’ which fit the holes in the oven frame and fit the 2 wood screws ‘B’. IMPORTANT If the oven is to work properly, the kitchen housing must be suitable.
- Page 6 Changing the Supply Cable • The supply cable must correspond to the to the correct specification and power consumption (See Technical Specification on page 3) • Open the terminal block cover with a screwdriver. • Pass the supply cable through the cable clamp under the terminal and fix the supply cable using the screw provided.
-
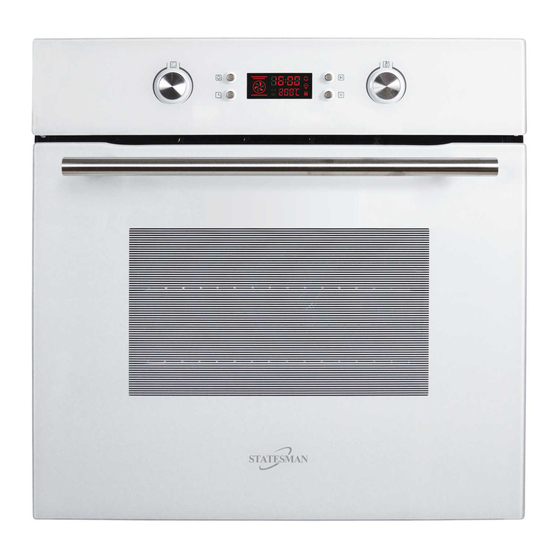
Page 7: Control Panel
The oven may emit an odour and /or smoke when first heated. Please ensure that the room is well ventilated and wait for the smell inside the cavity to clear before cooking any food. Once the oven cavity has cooled wipe the surfaces of the appliance with a clean damp cloth / sponge and dry with a cloth. -
Page 8: Symbol Functions
SYMBOLS FUNCTION GUIDE Symbol Function description Oven Lamp: Enables the user to observe the progress of cooking without opening the door. Defrost: The circulation of air at room temperature enables quicker thawing of frozen food (without the use of any heat). It’s a gentle but quick way to speed up the defrosting time and thawing of ready-made dishes and cream filled produce etc. -
Page 9: Operating Instructions
OPERATING INSTRUCTIONS Timer Functions Clock Setting After connecting the unit to the power, the symbols 0:00 will be visible on the display. • Press the clock button (fig. 3) and the hour figures will flash. • Rotate the adjustment dial (fig. 7) to change hour figures; the input time should be within 0-23. •... -
Page 10: Safety Lock
Oven Function, Temperature and Duration The selector dial (Fig.1) should be used to select the cooking function you require. The appliance will utilise different elements within the cavity depending on the function selected. • Turn the selector dial (Fig.1) to select the cooking function you require. The function symbols will light on the display to show which is currently selected. -
Page 11: Cooking Guidelines
Safety Lock (continued) • To switch off the safety lock, press the start cooking button and the stop cooking button simultaneously for 3 seconds. • There will be a long audible signal and the symbol will disappear from the LED display. This confirms that the safety lock has been de-activated. -
Page 12: Bulb Replacement
Cooking Guidelines (continued) • Take care when opening the oven door to avoid contact with hot parts of the oven and steam. • Always use an oven glove when removing cookware from the oven. • Keep children away from the oven when in use. •... -
Page 13: Removing Oven Door
Removing the Oven Door • Do not attempt to disengage the hinge locks on the door whilst it is removed from the oven. • The hinge springs could release, causing personal injury • Do not lift or carry the oven door by the door handle For easy cleaning the oven door can be removed as follows: •... -
Page 14: Disposal
SERVICE AND SPARE PARTS Should you experience any difficulty in using your Statesman appliance at any time, you may contact your Statesman Retailer or call our Customer Service Department on: 0844 848 5861 Please have the following details ready;...
Need help?
Do you have a question about the BSM60SS and is the answer not in the manual?
Questions and answers