
Subscribe to Our Youtube Channel
Related Manuals for TechLogix Network TL-CAV-01-HD


Summary of Contents for TechLogix Network TL-CAV-01-HD
- Page 1 User Manual TL-CAV-01-HD Multi-function AV distribution system All Rights Reserved Version: TL-CAV-01-HD_180723...
- Page 2 TL-CAV-01-HD User Manual Preface Read this user manual carefully before using this product. Pictures shown in this manual is for reference only, different model and specifications are subject to real product. This manual is only for operation instruction only, not for any maintenance usage.
- Page 3 TL-CAV-01-HD User Manual SAFETY PRECAUTIONS To insure the best from the product, please read all instructions carefully before using the device. Save this manual for further reference. ⚫ Unpack the equipment carefully and save the original box and packing material for possible future shipment ⚫...
-
Page 4: Table Of Contents
TL-CAV-01-HD User Manual Contents 1. Introduction ......................... 1 1.1 Brief Introduction ....................1 1.2 Features ......................1 1.3 Package List ......................2 2. Panel Description ......................3 2.1 Transmitter ......................3 2.2 Receiver ......................4 2.3 Control Panel ...................... 7 3. - Page 5 TL-CAV-01-HD User Manual 5.1 Transmitter ....................... 23 5.2 Receiver ......................24 5.3 Control Panel ....................25 6. Panel Drawing ......................26 6.1 Transmitter ....................... 26 6.2 Receiver ......................26 6.3 Control Panel ....................27 7. Troubleshooting & Maintenance ................28 8.
-
Page 6: Introduction
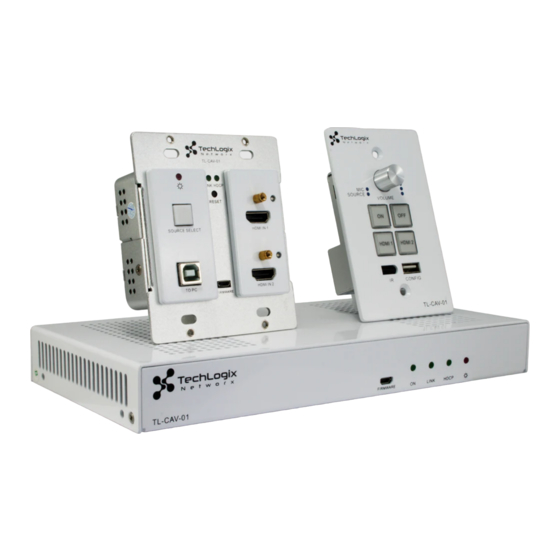
1. Introduction 1.1 Brief Introduction TL-CAV-01-HD is a multi-function AV distribution system, which included a wall plate Twisted Pair transmitter, Twisted Pair receiver with built-in audio amplifier and control panel. It is designed to provide HDMI video switching, system control, video extension and analog audio amplification in a convenient kit. -
Page 7: Package List
TL-CAV-01-HD User Manual 1.3 Package List ⚫ 1 x Transmitter ⚫ 1 x Receiver ⚫ 1 x Control Panel ⚫ 1 x Power adapter (DC 24V 2.71 A) ⚫ 2 x Mounting ears (for Receiver) ⚫ 4 x Screws (for installing mounting ears) ⚫... -
Page 8: Panel Description
TL-CAV-01-HD User Manual 2. Panel Description 2.1 Transmitter Figure 2-1 Transmitter Name Description ① Power Turns red when power is connected TP Link status indicator: ✓ OFF: No Link Link ② ✓ GREEN: Link successful ✓ Blinking GREEN: Link abnormal HDCP compliance indicator: ✓... -
Page 9: Receiver
TL-CAV-01-HD User Manual ✓ OFF: No HDMI signal traffic HDMI IN 2 ✓ YELLOW: HDMI signal traffic ⑨ indicator ✓ GREEN: HDMI IN 2 is chosen as input source. ⑩ HDMI IN 2 HDMI IN 2 ⑪ Micro USB port used for firmware update. - Page 10 TL-CAV-01-HD User Manual ✓ Blinking GREEN: Traffic without HDCP Power Turns red when power is connected ⑤ Connect to a PC to control the following items by Web-based GUI: ✓ Input signal switching TCP/IP ⑥ ✓ Volume adjustment ✓ Turn on or off the display ✓...
- Page 11 TL-CAV-01-HD User Manual “+” connects to positive, “-” connects to negative and “ ╧ ” connects to ground. ⑯ 2x20 watts at Speaker output. ⑰ 4Ω DC24V Power input for the included DC 24V 2.71A power adapter. www.tlnetworx.com...
-
Page 12: Control Panel
TL-CAV-01-HD User Manual 2.3 Control Panel POWER RS232 Figure 2-3 Control Panel Name Description MIC audio signal indicator, it will turn blue when the MIC audio ① is selected to adjust its volume. ✓ Press this button to mute or unmute speaker. - Page 13 TL-CAV-01-HD User Manual HDMI 2 Press it to select HDMI IN 2 signal as input source. ⑨ CONFIG USB-A connector to import or export configuration data. ⑩ RJ45 connector. Connect to the POWER/RS232 port on the ⑪ Transmitter via CAT5e/CAT6a cable to transmit RS232 control POWER signal.
-
Page 14: System Connection
TL-CAV-01-HD User Manual 3. System Connection 3.1 Usage Precautions 1) Speakers must be connected before powering the receiver on. 2) All devices should be connected before powering the receiver on. 3) Use shielded solid core straight-thru Cat5e or greater with TIA/EIA T568B terminations to connect the TP ports. -
Page 15: Poc Solution
TIA/EIA T568B terminations at both ends. 3.4 PoC Solution TL-CAV-01-HD supports PoC, which allows all components in the kit to share the same power supply and eliminates the need for extra power supplies at the remote nodes. Connect the DC24V 2.71A power adapter to the power port of Receiver,... -
Page 16: Typical Application
Figure 3-2 PoC Solution Diagram 3.5 Typical Application TL-CAV-01-HD is ideal for any space that requires a couple video sources and needs audio reinforcement. It is designed to solve some commonly inefficient issues, such as difficulty when trying to switch signal sources and providing whole room audio. This section provides a brief introduction to the typical application scenarios. - Page 17 TL-CAV-01-HD User Manual that person needing to yell to reach those users. ⚫ Scenario 3: System shutdown Press the button “OFF” to turn off display or long-press it to put the system into standby. www.tlnetworx.com...
-
Page 18: System Operation
TL-CAV-01-HD User Manual 4. System Operation 4.1 IR Learning Function IR learning function allows user to use the buttons of Control Panel to control the display. The Control Panel has four buttons: “ON”, “OFF”, “HDMI 1”, and “HDMI 2”. “HDMI 1” and “HDMI 2” do not support the IR learning function, because they are designed for switching the HDMI signal sources. -
Page 19: Usb Signal Return
TL-CAV-01-HD User Manual Press the buttons “ON” or “OFF” on Control Panel to turn on/off the display and system concurrently. Asynchronous control: ◆ Press “ON” to turn on display or long-press it to start system. Press “OFF” to turn off display or long-press it to put system into standby. -
Page 20: Rs232 Control
TL-CAV-01-HD User Manual 4.4 RS232 control Receiver provides an additional RS232 interface to connect with a display, and then control it by sending RS232 commands via Web-based GUI. Please refer to 4.6.3 Command Menu. CAT5e 6A Cable Transmitter Receiver RS232 Signal... - Page 21 TL-CAV-01-HD User Manual Control Panel POWER RS232 IR Signal IR Signal Transmitter Receiver HDMI Cable IR Signal HDMI Cable Projector Blue-ray DVD1 Figure 4-3 IR Control Diagram www.tlnetworx.com...
-
Page 22: Web-Based Gui Control
Connect the TCP/IP port of the Receiver to Ethernet port of PC with twisted pair, and then modify the PC’s network segment as the same as the TL-CAV-01-HD’s. For example, the IP address of PC can be modified as 192.168.0.177. -
Page 23: Setting Menu
TL-CAV-01-HD User Manual Figure 4-5 Control Menu In this interface, you can: Click “1” or “2” in the HDMI bar to choose a HDMI signal source Click “ON” or “OFF” in the DISPLAY bar to turn on or turn off the display device, ... - Page 24 TL-CAV-01-HD User Manual Figure 4-6 Setting Menu In this interface, you can: Modify the passwords on the left PASSWORD bar. Select the control mode for turning on/off display in DISPLAY CONTROL SELECT bar, default mode is IR control.
-
Page 25: Command Menu
TL-CAV-01-HD User Manual Click “Save” to save these settings. 4.6.3 Command Menu In setting menu, click “Command” to access command menu as shown in the below: Figure 4-7 Command Menu In this interface, you can: Enter the commands of display in Display On/Display OFF/Input Select box to ... -
Page 26: Network Menu
While in DHCP mode, if you need to get the IP address, it can be checked via UPNP function. 4.6.5 GUI update GUI for TL-CAV-01-HD supports online updates at http://192.168.0.178:100. Type the username and password (the same as the GUI log-in settings, modified password will be available only after rebooting) to log in the configuration interface. -
Page 27: Copy And Load Configuration Data
TL-CAV-01-HD User Manual Select the desired update file and press Apply, it will start upgrading then. 4.7 Copy and load configuration data The system IR or RS232 configuration can be copied to a USB thumb drive and loaded into additional systems or be saved as a backup. -
Page 28: Specification
TL-CAV-01-HD User Manual 5. Specification 5.1 Transmitter Video Ports Input Ports 2 x HDMI Output Port 1 x TP+Power Input 19-pin Type A HDMI Output RJ45 Connectors female Connector Transmission Twisted Pair Mode Control Ports 1 x USB 1 x Micro USB... -
Page 29: Receiver
TL-CAV-01-HD User Manual 5.2 Receiver Video Ports Input 1 x TP+Power Output 1 x HDMI Output Input Connector RJ45 19-pin Type A HDMI female Connector Audio Ports amplifier Input 1 x MIC Output (2x20Watt@4Ω), 1 x analog audio(LINE OUT) 4-pin... -
Page 30: Control Panel
TL-CAV-01-HD User Manual Power Power Supply DC24V 2.71A 55w (Max) consumption Reference Temperature 0 ~ 50° C 10% ~ 90% Humidity Dimension 250x 31 x 130 mm Weight 642g (W*H*D) 5.3 Control Panel Specification Program Port 1 x Micro USB... -
Page 31: Panel Drawing
TL-CAV-01-HD User Manual 6. Panel Drawing 6.1 Transmitter 89 mm Figure 6-1 Dimension of Transmitter 6.2 Receiver 250 mm Figure 6-2 Dimension of Receiver www.tlnetworx.com... -
Page 32: Control Panel
TL-CAV-01-HD User Manual 6.3 Control Panel 34 mm 70 mm POWER RS232 Figure 6-3 Dimension of Control Panel www.tlnetworx.com... -
Page 33: Troubleshooting & Maintenance
TL-CAV-01 User Manual 7. Troubleshooting & Maintenance Problems Causes Solutions Insert power adapter to Haven’t been powered on. the receiver. No reaction to any operation, power Should the replacement The poor quality of network indicator is off CAT5e/CAT6a cable of cable. - Page 34 TL-CAV-01 User Manual The PC’s network segment Unable to login to The PC’s network segment has need to be set as the Web-based GUI not been modified. same as the TL-CAV-01- HD’s Static becomes Check the grounding and stronger when bad grounding make sure it is connected connecting the video...
-
Page 35: After-Sales Service
TL-CAV-01 User Manual 8. After-sales Service If there appear some problems when running this product please check and deal with the problems reference to this user manual. Any transport costs are borne by the users during the warranty. 1) Product Limited Warranty: We warrant that our products will be free from defects in materials and workmanship for three years.
Need help?
Do you have a question about the TL-CAV-01-HD and is the answer not in the manual?
Questions and answers