Table of Contents
Advertisement
INSTALLER: LEAVE THIS MANUAL WITH THE APPLIANCE.
CONSUMER: RETAIN THIS MANUAL FOR FUTURE REFERENCE.
NEVER LEAVE CHILDREN OR OTHER AT RISK INDIVIDUALS ALONE WITH THE APPLIANCE.
CERTIFIED UNDER CANADIAN AND AMERICAN NATIONAL STANDARDS: ETL
CHFP-002/CHFPV-20/CHFP-30B/CHFP-40B/CHFP-50B/CHFP-60B/CHFP-74B/
CHFP-102B/SCW-001/SCW-002/SCW-003/SCI-001/SCI-002/SCI-003/CHFPN-60/CHFPN-74/CHFPN-102
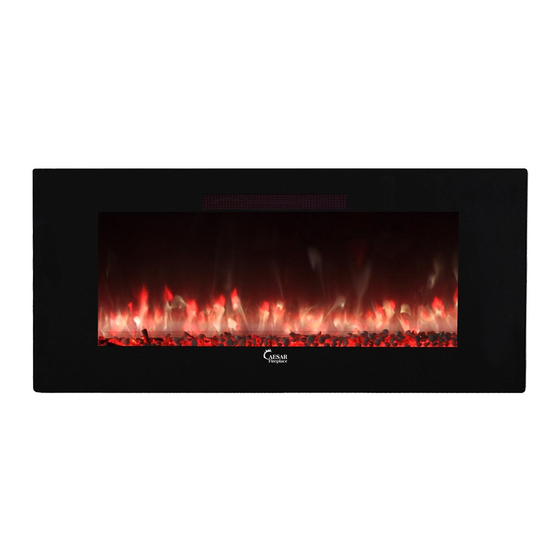
CHFP-002
CHFP-50B, the similar size as
CHFP-30B, CHFP-40B,
CHFP-60B, CHFP-74B,
CHFP-74BS and CHFP-102B.
SAFETY INFORMATION
WARNING
!
If the information in these instructions
are not followed exactly, a fire may
result causing property damage,
personal injury or loss of life.
Phone 1-800-306-3829 Fax (626) 453-0409 www.caesarfireplace.com sales@caesarhardware.com
INSTALLATION AND
OPERATING INSTRUCTIONS
ELECTRIC FIREPLACE
CHFPV-20
SCI-002, the similar size
as SCI-001 and SCI-003.
19295 E. Walnut Dr N, City of Industry, CA 91748
·
·
CHFPN-74, the similar size as CHFPN-60
and CHFPN-102.
SCW-001, the similar size as
SCW-002 and SCW-003.
WARNING
!
HOT GLASS WILL CAUSE
DO NOT TOUCH GLASS UNTIL
NEVER ALLOW CHILDREN TO
·
CHFP-74BS/
BURNS.
COOLED.
TOUCH GLASS.
C
US
Advertisement
Table of Contents

Subscribe to Our Youtube Channel
Related Manuals for Caesar Fireplace CHFP-002


Summary of Contents for Caesar Fireplace CHFP-002
- Page 1 CONSUMER: RETAIN THIS MANUAL FOR FUTURE REFERENCE. NEVER LEAVE CHILDREN OR OTHER AT RISK INDIVIDUALS ALONE WITH THE APPLIANCE. INSTALLATION AND OPERATING INSTRUCTIONS CERTIFIED UNDER CANADIAN AND AMERICAN NATIONAL STANDARDS: ETL CHFP-002/CHFPV-20/CHFP-30B/CHFP-40B/CHFP-50B/CHFP-60B/CHFP-74B/ CHFP-74BS/ CHFP-102B/SCW-001/SCW-002/SCW-003/SCI-001/SCI-002/SCI-003/CHFPN-60/CHFPN-74/CHFPN-102 ELECTRIC FIREPLACE CHFPN-74, the similar size as CHFPN-60...
-
Page 2: Table Of Contents
6.3.2 GLASS DOOR INSTALLATION METHOD FOR CHFP-××B AND CHFP-74BS OPERATING INSTRUCTIONS 7.1 MAIN POWER BUTTON 7.1.1 THE BUTTON THAT IS USED FOR CHFP-002 7.1.2 THE BUTTON THAT IS USED FOR CHFPV-20 AND SCW SERIES 7.1.3 THE BUTTON THAT IS USED FOR CHFP-××B, CHFP-74BS, SCI, AND CHFPN SERIES 7.2 REMOTE CONTROL... -
Page 3: Packing List
1.0 PACKING LIST Description Quantity Model Electric fireplace 1 pc CHFP-002, CHFPV-20, CHFP-30B, CHFP-40B, CHFP-50B, CHFP-60B, CHFP-74B, CHFP-74BS, Installation and operating instructions 1 pc CHFP-102B, SCW-001, SCW-002, SCW-003, SCI-001, SCI-002, SCI-003, CHFPN-60, Remote control (battery included) 1 pc CHFPN-74, CHFPN-102... -
Page 4: Welcome & Congratulations
2.0 WELCOME & CONGRATULATIONS Thank you and congratulations for choosing to purchase an electric fireplace from Caesar Fireplace, the world leader in electric fireplaces. To view the full line of Caesar Fireplace products, please visit www.caesarfireplace.com or our social media website as below: www.facebook.com/caesarhardware... -
Page 5: Dimensions
3.1 DIMENSIONS Take the dimensions of CHFP-50B for example. FRONT VIEW SIDE VIEW 6-3/4 (171mm) " 50 (1270mm) " 22-3/4 (578mm) " 14-1/8 (360mm) " 24 (610mm) " 36 (915mm) " 4 (102mm) " Power Line TOP VIEW 6-1/2 (161mm) "... - Page 6 Appliance Dimensions Description Voltage Watts Amps Buts Model (W×H×D) 12"×16"×10" Infrared mini CHFP-002 (305×406×254mm) heater 20"×35"×6-3/4" Wall-mount CHFPV-20 appliance (508×889×171mm) 30"×17"×6-3/4" CHFP-30B (762×429×171mm) 40"×20"×5-5/8" CHFP-40B (1016×510×143mm) Wall-mount, 50"×24"×6-3/4" CHFP-50B recessed, or (1270×610×171mm) free standing 60"×24"×6-3/4" CHFP-60B appliance (1524×610×171mm) 74"×24"×6-3/4" CHFP-74B/CHFP-74BS (1880×610×171mm)
-
Page 7: General Instructions
3.3 GENERAL INSTRUCTIONS WARNING READ THESE INSTRUCTIONS COMPLETELY BEFORE BEGINNING INSTALLATION FAILURE TO FOLLOW THEM COULD CAUSE AN APPLIANCE MALFUNCTION RESULTING IN SERIOUS INJURY AND/OR PROPERTY DAMAGE. ALL ELECTRIC APPLIANCES HAVE HOT AND ARCING OR SPARKING PARTS INSIDE. DO NOT OPEN RISK OF ELECTRIC SHOCK NO USER-SERVICEABLE PARTS INSIDE DO NOT USE DAMAGED ELECTRICAL CORDS. -
Page 8: Placing Appliance
4.0 PLACING APPLIANCE WARNING NEVER PLACE THIS ELECTRIC APPLIANCE WHERE IT MAY FALL INTO A BATHTUB OR OTHER WATER CONTAINER. WEAR SAFETY GLOVES AND SAFETY GLASSES FOR PROTECTION DURING INSTALLATION AND MAINTENANCE. TO PREVENT CONTACT WITH SAGGING OR LOOSE INSULATION THE ELECTRIC APPLIANCE MUST NOT BE INSTALLED AGAINST VAPOR BARRIER OR EXPOSED INSULATION LOCALIZED OVERHEATING COULD OCCUR AND A FIRE COULD RESULT. -
Page 9: Installation
5.0 INSTALLATION WARNING RISK OF FIRE! THE POWER CORD MUST NOT BE PINCHED AGAINST A SHARP EDGE SECURE CORD TO AVOID TRIPPING OR SNAGGING TO REDUCE THE RISK OF FIRE ELECTRIC SHOCK OR PERSONAL INJURY. DO NOT RUN CORD UNDER CARPETING. DO NOT COVER CORD WITH THROW RUGS RUNNERS, ETC ARRANGE CORD AWAY FROM CLUTTERED AREAS AND WHERE IT WILL NOT BE TRIPPED OVER. -
Page 10: Wall-Mount Installation
5.1 WALL-MOUNT INSTALLATION D ue to the many different materials used on different walls, it is highly recommended that you consult your local builder before you install this appliance on the wall. 5 1.1 WALL-MOUNT INSTALLATION METHOD FOR CHFPV-20 AND SCW SERIES NOTE: Wall-mount installation method for CHFPV-20, SCW-001, SCW-002, and SCW-003. -
Page 11: Wall-Mount Installation Method For Chfp- ×× B And Chfp-74Bs
5 1.2 WALL-MOUNT INSTALLATION METHOD FOR CHFP- ×× B AND CHFP-74BS NOTE: Wall-mount installation method for CHFP-30B, CHFP-40B, CHFP-50B, CHFP-60B, CHFP-74B, CHFP-74BS, and CHFP-102B. Below is the illustration of CHFP-50B, for the wall mount bracket and the quantity of wall anchors that be used for other models, please see page3. SIDE VIEW A Have two people hold the appliance against the wall to determine the final 6-3/4 (171mm) -
Page 12: Recessed Installation
5.2 RECESSED INSTALLATION 5 2.1 INSTALLATION METHOD FOR SCW SERIES NOTE: Installation method for SCW-001, SCW-002 and SCW-003. Below is the illustration of SCW-001, for the quantity of wall anchors that be used for other models, please see page3. A. Leave a box in the wall, the size is W38-1/2"×H18-1/2"×D4". B. -
Page 13: Free Standing Installation
5.3 FREE STANDING INSTALLATION NOTE: nly for CHFP-30B, CHFP-40B, CHFP-60B, CHFP-74B, CHFP-74BS, and CHFP-102B can be installed free standing. Below is the illustration of CHFP-50B. A Upend the box, then fix the stand with 4 screws at each side, as shown in the figure (A). Base installation is finished. B Put the hooks on the both sides of glass door into the holes in the box. -
Page 14: Finishing
6.0 FINISHING 6 1 GLASS DOOR REMOVAL OPENINGS, OPERATION OF OR DOORS OR ACCESS FOR SERVICE. OBSERVE 6 1.1 METHOD FOR CHFPV-20 AND SCW SERIES B elow is the illustration of CHFPV-20. Two people to hold the glass door and lift the door unti it’s out of the holes. B. -
Page 15: Method For Chfp- ××Band Chfp-74Bs
6.1.2 METHOD FOR CHFP- ×× B AND CHFP-74BS Two people to hold the glass door and lift the door until it’s out of the holes. B. Remove the glass door from appliance. 6 2 MEDIA BED KITS INSTALLATION NOTE: Glass front must be removed and the appliance must be finished in its final location before the media bed kits are installed. -
Page 16: Glass Door Installation
Model CHFPV-20/CHFP-30B/CHFP-40B/CHFP-50B/SCW-001 Tahiti Getaway Falling Glamour Winter Treasure Morocco Media kits Stars Night Flakes Hunt Dream (1 bag of soft sand included) 1 box 1 box Quantity 1 box 1 box 1 box 1 box Model CHFP-60B/ CHFP-74B/CHFP-74BS/SCW-002/SCW-003/CHFPN-60/CHFPN-74/SCI-001 Tahiti Getaway Falling Glamour Winter... -
Page 17: Operating Instructions
Once the appliance has been plugged into a grounded electrical outlet, it is ready to operate. 7.1 MAIN POWER BUTTON 7 1.1 THE BUTTON THAT IS USED FOR CHFP-002 The Main Power Button is located at the back of the heater. -
Page 18: Remote Control
7.2 REMOTE CONTROL 7.2.1 BATTERY INSTALLATION A. Pulling the battery holder out of the slot remote. B. Install the battery. It uses CR 2032 battery. C. Reinstall the battery holder into the remote by sliding it into position, as shown. Remote (REAR VIEW) Battery must be recycled or disposed of... -
Page 19: Remote Operation For All Models Except Chfpv-20
& white, red & yellow & blue, multicolor changing colors. When you press the button for 3 seconds until you hear a beep the indicator will show digital "0" the flame color and brightness will be changed automatically. (For CHFP-002, CHFP-××B, CHFP-74BS, SCI, and CHFPN series) D-2 To change flame color, press the "FLAME... -
Page 20: Led Control
"--". Press it for the third time, then the mechanism will stop function. After 10 seconds, the indicator will show "O ". (For CHFP-002 and SCI-003) Press "TIMER" button, this sets the timing for switching the fireplace off automatically. The timer ranges from 1 to 8 hours, which will be shown on the indicator from "1H"... -
Page 21: Control Panel That Is Used For Chfpv-20 And Scw Series
7.4.1 CONTROL PANEL THAT IS USED FOR CHFPV-20 AND SCW SERIES (For CHFPV-20) (For SCW series) 7.4.2 CONTROL PANEL THAT IS USED FOR CHFP- ×× B AND CHFP-74BS 7.4.3 CONTROL PANEL THAT IS USED FOR SCI AND CHFPN SERIES NOTE: It is used for SCI-001, SCI-002, SCI-003, CHFPN-60, CHFPN-74, and CHFPN-102. -
Page 22: Intelligent Control
INTELLIGENT CONTROL A. Scan QR code to get the APP, download and install it. B. Turn on the fireplace and make sure that the smart phone or tablet and fireplace are under the same WIFI. C. Click the icon to open the software, then click "Add" to connect WIFI and press "Start" to configure your device in 60 seconds. -
Page 23: Partially Reflective Glass Cleaning
8.0 MAINTENANCE WARNING DISCONNECT POWER AND ALLOW HEATER TO COOL BEFORE ATTEMPTING ANY MAINTENANCE OR CLEANING TO REDUCE THE RISK OF FIRE, ELECTRIC SHOCK OR DAMAGE TO PERSON. THE FIREPLACE SHOULD NOT BE OPERATED WITH AN ACCUMULATION OF DUST OR DIRT ON OR IN THE UNIT, AS THIS CAN CAUSE A BUILD UP OF HEAT AND SUBSEQUENT EVENTUAL DAMAGE. -
Page 24: Replacement Parts
9.0 REPLACEMENT PARTS Take the replacement parts of CHFP-50B for example. 1-800-306-3829 CHP-001 CHP-002 CHP-003 CHP-004 CHP-005 STAND CHP-006 CHP-007 CHP-008 CHP-009 REFLECTOR CHP-010 CHP-011 CHP-012 CHP-013 BACKLIGHT NOTE: Care must be taken when removing and disposing of any broken glass or damaged components. -
Page 25: Trouble Shooting
10.0 TROUBLE SHOOTING TURN OFF THE APPLIANCE COMPLETELY AND LET COOL BEFORE SERVICING. ONLY A QUALIFIED SERVICE PERSON SHOULD SERVICE AND REPAIR THIS ELECTRIC APPLIANCE. SYMPTOM PROBLEMTEST SOLUTION Timer does not work There is something wrong with the Replace the circuit board (CHP-002) circuit board Heater shuts off automatically Appliance's fuse has blown... -
Page 26: Warranty
CAESAR FIREPLACE® will not be responsible for installation, labor or any other expenses related to the reinstallation of a warranted part and such expenses are not covered by this warranty.
Need help?
Do you have a question about the CHFP-002 and is the answer not in the manual?
Questions and answers