Table of Contents
Advertisement
Quick Links
INSTALLER: LEAVE THIS MANUAL WITH THE APPLIANCE.
CONSUMER: RETAIN THIS MANUAL FOR FUTURE REFERENCE.
NEVER LEAVE CHILDREN OR OTHER AT RISK INDIVIDUALS ALONE WITH THE APPLIANCE.
INSTALLATION AND
OPERATING INSTRUCTIONS
CERTIFIED UNDER CANADIAN AND AMERICAN NATIONAL STANDARDS: ETL
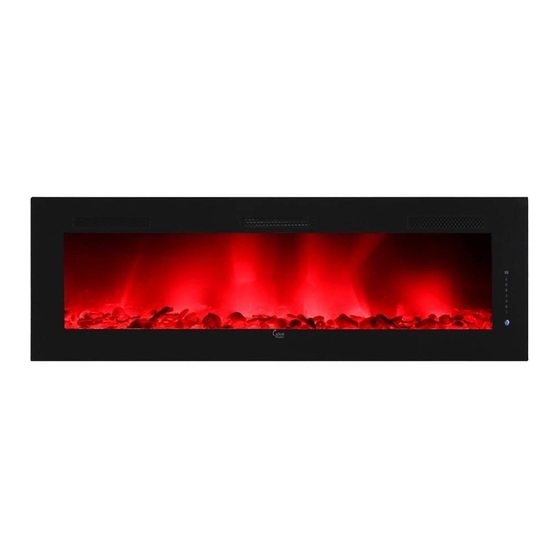
CHFP-74A
ELECTRIC FIREPLACE
WARNING
!
HOT GLASS WILL CAUSE
BURNS.
SAFETY INFORMATION
DO NOT TOUCH GLASS UNTIL
WARNING
COOLED.
!
NEVER ALLOW CHILDREN TO
TOUCH GLASS.
If the information in these instructions
are not followed exactly, a fire may
result, causing property damage,
personal injury or loss of life.
C
US
19295 E. Walnut Dr N, City of Industry, CA 91748
·
·
·
Phone (626) 328-6324 Fax (626) 453-0409 www.caesarfireplace.com sales@caesarhardware.com
Advertisement
Table of Contents

Related Manuals for Caesar Fireplace CHFP-74A


Summary of Contents for Caesar Fireplace CHFP-74A
- Page 1 CONSUMER: RETAIN THIS MANUAL FOR FUTURE REFERENCE. NEVER LEAVE CHILDREN OR OTHER AT RISK INDIVIDUALS ALONE WITH THE APPLIANCE. INSTALLATION AND OPERATING INSTRUCTIONS CERTIFIED UNDER CANADIAN AND AMERICAN NATIONAL STANDARDS: ETL CHFP-74A ELECTRIC FIREPLACE WARNING HOT GLASS WILL CAUSE BURNS.
-
Page 2: Table Of Contents
TABLE OF CONTENTS PACKING LIST WELCOME & CONGRATULATIONS INTRODUCTION 3.1 DIMENSIONS 3.2 LISTING APPROVALS 3.3 GENERAL INSTRUCTIONS PLACING APPLIANCE 4.1 UNPACKING AND TESTING APPLIANCE 4.2 GROUNDING APPLIANCE INSTALLATION 5.1 WALL-MOUNT INSTALLATION 5.2 RECESSED INSTALLATION 5.3 FREE STANDING INSTALLATION (OPTION) FINISHING 6.1 GLASS DOOR REMOVAL 6.2 MEDIA BED KITS INSTALLATION 6.2.1 6 INTERCHANGEABLE MEDIA BED KITS OPTIONS... -
Page 3: Packing List
1.0 PACKING LIST Description Quantity Electric fireplace 1 pc Installation and operating instructions 1 pc Remote control (battery included) 1 pc Media bed kits (falling stars) 3 boxes Wall mount bracket 1 pc Wall anchors 13 sets... -
Page 4: Welcome & Congratulations
2.0 WELCOME & CONGRATULATIONS Thank you and congratulations for choosing to purchase an electric fireplace from Caesar Fireplace, the world leader in electric fireplaces. To view the full line of Caesar Fireplace products, please visit www.caesarfireplace.com. 3.0 INTRODUCTION WARNING ·... -
Page 5: Dimensions
United States and Canada. If you need assistance during installation, please contact your local dealer. Model Number CHFP-74A NOTE: This appliance must be electrically wired and grounded Wall-mount, in accordance with local codes or, in the absence of local... -
Page 6: General Instructions
3.3 GENERAL INSTRUCTIONS WARNING READ THESE INSTRUCTIONS COMPLETELY BEFORE BEGINNING INSTALLATION FAILURE TO FOLLOW THEM COULD CAUSE AN APPLIANCE MALFUNCTION RESULTING IN SERIOUS INJURY AND/OR PROPERTY DAMAGE. ALL ELECTRIC APPLIANCES HAVE HOT AND ARCING OR SPARKING PARTS INSIDE. DO NOT OPEN RISK OF ELECTRIC SHOCK NO USER-SERVICEABLE PARTS INSIDE DO NOT USE DAMAGED ELECTRICAL CORDS. -
Page 7: Placing Appliance
4.0 PLACING APPLIANCE WARNING NEVER PLACE THIS ELECTRIC APPLIANCE WHERE IT MAY FALL INTO A BATHTUB OR OTHER WATER CONTAINER. WEAR SAFETY GLOVES AND SAFETY GLASSES FOR PROTECTION DURING INSTALLATION AND MAINTENANCE. TO PREVENT CONTACT WITH SAGGING OR LOOSE INSULATION THE ELECTRIC APPLIANCE MUST NOT BE INSTALLED AGAINST VAPOR BARRIER OR EXPOSED INSULATION LOCALIZED OVERHEATING COULD OCCUR AND A FIRE COULD RESULT. -
Page 8: Installation
5.0 INSTALLATION WARNING RISK OF FIRE! THE POWER CORD MUST NOT BE PINCHED AGAINST A SHARP EDGE SECURE CORD TO AVOID TRIPPING OR SNAGGING TO REDUCE THE RISK OF FIRE ELECTRIC SHOCK OR PERSONAL INJURY. DO NOT RUN CORD UNDER CARPETING. DO NOT COVER CORD WITH THROW RUGS RUNNERS, ETC ARRANGE CORD AWAY FROM CLUTTERED AREAS AND WHERE IT WILL NOT BE TRIPPED OVER. -
Page 9: Wall-Mount Installation
5.1 WALL-MOUNT INSTALLATION D ue to the many different materials used on different walls, it is highly recommended that you consult your local builder before you install this appliance on the wall. SIDE VIEW A Have two people hold the appliance against the wall to determine the final 6-3/4 (171mm) "... -
Page 10: Recessed Installation
5.2 RECESSED INSTALLATION Leave a frame in the wall, the size is W68-1/2"×H22-3/4"×D4". B. Have two people put the box into the wall, and fix the box to the wall with self-tapping screws. C. Put the hooks on the both sides of glass door into the holes in the box. Then push down the glass door to its place. D. -
Page 11: Finishing
6.0 FINISHING 6 1 GLASS DOOR REMOVAL OPENINGS, OPERATION OF DOORS OR ACCESS FOR SERVICE. OBSERVE Two people to hold the glass door and lift the door until it’s out of the holes. B. To d isconnect the data line and power line, press the plastic connector, then pull them out. Plastic Connector Plastic Connector C. -
Page 12: Media Bed Kits Installation
Apply an even layer from side to side. 6 2.1 6 INTERCHANGEABLE MEDIA BED KITS OPTIONS Morocco Dream Winter Flakes Thahiti Getaway Falling Stars Glamour Night Treasure Hunt Model CHFP-74A Media Morocco Winter Falling Glamour Treasure Thahiti Getaway bed kits... -
Page 13: Glass Door Installation
6.3 GLASS DOOR INSTALLATION A. To connect power line, align the plastic connector and red dot, then connect data line. B. Two people to hold the glass door and put the hooks into the holes. C. Check the glass door for stability, ensuring the hooks will not break free from the holes. 7.0 OPERATING INSTRUCTIONS Once the appliance has been plugged into a grounded electrical outlet, it is ready to operate. -
Page 14: Remote Control
7.2 REMOTE CONTROL 7.2.1 BATTERY INSTALLATION A. Pulling the battery holder out of the slot remote. B. Install the battery. It uses CR 2032 battery. C. Reinstall the battery holder into the remote by sliding it into position, as shown. Remote (REAR VIEW) Battery must be recycled or disposed of... -
Page 15: Panel Control
G. To change flame speed, press the SPEED " " button. There are 5 speeds to choose from. indicator will show "V1" to "V5" when pressing this button. Under the unlock mode to activate the heater press the HEAT " "... -
Page 16: Maintenance
8.0 MAINTENANCE WARNING DISCONNECT POWER AND ALLOW HEATER TO COOL BEFORE ATTEMPTING ANY MAINTENANCE OR CLEANING TO REDUCE THE RISK OF FIRE, ELECTRIC SHOCK OR DAMAGE TO PERSON. THE FIREPLACE SHOULD NOT BE OPERATED WITH AN ACCUMULATION OF DUST OR DIRT ON OR IN THE UNIT, AS THIS CAN CAUSE A BUILD UP OF HEAT AND SUBSEQUENT EVENTUAL DAMAGE. -
Page 17: Replacement Parts
9.0 REPLACEMENT PARTS 626-328-6324 CHP-001 CHP-002 CHP-003 CHP-004 MAIN POWER BUTTON CHP-005 CHP-006 CHP-007 CHP-008 CHP-009 REFLECTOR CHP-010 CHP-011 CHP-012 CHP-013 STAND... -
Page 18: Warranty
CAESAR FIREPLACE® will not be responsible for installation, labor or any other expenses related to the reinstallation of a warranted part and such expenses are not covered by this warranty.
Need help?
Do you have a question about the CHFP-74A and is the answer not in the manual?
Questions and answers