Table of Contents
Advertisement
Quick Links
NOTE:
Please read all instructions
carefully before using this
product
Table of Contents
Safety Notice
Hardware Pack
Assembly Instruction
Parts List
Warranty
Ordering Parts
Model
RS7000
Retain This
Manual for
Reference
01012014
OWNER'S
MANUAL
Marcy Fitness
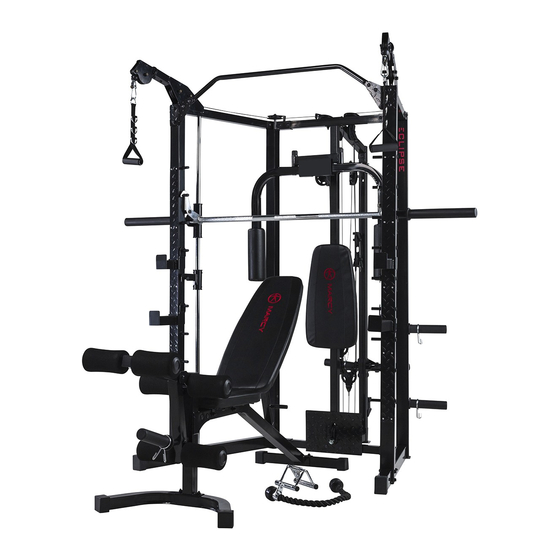
MARCY ECLIPSE RS7000
DELUXE SMITH CAGE
www.marcyfitness.co.uk
Advertisement
Table of Contents

Related Manuals for Marcy ECLIPSE RS7000


Summary of Contents for Marcy ECLIPSE RS7000
- Page 1 NOTE: Please read all instructions carefully before using this product MARCY ECLIPSE RS7000 Table of Contents DELUXE SMITH CAGE Safety Notice Hardware Pack Assembly Instruction Parts List Warranty Ordering Parts Model RS7000 Retain This Manual for Reference 01012014 OWNER'S MANUAL Marcy Fitness www.marcyfitness.co.uk...
-
Page 2: Table Of Contents
ORDERING PARTS..................37 BEFORE YOU BEGIN Thank you for selecting the MARCY Eclipse RS7000 Deluxe Smith Cage. For your safety and benefit, read this manual carefully before using the equipment. As a distributor, we are committed to provide you complete customer satisfaction. - Page 3 OF 35 OR PERSONS WITH PRE-EXISTING HEALTH PROBLEMS. READ ALL INSTRUCTIONS BEFORE USING ANY FITNESS EQUIPMENT. TUNTURI FITNESS BV ASSUMES NO RESPONSIBILITY FOR PERSONAL INJURY OR PROPERTY DAMAGE SUSTAINED BY OR THROUGH THE USE OF THIS PRODUCT. SAVE THESE INSTRUCTIONS. Marcy Fitness www.marcyfitness.co.uk...
- Page 4 The warning labels shown here have been placed on the Rear Base, and Bench Rear Stabilizer. If the labels are missing or illegible, please contact customer service by email: service.international@tunturi- fitness.com for replacements. Apply the labels in the location shown. Marcy Fitness www.marcyfitness.co.uk...
-
Page 5: Smith Cage Hardware Pack
SMITH CAGE HARDWARE PACK NOTE: The following parts are not drawn to scale. Please use your own ruler to measure the size. Marcy Fitness www.marcyfitness.co.uk... - Page 6 Marcy Fitness www.marcyfitness.co.uk...
- Page 7 SMITH CAGE HARDWARE PACK NOTE: The following parts are not drawn to scale. Please use your own ruler to measure the size. Marcy Fitness www.marcyfitness.co.uk...
- Page 8 SMITH CAGE HARDWARE PACK NOTE: The following parts are not drawn to scale. Please use your own ruler to measure the size. Marcy Fitness www.marcyfitness.co.uk...
- Page 9 SMITH CAGE HARDWARE PACK Marcy Fitness www.marcyfitness.co.uk...
-
Page 10: Smith Cage Assembly Instructions
M10 x 2 ½” Allen Bolts (#95), four Ø ¾” Washers (#107), and two M10 Aircraft Nuts (#110). E.) Repeat D to connect Rear Top Beam (#6) to Rear Left and Right Vertical Frame. DIAGRAM 1 Marcy Fitness www.marcyfitness.co.uk... - Page 11 I.) Attach the Chin-up Bar (#30) to the Left and Right Chin-up Bracket (#49 & #50). Secure each end of Chin-up Bar with two M10 x 1 5/8” Carriage Bolts (#86), two Ø ¾” Washers (#107), and two M10 Aircraft Nuts (#110). Marcy Fitness www.marcyfitness.co.uk...
- Page 12 DIAGRAM 2 Marcy Fitness www.marcyfitness.co.uk...
- Page 13 Rear Top Beam, and Middle Vertical Frame together with two M10 x 2 ½” Carriage Bolts (#88), two Ø ¾” Washers (#107), and two M10 Aircraft Nuts (#110). H.) Securely tighten all Nuts and Bolts installed in Step-1, Step-2, and Step-3. Marcy Fitness www.marcyfitness.co.uk...
- Page 14 DIAGRAM 3 Marcy Fitness www.marcyfitness.co.uk...
- Page 15 B.) Attach the Butterfly Stopper (#31) to Butterfly Base. Secure it with two M6 x 3/8” Allen Bolts (#58). C.) Attach the Backrest Board (#39) to Middle Vertical Frame. Secure it with two M8 x 2 3/8” Allen Bolts (#103) and two Ø 5/8” Washers (#106). DIAGRAM 4 Marcy Fitness www.marcyfitness.co.uk...
- Page 16 Secure each Swivel Pulley Bracket with one M12 x 5” Hex Bolt (#100), two Ø 1” Washer (#108), and one M12 Aircraft Nut (#111). Do not over tighten the Nuts. Make sure the Brackets are able to swivel. Marcy Fitness www.marcyfitness.co.uk...
- Page 17 DIAGRAM 5 Marcy Fitness www.marcyfitness.co.uk...
- Page 18 CABLE LOOP DIAGRAM Marcy Fitness www.marcyfitness.co.uk...
- Page 19 Cable around the Pulley then upward to the right Swivel Pulley Bracket. Let the Bracket hanging for now. E.) Repeat Procedure C above to install a Pulley and Cable Retainers to the Bracket. F.) Draw the Cable around the Pulley then clip to the Right Butterfly (#13). Marcy Fitness www.marcyfitness.co.uk...
- Page 20 Marcy Fitness www.marcyfitness.co.uk...
- Page 21 Q.) Re-install the Ball Stopper; Big Washer, and the U-shaped Connector previously removed in A above. Connect a Single Handle (#79) to each end of the Cable with a Hook (#73). Secure each Hook with one M10 x 1 1/8” Allen Bolt (#92) and M10 Aircraft Nut (#110). Marcy Fitness www.marcyfitness.co.uk...
- Page 22 DIAGRAM 7-1 Marcy Fitness www.marcyfitness.co.uk...
- Page 23 DIAGRAM 7-2 Marcy Fitness www.marcyfitness.co.uk...
- Page 24 UPPER CABLE (#47) LOOP DIAGRAM Marcy Fitness www.marcyfitness.co.uk...
- Page 25 Weight Post (#23). Secure the end of Cable to the bracket with one M10 x ¾” Allen Bolt (#90), two Ø ¾” Washers (#107), and one M10 Aircraft Nut (#110). E.) Attach two Weight Post Olympic Sleeves (#68) onto the Sliding Weight Post. Attach a Spring Clip to each Sleeve. Marcy Fitness www.marcyfitness.co.uk...
- Page 26 DIAGRAM 8 Marcy Fitness www.marcyfitness.co.uk...
- Page 27 Pulley will loosen the tension. M.) Attach the Shiver Bar (#54) to the Lower Cable with one 15-link Chain (#72) and two Hooks (#73). Replace the Shiver Bar with Ankle Strap (#75) or Triceps Rope (#53) for various exercises. Marcy Fitness www.marcyfitness.co.uk...
- Page 28 DIAGRAM 9 Marcy Fitness www.marcyfitness.co.uk...
- Page 29 D.) Attach four Weight Post Olympic Sleeves (#68) to the Weight Posts. Attach Spring Clips (#70) to the sleeves. Insert the Left & Right Bar Holders (#21 & 22), the Left & Right Safety Catches (#19 & 20) into the selected holes on the Front Left & Right Vertical Frames. Marcy Fitness www.marcyfitness.co.uk...
- Page 30 Marcy Fitness www.marcyfitness.co.uk...
- Page 31 Marcy Fitness www.marcyfitness.co.uk...
-
Page 32: Smith Cage Parts List
57 Ø 1” x ½” Pulley Bushing 2” Square End Cap 58 M6 x 3/8” Allen Bolt M10 x 2 3/8” Allen Bolt 59 Ø 1 ½” x Ø ½” Spacer 60 1 5/8” x ¾” End Cap Marcy Fitness www.marcyfitness.co.uk... -
Page 33: Multi-Purpose Bench Hardware Pack
MULTI-PURPOSE BENCH HARDWARE PACK NOTE: The following parts are not drawn to scale. Please use your own ruler to measure the size. Marcy Fitness www.marcyfitness.co.uk... - Page 34 MULTI-PURPOSE BENCH HARDWARE PACK NOTE: The following parts are not drawn to scale. Please use your own ruler to measure the size. Marcy Fitness www.marcyfitness.co.uk...
-
Page 35: Multi-Purpose Bench Assembly Instructions
D.) Attach the other end of Main Frame to the Rear Stabilizer (#3). Secure it with two M10 x 2 ½” Carriage Bolts (#28), two Ø ¾” Washers (#35), and two M10 Aircraft Nuts (#37). E.) Securely tighten all Nuts and Bolts. DIAGRAM 1 Marcy Fitness www.marcyfitness.co.uk... - Page 36 Securely tighten Nut and Bolt in A & B. C.) Attach two Seat Brackets (#4) to the Main Frame. Secure each Seat Bracket with one M8 x 2 ¾” Allen Bolt (#27), two Ø 5/8” Washers (#36), and one M8 Aircraft Nut (#33). DIAGRAM 2 Marcy Fitness www.marcyfitness.co.uk...
- Page 37 M8 x 1 5/8” Allen Bolts (#32) and ∅ 5/8” Washers (#36). B.) Place the Seat Pad (#10) onto the two Seat Brackets (#4). Secure it with four M8 x 1 1/8” Allen Bolts (#31) and ∅ 5/8” Washers (#36). DIAGRAM 3 Marcy Fitness www.marcyfitness.co.uk...
- Page 38 Push six Foam rolls (#14) onto the Tubes from both ends. Plug six Foam Roll End Caps (#16) into the Ends. D.) Attach an Olympic Sleeve (#15) onto the Leg Developer Weight Post. Attach a Spring Clip (#21) to the Olympic Sleeve. DIAGRAM 4 Marcy Fitness www.marcyfitness.co.uk...
- Page 39 Marcy Fitness www.marcyfitness.co.uk...
-
Page 40: Multi-Purpose Bench Parts List
M8 x 1 1/8” Allen Bolt M8 x 1 5/8” Allen Bolt M8 Aircraft Nut Ø 1” End Cap Ø ¾” Washer Ø 5/8” Washer M10 Aircraft Nut Ø 1” x Ø 3/8” Washer 6# Allen Wrench (Tool) 5# Allen Wrench (Tool) Marcy Fitness www.marcyfitness.co.uk... -
Page 41: Weight Resistance Chart
RS7000 WEIGHT RESISTANCE CHART Station Ratio Example Low Pulley 100% 4.5kg plate creates 4.5kgresistance Butterfly (both arms) 100% 4.5kgplate creates 2.25kgresistance Left Cross-Over 4.5kgplate creates 2.25kgresistance Right Cross-Over 4.5kgplate creates 2.25kgresistance *Numbers are approximate. Actual resistance may vary. Marcy Fitness www.marcyfitness.co.uk... -
Page 42: Warranty
Replacement parts can be ordered by contacting our Customer Support Department, Monday to Friday, 9am – 5pm GMT +1 hour: E mail: service.international@tunturi-fitness.com When ordering replacement parts, please give the following information, Model Description of Parts Part Number Date of Purchase Marcy Fitness www.marcyfitness.co.uk...
Need help?
Do you have a question about the ECLIPSE RS7000 and is the answer not in the manual?
Questions and answers