Table of Contents
Advertisement
Quick Links
Pulsar
© 2021 CLEMCO INDUSTRIES CORP.
One Cable Car Dr.
Washington, MO 63090
Phone (636) 239-4300
Fax (800) 726-7559
Email: info@clemcoindustries.com
www.clemcoindustries.com
®
Plus III-S, Pulsar
DATE OF ISSUE: 08/21
REVISION:
PRODUCTS AND THIS INFORMATIONAL MATERIAL
Clemco proudly provides products for the abrasive blast industry
and is confident that industry professionals will use their knowledge
and expertise for the safe and efficient use of these products.
The products described in this material and the information
relating to these products are intended for knowledgeable,
experienced users. It is the responsibility of the employer to
ensure that proper training of operators has been performed and
a safe work environment is provided.
No representation is intended or made as to the suitability of the
products described here for any purpose or application, or to the
efficiency, production rate, or useful life of these products. All
estimates
responsibility of the user and must be derived solely from the user's
experience and expertise, not from information contained in this
material.
It is possible that the products described in this material may be
combined with other products by the user for purposes determined
solely by the user. No representations are intended or made as to
the suitability of, engineering balance of, or compliance with
regulations or standard practice of any such combination of products
or components the user may employ.
This equipment is only one component of a cabinet blasting
operation. Other products, such as air compressors, air filters and
receivers, abrasives, equipment for ventilating or dehumidifying, or
other equipment, even if offered by Clemco, may have been
manufactured or supplied by others. The information Clemco
provides is intended to support the products Clemco manufactures.
Users must contact each manufacturer and supplier of products
used in the blast operation for warnings, information, training, and
instruction relating to the proper and safe use of their equipment.
Pulsar
Suction Blast Cabinets
NOTICE TO PURCHASERS AND USERS OF OUR
regarding
production
®
Plus III-S6
®
Plus VI-S
O. M. 30421
rates
or
finishes
are
the
Advertisement
Table of Contents

Related Manuals for Zero Pulsar Plus lll-S


Summary of Contents for Zero Pulsar Plus lll-S
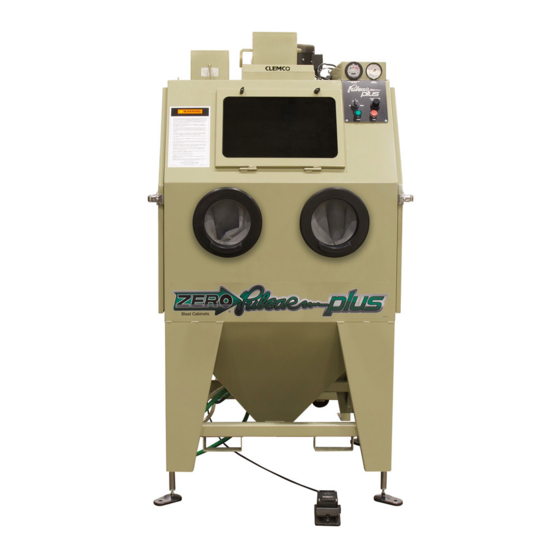
- Page 1 ® ® Pulsar Plus III-S, Pulsar Plus III-S6 ® Pulsar Plus VI-S Suction Blast Cabinets O. M. 30421 DATE OF ISSUE: 08/21 REVISION: NOTICE TO PURCHASERS AND USERS OF OUR PRODUCTS AND THIS INFORMATIONAL MATERIAL Clemco proudly provides products for the abrasive blast industry and is confident that industry professionals will use their knowledge and expertise for the safe and efficient use of these products.
-
Page 2: Table Of Contents
® PULSAR PLUS III-S, III-S6, and VI-S SUCTION BLAST CABINETS Page 1 INTRODUCTION Scope of Manual Danger indicates a hazardous situation that, if not avoided, will result in death or serious 1.1.1 These instructions cover setup, operation, injury. maintenance, troubleshooting, optional accessories, and replacement parts for the following Pulsar ®... -
Page 3: General Description
® PULSAR PLUS III-S, III-S6, and VI-S SUCTION BLAST CABINETS Page 2 Reclaimer Static Pressure (exhaust damper) .... 5.4 TROUBLESHOOTING – PNEU. and MECHANICAL ..8.0 Cabinet Height – Lift Legs .......... 5.5 Poor visibility/dusty media .......... 8.1 Door Interlocks ............5.6 Abnormally high media consumption ...... - Page 4 ® PULSAR PLUS III-S, III-S6, and VI-S SUCTION BLAST CABINETS Page 3 Lifting Eye Exhaust Damper Power Module Power Lift-Leg Assembly Reclaimer Media Fill Door PULSAR VI-S CABINET ENCLOSURE Back View Refer to Figure 5 for additional cabinet components. PULSAR VI-S POWER MODULE Refer to Figure 6 for additional Exhauster Motor power module components.
-
Page 5: Theory Of Operation
® PULSAR PLUS III-S, III-S6, and VI-S SUCTION BLAST CABINETS Page 4 1.4.2 Cabinet Enclosure: This manual covers two pulse pressure is set to 0 psi, the timer is still functioning Pulsar ® Plus cabinet sizes. but there is no pulse because pressure is turned off. Pulse pressure should be left OFF (0 psi) until the Pulsar III Approximate work chamber dimensions: cartridge is seasoned, per Section 7.15. -
Page 6: Cabinet And Power-Module Controls And Functions
NOTE: Pressure should be set life of the reclaimer and should be installed when using to zero (0 psi) until the filter cartridge is seasoned. silicon carbide, aluminum oxide, or other aggressive media, as noted in Section 1.11.4. Rubber liners are Dust-Collector Pulse Timing: Pulse timing is controlled shown on Page 47, Figure 57. - Page 7 ® PULSAR PLUS III-S, III-S6, and VI-S SUCTION BLAST CABINETS Page 6 1.11.4 Silicon carbide, aluminum oxide, and garnet: pressure), and dust-collector filter loading (differential These are the most aggressive of the commonly used pressure across the dust filters). media. Aggressive media may be used, but the service life As a rule, larger orifice air jets and nozzles deliver more of any components exposed to the media will be reduced.
-
Page 8: Compressed-Air Requirements
® PULSAR PLUS III-S, III-S6, and VI-S SUCTION BLAST CABINETS Page 7 1.11.7 Plastic media: Plastic and similar lightweight 1.13 Electrical Requirements and/or nonaggressive media generally 1.13.1 Standard cabinets are provided with 1 HP, recommended for suction-style cabinets because the 120/230 VAC, 1 PH, 60 Hz (wired 120). - Page 9 ® PULSAR PLUS III-S, III-S6, and VI-S SUCTION BLAST CABINETS Page 8 Backside of the Control Console. Air In - Blue Male Power-Cord Connector Air Out - Gray Differential-Pressure In (–) - White Female Power-Cord Connector Differential-Pressure Out ( ) - Green ...
- Page 10 ® PULSAR PLUS III-S, III-S6, and VI-S SUCTION BLAST CABINETS Page 9 Diaphragm Pulse valve Digital Pulse Timer Pulse Reservoir Pulse-Pressure Regulator Mounted on the reclaimer flange On 600 Power Modules. Pneumatic Inlet Assembly 120-Volt U-Ground Plug Compressed-Air Inlet Media Fill Door Grounding Lug Exhaust (outlet) Damper Location varies with model.
-
Page 11: Connect Compressed-Air Supply Line
® PULSAR PLUS III-S, III-S6, and VI-S SUCTION BLAST CABINETS Page 10 Retaining Collar To connect the tubing: Push the tubing into the fitting until it seats. Gently pull on the tubing to make Latch sure it is securely fastened. Male Connector Blue Tubing –... -
Page 12: Ground The Cabinet And Power Module
® PULSAR PLUS III-S, III-S6, and VI-S SUCTION BLAST CABINETS Page 11 Ground the Cabinet and Power Module 2.3.3 Refer to the table in Figure 8 to determine the minimum ID of air-supply line to the cabinet and connect 2.4.1 To prevent static electricity buildup, attach an the line from the air source to the air filter. -
Page 13: Connect Media Hose And Air Hoses
® PULSAR PLUS III-S, III-S6, and VI-S SUCTION BLAST CABINETS Page 12 Connect Media Hose and Air Hoses – Figure 10 Set Air-Inlet Damper ‒ Figure 11 Located on the top-rear edge of the cabinet, as shown in Figure 5. 2.6.1 Refer to Figure 10 and attach the clear media hose from under the cabinet hopper to the metering... -
Page 14: Final Assembly
® PULSAR PLUS III-S, III-S6, and VI-S SUCTION BLAST CABINETS Page 13 the grommet holes. Use a screw gun with a 5/16" socket Final Assembly to drill and thread the screws through the door’s inner 2.9.1 Position the foot pedal on the floor at the front of wall at each grommet. -
Page 15: Media Unloading
® PULSAR PLUS III-S, III-S6, and VI-S SUCTION BLAST CABINETS Page 14 1. Turn OFF the exhauster. 5. Replace the plug when the reclaimer is empty, or, if changing media type, purge the media hose, as 2. Unhook the two door latches and open the reclaimer noted below. -
Page 16: Blasting Operation
® PULSAR PLUS III-S, III-S6, and VI-S SUCTION BLAST CABINETS Page 15 Blasting Operation Shut down the cabinet immediately if dust discharges from the dust collector or cabinet. To avoid the inhalation of dust, which can Check to make sure the dust-collector filter cause respiratory illness from short-term cartridge is correctly seated and that it is not ingestion or death from long-term ingestion:... -
Page 17: Shutdown
® PULSAR PLUS III-S, III-S6, and VI-S SUCTION BLAST CABINETS Page 16 4.7.3 Keep doors closed and exhauster running until 5.1.2 To adjust pressure, unlock the regulator knob by the cabinet is clear of all airborne dust. pulling it out, as shown in Figure 14, and turn it clockwise to increase pressure or counterclockwise to 4.7.4 Unload parts. -
Page 18: Reclaimer Static Pressure (Exhaust Damper)
® PULSAR PLUS III-S, III-S6, and VI-S SUCTION BLAST CABINETS Page 17 5.3.3 If pulsation occurs in the media hose, either 5.4.3 A manometer (flexible U-tube) or differential- media is damp and caked, or not enough air is entering pressure gauge is useful for adjusting and monitoring the media stream. -
Page 19: Door Interlocks
® PULSAR PLUS III-S, III-S6, and VI-S SUCTION BLAST CABINETS Page 18 Door Interlocks ‒ Figure 18 5.6.5 Turn the screw in until it engages the switch without applying excessive pressure. Listen closely and a click can be heard as the screw engages and ... -
Page 20: Dust-Collector Pulse Pressure
® PULSAR PLUS III-S, III-S6, and VI-S SUCTION BLAST CABINETS Page 19 Detail 2 Detail 1 Plunger Extended – Disables Blasting Plunger Recessed – Enables Blasting Top of Bin Gasket Bin in the down (unlocked) position. Bin in the up (locked) position. Mounting Screws Interlock Switch 1/4"... -
Page 21: Digital Pulse-Control Timer
® PULSAR PLUS III-S, III-S6, and VI-S SUCTION BLAST CABINETS Page 20 NOTE: The blue insert on the adjustment knob locks and unlocks knob, which prevents unintentional adjusting. While the knob is down, in the lock position, OFF TIME slide the insert to either side to lock it and back to center The sec (seconds) to unlock it, as shown in Figure 21. -
Page 22: Reset Pulse On Time To Factory Setting, 0.15
® PULSAR PLUS III-S, III-S6, and VI-S SUCTION BLAST CABINETS Page 21 the new time is saved, the unit resumes operation with indicating the new time is being saved. Once the new the new time setting. time is saved, the unit resumes operation with the new time. -
Page 23: Cabinet Air-Inlet Damper
® PULSAR PLUS III-S, III-S6, and VI-S SUCTION BLAST CABINETS Page 22 5.9.5.1 Reset OFF (time between each pulse) subrange 1. Press the right "on/arrow up" button, and ON appears to factory setting of seconds, as shown in Figure 25: briefly on the display. - Page 24 5.11.7.2 Place the unused end of the manometer tubing over only the first tapered barb on the barb fitting; 5.11.5 Adjust the slide rule to align the zero with the pushing the tubing all the way onto the barb may make it fluid level.
-
Page 25: Preventive Maintenance
® PULSAR PLUS III-S, III-S6, and VI-S SUCTION BLAST CABINETS Page 24 5.11.8.2 To find the static pressure, add the number of nozzle, media hose, flex hose, wear plate, and all items inches the fluid travels up one column to the inches the covered in this section. -
Page 26: Daily Inspection During Blasting
® PULSAR PLUS III-S, III-S6, and VI-S SUCTION BLAST CABINETS Page 25 adjust frequency based on usage, contamination, and 6.2.4.5 Clip both latch hooks into the latch brackets and friability of the media. raise both latch handles to raise the bin, and latch it in place. -
Page 27: Media Hose
® PULSAR PLUS III-S, III-S6, and VI-S SUCTION BLAST CABINETS Page 26 6.4.4 Media hose: Inspect media hose for thin spots SERVICE MAINTENANCE by pinching it every 6 to 12 inches. Replace the hose when it becomes soft. 6.4.5 Dust-collector’s inline filter: Check for dust Prior to doing any maintenance or opening the accumulation and empty it as needed. -
Page 28: Quick-Change Gloves And Glove Mounts
® PULSAR PLUS III-S, III-S6, and VI-S SUCTION BLAST CABINETS Page 27 7.1.4 Place the smooth side of the strap over the attached glove. Insert the strap end through the buckle Glove Mount Attachment Ring and pull the strap taut. While keeping the strap taut, Shoulder Screw Slot fasten the straps by pressing the hook end into the loop Shoulder Screw Head... -
Page 29: View-Window Cover Lens
Do not use plate glass for replacement view 5/32 x 3/4 Gasket windows. Plate glass shatters on impact and can cause severe injury. Use only genuine ZERO ® laminated replacement glass. Window Frame 7.5.1 Remove the two window-frame nuts located on... -
Page 30: Led Light Assembly
® PULSAR PLUS III-S, III-S6, and VI-S SUCTION BLAST CABINETS Page 29 7.7.3 Pivot the window frame up or down until tension 7.8.1.2 Remove the four nuts and washers (save them is off the frame hinges. to reuse) that attach the light assembly to the cabinet, lift the light off the diffuser, as shown in Figure 36. -
Page 31: Tube-Lock Fittings
® PULSAR PLUS III-S, III-S6, and VI-S SUCTION BLAST CABINETS Page 30 7.9.2 Reconnect the tubing by inserting it through the 7.8.4 LED light assembly replacement collar until it seats. Tug on the tubing to make sure it is 7.8.4.1 Turn OFF electrical power and perform lockout secured. -
Page 32: Replacing Reclaimer Wear Plate
® PULSAR PLUS III-S, III-S6, and VI-S SUCTION BLAST CABINETS Page 31 Filter Mounting Bracket Pilot-Operated O-Ring Branch Module Pressure Regulator O-Ring Retaining Clip Mounting Screws Figure 38 7.11.1 300 reclaimer with welded-on, nonremovable top ‒ Figure 40 Bracket Recess Refer to Section 7.11.2 to replace the wear plate in a 600 cfm reclaimer with a bolt-on, removable top. -
Page 33: Cfm Reclaimer With Bolt-On Top
® PULSAR PLUS III-S, III-S6, and VI-S SUCTION BLAST CABINETS Page 32 reclaimer. Remove the screws and pull out the wear 7.11.2.1 Remove the flex hose from the reclaimer inlet. plate through the reclaimer inlet. 7.11.2.2 Unbolt the reclaimer top and remove the top. 7.11.1.3 Remove remnants of old caulk that will prevent the new wear plate from seating against the 7.11.2.3 Remove the reclaimer inlet-pipe adaptor,... - Page 34 ® PULSAR PLUS III-S, III-S6, and VI-S SUCTION BLAST CABINETS Page 33 7.11.2.9 Use a new inlet gasket and reattach the inlet- 7.12.2 Make a note of the reclaimer’s alignment; the pipe adaptor. reclaimer door is facing the power module’s open side. The reclaimer must be reinstalled facing in the same 7.11.2.10 Allow time for the caulking to cure before direction.
- Page 35 ® PULSAR PLUS III-S, III-S6, and VI-S SUCTION BLAST CABINETS Page 34 7.12.10 Remove the nuts and washers located along 7.12.14 Remove all old caulking and adhesive from the the right side of the inlet and remove the lined baffle weldment.
- Page 36 ® PULSAR PLUS III-S, III-S6, and VI-S SUCTION BLAST CABINETS Page 35 7.12.22 (7th) Align the front edge of the inlet top liner to at each existing hole location. NOTE: To field install a the front of the inlet housing and use self-drilling screws new, first-time wall liner, use self-drill/tap screws to to secure.
-
Page 37: Removing Or Replacing Reclaimer Inlet Baffle
® PULSAR PLUS III-S, III-S6, and VI-S SUCTION BLAST CABINETS Page 36 7.12.35 Allow time for the caulking to cure before 7.13.5 If removing (not replacing) the baffle, remove the putting the reclaimer in service strip gasket from the inner tube and install the baffle bolts and reclaimer top. -
Page 38: Seasoning Filter Cartridge
® PULSAR PLUS III-S, III-S6, and VI-S SUCTION BLAST CABINETS Page 37 NOTE: Blasting media is usually nontoxic; however, 7.14.4 From the bottom of the filter cartridge, slide a some materials being removed by the blast process suitable plastic trash bag over the cartridge to contain dust. may be toxic. -
Page 39: Clean Dust-Collector's Inline Filter
® PULSAR PLUS III-S, III-S6, and VI-S SUCTION BLAST CABINETS Page 38 Section 5.9.2. Switch the power toggle switch to ON to Push the bottom cap against the bottom of the filter body start the exhauster and pulse cycle. and turn it to the right until the projection is below the locking tab. -
Page 40: Diaphragm Pulse Valve
® PULSAR PLUS III-S, III-S6, and VI-S SUCTION BLAST CABINETS Page 39 7.18 Diaphragm Pulse Valve 7.18.3 Reassemble using the new diaphragm and O- ring from the service kit, making sure the diaphragm is correctly aligned, as noted in Figures 54 and 55, and that the O-ring is seated into the groove. -
Page 41: Poor Visibility/Dusty Media
® PULSAR PLUS III-S, III-S6, and VI-S SUCTION BLAST CABINETS Page 40 TROUBLESHOOTING 8.1.9 Obstruction in flex hose between the cabinet PNEUMATIC and MECHANICAL hopper and reclaimer inlet. Inspect hose for blockage. Refer to Section 9.0 to troubleshoot electrical problems. 8.1.10 Paddle wheel worn. -
Page 42: Plugged Nozzle
® PULSAR PLUS III-S, III-S6, and VI-S SUCTION BLAST CABINETS Page 41 8.3.4 Blockage in media hose or gun. Blockage may 8.5.5 A vibrator mounted on the reclaimer mounting bolt occur because of: may help prevent bridging of fine-mesh media. NOTE: To ... -
Page 43: Blowback Through Media Hose
® PULSAR PLUS III-S, III-S6, and VI-S SUCTION BLAST CABINETS Page 42 8.9.2 Check for blockage in media hose. Refer to 8.12.2 Inlet regulator stuck open. Inspect inlet Section 8.7. regulator. 8.9.3 Poor suction in media hose. Refer to Section 8.8. 8.13 Media buildup in cabinet hopper;... -
Page 44: Dust Or Media Leaking From Cabinet
® PULSAR PLUS III-S, III-S6, and VI-S SUCTION BLAST CABINETS Page 43 3. If the display is not lit after checking the above, 8.15 Dust or media leaking from cabinet have the electrical system checked by a qualified electrician. ... -
Page 45: Troubleshooting - Electrical
® PULSAR PLUS III-S, III-S6, and VI-S SUCTION BLAST CABINETS Page 44 9.1.4.1 With the dust collector bin locked in place TROUBLESHOOTING – ELECTRICAL correctly, check voltage between Terminals 10 and 2. If 120 VAC is not present, dust-collector bin switch has an Refer to Section 8.0 to troubleshoot pneumatic and issue. -
Page 46: Lift Legs Do Not Move
® PULSAR PLUS III-S, III-S6, and VI-S SUCTION BLAST CABINETS Page 45 9.4.1.3 With dust collector motor on and running and the 9.2.5.1 Remove cover plate on motor junction box left-hand door closed, check right-hand door interlock (located directly on the motor housing). Check that the switch. -
Page 47: Accessories And Replacement Parts
® PULSAR PLUS III-S, III-S6, and VI-S SUCTION BLAST CABINETS Page 46 HEPA filter assembly, Pulsar Plus top mount 10.0 ACCESSORIES and REPLACEMENT PARTS for Pulsar Plus III power module ......30485 Unless otherwise noted quantities are each. for Pulsar Plus VI power module ......30475 Time delay door locks, for both doors .... - Page 48 ® PULSAR PLUS III-S, III-S6, and VI-S SUCTION BLAST CABINETS Page 47 Cabinet-hopper rubber-liner set Optional Extension Nozzles – Figure 58 for Pulsar III suction cabinet ....... 30888 Item Description Stock No. for Pulsar VI suction cabinet ....... 23499 3" Straight extension nozzle Pass-thru door, with 15 inch-square cutout No.
-
Page 49: Pulsar Iii-S And Vi-S Cabinet Assembly
® PULSAR PLUS III-S, III-S6, and VI-S SUCTION BLAST CABINETS Page 48 10.2 Pulsar III-S and VI-S Cabinet Assembly Foot pedal, electric ........30188 Figure 59 Gasket, 5/32" x 3/4", 3 ft required ..... 00192 Detent sleeve, door interlock ..... 15042 Item Description Stock No. - Page 50 ® PULSAR PLUS III-S, III-S6, and VI-S SUCTION BLAST CABINETS Page 49 10.3 Cabinet Control Console Assembly – Figure 60 Switch, 3-position selector ......30293 Switch, green LED pushbutton ....30291 Item Description Stock No. Switch, red pushbutton ......30292 Control console assembly, includes all items Washer, color code except 21, which are on the cabinet ..
-
Page 51: View Window Assembly
® PULSAR PLUS III-S, III-S6, and VI-S SUCTION BLAST CABINETS Page 50 10.6 Gloves and Glove Attachments – Figure 63 10.4 View-Window Assembly ‒ Figure 61 Item Description Stock No. Item Description Stock No. Armrest-glove mount kit, each, Window glass, 12.5" x 19.5" laminated ..12212 includes items 1 thru 5, 10, and 11 .. -
Page 52: Led Light Assembly
® PULSAR PLUS III-S, III-S6, and VI-S SUCTION BLAST CABINETS Page 51 10.7 LED Light Assembly – Figure 64 Air jet assembly w/ Item 5 No. 4 ............12342 LED light assembly ......... 29711 No. 5 ............12343 Diffuser lens ..........29713 No. -
Page 53: Pneumatic Controls And Parts
® PULSAR PLUS III-S, III-S6, and VI-S SUCTION BLAST CABINETS Page 52 10.9 Pneumatic Controls and Parts – Figure 66 Hose end, 1/2" barb x 1/2" female swivel ... 15002 Hose end, 1/2" barb x 3/8" male NPT ..06369 Item Description Stock No. - Page 54 ® PULSAR PLUS III-S, III-S6, and VI-S SUCTION BLAST CABINETS Page 53 10.10 Reclaimer, 300 CFM – Figure 67 10.11 Reclaimer, 600 CFM ‒ Figure 68 Item Description Stock No. Item Description Stock No. Reclaimer assembly, Pulsar III Reclaimer assembly, Pulsar VI, Includes items with an asterisk (*) ..
-
Page 55: Dust Collector Assembly
® PULSAR PLUS III-S, III-S6, and VI-S SUCTION BLAST CABINETS Page 54 10.12 Dust Collector Assembly, 300 and 600 cfm Fitting, elbow, 1/4" NPT x 3/8" tube ..11685 Figure 69 Elbow, 1/4" brass st......... 02027 Nipple, 1/4" brass hex ......02808 Item Description Stock No.
Need help?
Do you have a question about the Pulsar Plus lll-S and is the answer not in the manual?
Questions and answers