
Related Manuals for Stoneridge OPTAC


Summary of Contents for Stoneridge OPTAC
- Page 1 OPTAC Download Tool User Manual Help-line Telephone Number: 0870 887 9202 E-Mail: optac@stoneridge.com Document version 2.1 Document No. 6939-170 Page 1...
-
Page 2: Table Of Contents
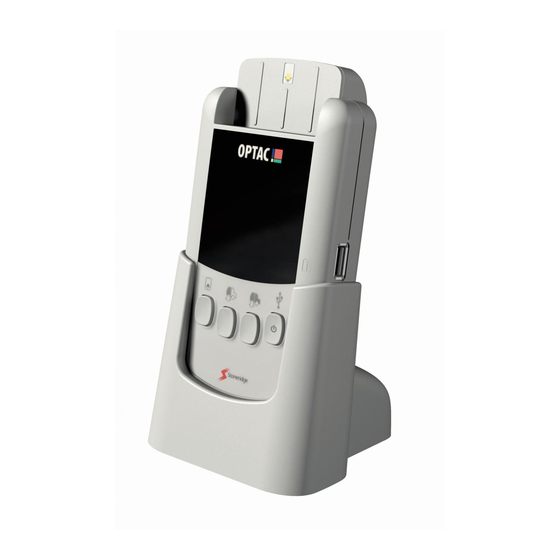
TERMINOLOGY................4 INTRODUCTION................4 What does the OPTAC Download Tool do ?............4 With which VU Types can the Tool be used ?............4 PREPARATION FOR USE............... 4 Power Supply......................4 Connectors......................5 Functions of the Buttons ..................5 Switching On/Off.................... - Page 3 FIGURE 1: OPTAC DOWNLOAD TOOL OUTLINE Smart Card Slot Connector Connector Download Battery life Indicators Indicator Smartcard Download button On/Off/Programmable function button Partial tachograph download button Full tachograph download button Document version 2.1 Document No. 6939-170 Page 3...
-
Page 4: Terminology
3 PREPARATION FOR USE Power Supply The OPTAC Tool is powered by 2 x AA batteries. To insert the batteries, remove the battery cover on the rear of the Download Tool and insert as indicated in the battery compartment. Replace the battery cover. -
Page 5: Connectors
Connectors. The OPTAC Tool has one slot at the top of the unit and connectors on the left and right hand sides. A. Smart card slot. For reading data from driver and workshop smart cards. B. VU Download Connector. For reading data from the VU using the cable supplied C. -
Page 6: Programmable Button
Programmable Button Once the OPTAC tool is powered up this Button can be used for special functions. If a memory stick is inserted and this Button is pressed, the Download Tool will copy its contents to a memory stick. If a memory stick is not inserted and this Button is pressed, the tool will perform a special download, please ensure the VU Cable is attached when performing Special Downloads from the VU. - Page 7 3. Switch on the Download Tool (Press and hold the Power Button for approximately 3 seconds) 4. Press the Button for a Full VU download, or the Button for a partial download. 5. As the download is performing the green lights will flash back and forth. Please allocate plenty of time when performing VU Downloads as considerably more information is being handled than when performing a smart card download.
-
Page 8: Performing A Smartcard Download
7. If the download fails the light above the VU button that was pressed will be red. 3.6.2 Performing a Smartcard Download. Switch on the Download Tool (Press and hold the Power BUTTON for approximately 3 seconds). Document version 2.1 Document No. - Page 9 2. Insert the Smartcard into the Download Tool into the smartcard slot. Ensure the chip on the card is face up and pointing down (as displayed in the image on the Download Tools Smartcard slot) 3. Press the Smartcard download button. 4.
-
Page 10: Uploading
6. If the download fails the LED above the Smartcard Button that was pressed will be red. Uploading This section will illustrate how to transfer the data from the Download Tool to your computer 1. Insert the USB cable into socket C of the Download Tool. Document version 2.1 Document No. -
Page 11: Special Function Download
3. Switch on the Download Tool (Press and hold the Power Button for approximately 3 seconds). 4. The OPTAC tool will be seen as a memory stick by the computer, and files can been viewed through Windows Explorer. Special software such as OPTAC Fleet Viewer can be used to import files directly. - Page 12 1. Insert the VU cable into the VU connector socket B of the Download Tool. 2. Insert the other end of the VU cable into the 6 pin download connector of the VU. 3. Switch on the Download Tool (Press and hold the Power Button for approximately 3 seconds). 4.
- Page 13 5. As the download is performing the green lights will flash back and forth. 6. If the download is successful a static green light will remain above the On/Off Button that was pressed. 7. If the download fails the LED under the VU Button that was pressed will be red. Document version 2.1 Document No.
-
Page 14: Copying Data To A Memory Stick
BE ENTIRELY EMPTY PRIOR TO USE - please erase any files before commencing copy. 1. Insert a memory stick into socket C of the Download Tool. (The OPTAC image on the stick actually faces the other way than as illustrated in the image) 2. - Page 15 3. Press the Power Button once more. Note it must be a short press or the tool will switch off. 4. As the data is copying to the memory stick the green lights will flash back and forth. 5. If the copying is successful a static green light will remain above the On/Off Button that was pressed.
-
Page 16: Mounting The Security Cradle
7. Switch off the Download Tool and remove the memory stick. Do NOT remove the memory stick while the tool is SWITCHED ON. 3.10 Mounting the Security Cradle. To mount the security cradle a solid wooden surface such as a desk or work bench will be required. - Page 17 2. Insert the OPTAC Download Tool into the Security Cradle. 3. Using the security screw driver provided, screw the security screw through the hole on the back of the security cradle into the OPTAC Download Tool, as indicated in the figure below. Document version 2.1 Document No.
-
Page 18: Problem Solving
4 UPGRADING THE OPTAC DOWNLOAD TOOL The OPTAC Download Tool is designed in such a way, that it can be upgraded. This means that any new features or enhancements can be downloaded from a PC or Laptop into the OPTAC Download Tool. - Page 19 This will also require the use of the OPTAC Download Tool Upgrade software. This can be found on either the OPTAC Fleet Viewer CD, or the OPTAC Download Tool Configuration mini-CD. Instructions for the Upgrade can be found on these CD’s.
Need help?
Do you have a question about the OPTAC and is the answer not in the manual?
Questions and answers