Table of Contents
Advertisement
Quick Links
Advertisement
Table of Contents
Troubleshooting

Related Manuals for Kent Scientific CODA Monitor


Summary of Contents for Kent Scientific CODA Monitor
- Page 1 CODA Monitor User’s Guide...
- Page 2 CODA Monitor User’s Guide ©2017 Kent Scientific Corporation, Documentation Version 1.0 for On-Unit Help Version 1.01 and Firmware Revision 1.01.00 March 2017...
-
Page 3: Table Of Contents
TABLE OF CONTENTS Introduction ................. 1 System Components ..............1 About the CODA® Monitor ............2 Navigating the CODA Monitor ..........2 Using the CODA Monitor Non-Invasive Blood Pressure ............5 Set Up Hardware ................5 Configure Settings ............... 5 Connect the Animal .............. - Page 4 Data Management ............20 Connecting to a PC..............20 Upload ..................20 History ..................21 Analog Output ................23 CODA PC Software ............24 Install CODA Software ..............24 Use CODA Software ..............25 General Information ............26 Contact ..................26 Warranty and Satisfaction Guarantee ........26 Specifications ................27 Index ...................
-
Page 5: Introduction
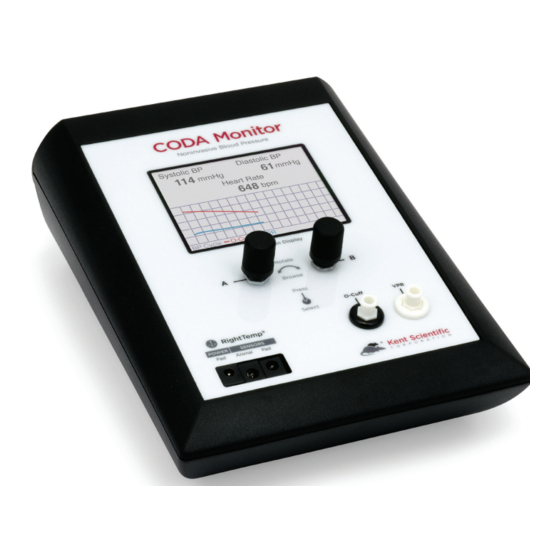
Introduction The CODA Monitor is not designed, intended, or authorized for use in human applications. System Components Front Panel Dial Controls Touch Screen Display VPR Port RightTemp Module • Pad Power • Animal Sensor • Pad Sensor O-Cuff Port Back Panel... -
Page 6: About The Coda Monitor
Navigating the CODA Monitor Touch Screen CODA Monitor Touch Screens offer quick access to features and settings. Touch the upper half of the Run Screen to reach the first Touch Screen. Start... - Page 7 Touch the bottom half of the Run Screen to open the pop-up Display Menu and quickly scroll through charts, view other data or silence Alarms. Systolic BP Diastolic BP -- mmHg -- mmHg Mean BP Heart Rate -- mmHg -- bpm MeasRR degC Stop Alarm...
- Page 8 The Main Menu is the non-touch gateway to all features and setting choices for configuring the CODA Monitor, useful when a touch screen is not a feasible option, such as for an operator with damp hands. Access the Main Menu through the Touch Screen Menu or from the Run Screen by holding Dial A.
-
Page 9: Using The Coda Monitor Non-Invasive Blood Pressure
1. Attach the VPR cuff to the VPR port. 2. Attach the Occlusion cuff to the O-Cuff port. Configure Settings CODA Monitor Settings 1. Touch: 1) the upper half of the Run Screen for the Touch Screen Menu. 2) “Animal Type” to select the animal species. -
Page 10: Connect The Animal
Connect the Animal 1. Place the animal in the holder if you are using it: 1) Remove the rear gate of the animal holder. 2) Adjust the nose cone to the front of the holder and tighten the screw. 3) Place the animal into the holder. Allow the animal to enter the holder freely, using as little force as possible. - Page 11 O-Cuff placed on tail • Slide the VPR cuff up the tail, with the larger diameter end first, until you reach the O-cuff. Do not force the cuff onto the tail. Measurements can be detected from any part of the tail as long as a sufficient portion of the tail is inside the VPR cuff.
-
Page 12: Coda Tips
Note: Do not start the experiment if the tail temperature is below 32C. It may take several minutes for the animal’s tail to reach the proper temperature. 5. Touch “Start CODA” to begin measurements. CODA Tips CODA Tips • Choose a warm, quiet room for blood pressure measurements. Avoid high-traffic or noisy locations. -
Page 13: Troubleshooting
Solutions • O-Cuff and/or VPR • Ensure the cuffs are connected tightly to Main Line ports are open or not the CODA Monitor. press error CODA cannot reach connected to the cuffs. • See “Diagnostic Procedures” to diagnose • Cuff or cuff bladders and determine the source of potential leak. - Page 14 Sample Displays Correct BP Curve VPR Cuff Leaks Two sample displays showing leaking VPR cuffs. The top channel in each display shows a nearly horizontal blue line, indicating no leak in the VPR cuff. The bottom channel in each display shows a sharp drop at the beginning of the cycle, indicating a probable VPR cuff leak.
- Page 15 No action required. Success Air Leak. Use O-Cuff and VPR Cuff tests to locate the cause of Fail the leak. If you are unable to pinpoint and correct the problem, contact Kent Scientific. O-Cuff Test Resulting Meaning Possible Action Message No leaks found.
-
Page 16: Coda Cuff And Bladder Maintenance
CODA Cuff and Bladder Maintenance Bladders in both the O-Cuffs and VPR cuffs require periodic replacement. Replacement bladders are included with your CODA Monitor. Bladder shelf life is approximately a year. Use only fresh Kent Scientific pre-measured cuff-bladder replacements. Other materials or replacement bladders could seriously affect blood pressure readings. -
Page 17: Temperature Monitor And Homeothermic Warming
Homeothermic Warming Set Up Hardware 1. Connect the warming pad to the “Pad Power” port on the front of the CODA Monitor. 2. Choose one of the two probes as the body temperature sensor. • For mice, select the smaller probe. -
Page 18: Monitoring An Animal
RightTemp Settings 1. Touch: 1) “General setup”. 2) “RightTemp setup”. 3) “Control warming” to choose the type of warming: • “Off“: temperature monitoring, no warming • “Unregulated“: temperature monitoring, warming with no sensor control • “Pad temp regulated“: temperature monitoring with Pad sensor control •... -
Page 19: Troubleshooting
Connections are loose or • Ensure that the connection on the front incorrect. of the CODA Monitor is tight. Pad is overheating. Settings are incorrect. • Ensure that all settings are properly enabled for warming and that correct target temperatures are selected. -
Page 20: System Customization
System Customization Profiles CODA Monitor can save your settings as one or more Profiles. Profiles contain all non-calibration-related settings, including display and functional settings. To save your current settings as a new Profile: 1. Touch 1) the upper half of the Run Screen for the Touch Screen Menu. - Page 21 To use a Dial command: 1. At the Run Screen, quickly turn the Dial assigned to the Parameter whose value you want to change. The CODA Monitor beeps and the associated text becomes blue. 2. Turn the Dial to increase or decrease the value for the assigned Parameter. After 3 seconds, the CODA Monitor beeps again and the command text returns to black.
-
Page 22: Alarms
Alarms Alarms alert you to certain conditions that might require attention while the CODA Monitor is running. There are three levels of alarms: Banner Sound (If On) Configurable Based On Level Warning Parameters or other Yellow Short, 1-beep pattern operating conditions Serious Parameters or other Longer 3-beep pattern... - Page 23 To clear a sounding alarm: A triggered alarm produces a colored banner at the bottom of the screen describing the cause of the alarm. The banner color corresponds to the severity of the alarm. To silence the alarm, touch: 1) the bottom half of the Run Screen. 2) “Stop Alarm”.
-
Page 24: Data Management
Data Management For PC Connections Kent Scientific devices can collect and monitor data using a serial over-USB connection. The data can be uploaded to data acquisition and management programs as ADI’s LabChart® or Kent Scientific’s CODA Software. If you do not have compatible software, please contact Kent Scientific. -
Page 25: History
The History feature stores the most recent 1000 records from your runs. You can send this data to a PC through the USB port at a later time. CODA Monitor can store data for up to 10 Parameters simultaneously at user-selected time intervals. You can view the data on screen or export the data to a computer after your study is complete. - Page 26 Changing these settings permanently deletes any previously saved data. 3. Touch “Enable” and choose “Enabled”. To save data to History: 1. Touch: 1) the upper half of the Run Screen for the Touch Screen Menu. 2) “General setup”. 3) “Data Mgmt”. 4) “History”.
-
Page 27: Analog Output
The Analog Output feature sends an analog signal corresponding to a single Parameter to external equipment via a remote cable. Please contact Kent Scientific for a remote cable if you would like to use this feature. To configure Analog Output 1. -
Page 28: Coda Pc Software
CODA PC Software The optional CODA PC software allows you to set up, run, and monitor blood pressure from a desktop or laptop computer. System Requirements Operating System: Windows® 7, 64 bit Windows® 8, 64 bit Windows® 10, 64 bit Processor: 2.0 GHz or higher RAM:... -
Page 29: Use Coda Software
Using the CODA Software 1. Open the CODA Software and select the CODA device. o When you open the CODA Software, the Device Manager appears. Click Use All Displayed Devices to proceed using the detected CODA. 2. Create or add to your list of Users, if necessary. o You must create a database of Users, Animals, and Animal Groups for your experiments. -
Page 30: General Information
This product is not designed, intended, or authorized for use in human applications. Product Warranty The CODA Monitor has a one (1) year warranty including all parts and labor charges. This warranty does not cover damage by any cause including, but not limited to, any... -
Page 31: Specifications
Satisfaction Guarantee Should you experience difficulty with the CODA Monitor, our Technical Support Group will assist you in trouble-shooting and determining if the product needs to be returned to our facility. We will issue you a Return Manufacturer Authorization (RMA) number before the product is shipped back for repair. - Page 32 Mouse 0.077” and Rat 0.140” Time constant in air 15.0sec Dissipation constant 0.75 m/W (°C) CODA Monitor and RightTemp are registered trademarks of Kent Scientific Corporation. Windows is a registered trademark of Microsoft Corporation. LabChart is a registered trademark of ADInstruments Pty Ltd.
-
Page 33: Index
Index ADI ..........20 chart2 stopped ......3 fail ............11 alarms .........3, 18 charts ........... 3, 4 fixed alarms ........18 analog output ......23 coda software ....20, 24, 25 flow control ......... 20 anesthetic ........8 com port settings ....20, 23 full reset ..........17 anesthetized ......8, 14 config ........ - Page 34 maximum pad temperature ... 14 presets ..........17 settings .... 2, 5, 13, 14, 15, 16, 17, 18, 20, 22, 23, 24 measurement ......5, 9 probe......... 13, 15 shelf life ..........12 menu screen ........3 probes ........13, 14 silence ........3, 19 menu screens .........
- Page 35 upper half ....2, 4, 5, 16, 17, 18, 21, 22, 23, 24 usb ........20, 21, 24 values ......... 3, 17 voltage output ......23 vpr port ........1, 5 vpr ports ......... 9 vpr sensor ......... 2, 8 warming pad ....6, 13, 14, 15 warning ..........18 warranty ........26 yellow ..........18...
- Page 36 1116 Litchfield Street Torrington, Connecticut 06790 Local: 860-626-1172 Toll-Free: 888-572-8887...
Need help?
Do you have a question about the CODA Monitor and is the answer not in the manual?
Questions and answers