Table of Contents
Advertisement
Advertisement
Table of Contents

Related Manuals for wiking Mini 2


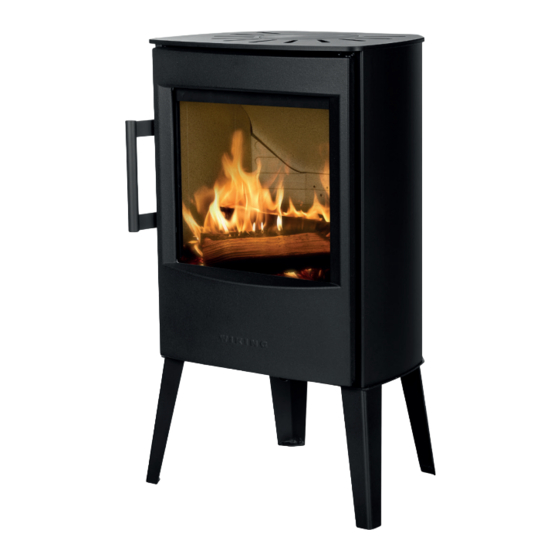
Summary of Contents for wiking Mini 2
- Page 1 WIKING Mini 2 Installation- and User’s Manual 01.11.2020 / 53-077-2...
-
Page 2: Table Of Contents
Contents Drawings ......................3-6 Installation ......................8 Firing manual - wood ................... 13 Firing in general ....................16 Maintenance ......................17 Declaration of Performance ................19 Product informaiton EcoDesign ................20 Trouble Shooting ....................22 Guarantee Certificate ..................24... -
Page 3: Drawings
Page 3 of 24 pages... - Page 4 Page 4 of 24 pages...
- Page 5 Page 5 of 24 pages...
- Page 6 Page 6 of 24 pages...
- Page 7 Page 7 of 24 pages...
-
Page 8: Installation
Congratulations on your new WIKING woodburning stove. We are pleased that you have cho- sen a WIKING woodburning stove and confident that it will give you much pleasure. To ensure optimum operation and safety, we recommend that the installation should be carried out by an authorised WIKING retailer or a fitter recommended by the retailer. - Page 9 European, national and local regulations must be observed in terms of the size and thickness of a non-combustible floor covering the floor in front of the combustion chamber opening. Ask your WIKING retailer for assistance. The combustion chamber opening is 35.0 cm wide. Distance to combustible materials Min.
- Page 10 T400 and be CE marked. Furthermore, it must have obtained the classification of G in soot fire testing. The required distance to combustible material must be complied with in ac- cordance with the brand label. Ask your WIKING retailer for further information. Changing the Smoke Outlet from Top Outlet to Back Outlet Proceed as follows to change the smoke outlet from top outlet to rear outlet: 1.
- Page 11 Vertical cross-section of the stoves (drawing A) Steel smoke deflector. Vermiculite smoke deflector. Vermiculite rear plate. Vermiculite corner plate. Vermiculite side plate. Bottom plate Protection during transportation Fittings Please note: The combustion chamber is covered with plates made of vermiculite, which is a heat-insulating material.
- Page 12 If the stove has not been used for a longer period, it is important to check that the chimney pipe is not blocked. t is possible to connect several devices to the same chimney. However, it is important to first check the applicable rules.
-
Page 13: Firing Manual - Wood
Firing manual - wood Your first heating session The lacquer will be fully hardened after the stove has been used, and the door and the ashpan should be opened very carefully as there will otherwise be a risk that the gaskets will stick to the lacquer. - Page 14 Important! The ash pan must not be opened during the lighting stage and must always be kept closed when the stove is lit or the WIKING Automatic™ might be damaged. Only open ®...
- Page 15 “initiator”, which is not the purpose of the air. Close the door again and fully open the air supply by moving the air control lever to the extreme left.When the wood has caught fire properly, the air supply can be gradually reduced by moving the air control lever to the right until uniform, steady combustion is achieved.
-
Page 16: Firing In General
Firing in general Rapid or fierce heat Rapid or fierce heat is obtained by burning many small pieces of wood. Maximum amounts of fuel: The maximum allowed amount of fuel per hour is: Wood: 2,4 kg If these limits are exceeded, the stove will no longer be covered by the factory guarantee, and it may also become damaged due to excessive heat, the glass may turn white, for example.. -
Page 17: Maintenance
All service checks must be performed by an authorised fitter. Use only original spare parts. Inside cleaning Before chimney sweeping can be performed, the air control lever must be set to its minimum position to prevent soot and ash from entering the WIKING Automatic™. Unless the safety ®... - Page 18 Automatic™ (drawing D1-D3) ® The spring in the WIKING Automatic™ should be controlled at least once every second year. Lift the top plate off the stove. Remove the two screws (1) in the top of both side plates. Re- move both side plates. Remove the rear plate of the stove (2). On a cold stove, the starting point of the feeler is controlled.
-
Page 19: Declaration Of Performance
Declaration of Performance The DoP can be downloaded from our website via the following links: www.wiking.com/dop/mini Page 19 of 24 pages... -
Page 20: Product Informaiton Ecodesign
Product information on solid fuel local space heaters according to Comission regulation (EU) 2015/1185 WIKING Mini 2 Model Direct heat output [kW] Indirect heating functionality Indirect heat output [kW] Two ore more manual stages, no temperature control Type of heat output/room temperature control... - Page 21 Page 21 of 24 pages...
-
Page 22: Trouble Shooting
Trouble Shooting If you experience that your wood-burning stove is not functioning optimally, consult this table to find some usual problems that may arise and how to solve them. If you cannot solve them and/ or other problems occur, pleas contact your maintenance man or wood-burning stove dealer. Problem Possible Cause Try the Following... - Page 23 Page 23 of 24 pages...
-
Page 24: Guarantee Certificate
It is important that you record your retailers name, address and telephone number on this section, as he is responsible for any ajustment which may be required during the warranty period. Model type Date of purchase Retailer Address Tel. HWAM A/S DK-8362 HØRNING www.wiking.com...
Need help?
Do you have a question about the Mini 2 and is the answer not in the manual?
Questions and answers