Advertisement
Quick Links
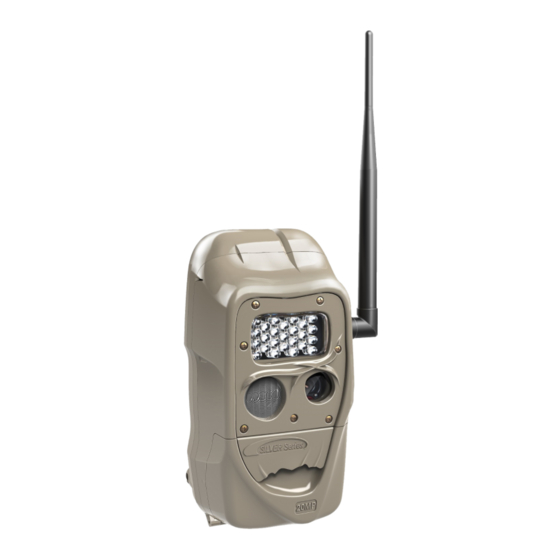
CuddeLink
FCC Notice
Changes or modifications not expressly approved by the party responsible for compliance could
void the user's authority to operate the equipment. This device complies with Part 15 of the
FCC Rules. Operation is subject to the following two conditions: (1) this device may not cause
harmful interference, and (2) this device must accept any interference received, including
interference that may cause undesired operation. This equipment has been tested and found to
comply with the limits for a Class B digital device, pursuant to Part 15 of the FCC Rules. These
limits are designed to provide reasonable protection against harmful interference in a
residential installation. This equipment generates, uses and can radiate radio frequency energy
and, if not installed and used in accordance with the instructions, may cause harmful
interference to radio communications. However, there is no guarantee that interference will
not occur in a particular installation. If this equipment does cause harmful interference to radio
or television reception, which can be determined by turning the equipment off and on, the user
is encouraged to try to correct the interference by one or more of the following measures:
Reorient or relocate the receiving antenna.
Increase the separation between the equipment and receiver.
Connect the equipment into an outlet on a circuit different from that to which the receiver
is connected.
Consult the dealer or an experienced radio/TV technician for help.
Quick Start Guide
This guide assumes you know how to navigate the camera's user interface. All the settings
explained in this section are in the CL MENU item. To access the CL MENU press MODE until
COMMANDS is selected, then press MORE until CL MENU appears, then press UP to enter. Use
UP and DOWN to make selections. Press MORE to advance to the next item.
1. One CuddeLink equipped camera must be the HOME camera. HOME is the camera that
collects images from the REMOTE cameras.
2. Set up HOME camera:
Version 2.20.2017
CuddeLink Manual
Page 1 of 24
Advertisement

Related Manuals for Cuddeback CuddeLink


Summary of Contents for Cuddeback CuddeLink
- Page 1 COMMANDS is selected, then press MORE until CL MENU appears, then press UP to enter. Use UP and DOWN to make selections. Press MORE to advance to the next item. 1. One CuddeLink equipped camera must be the HOME camera. HOME is the camera that collects images from the REMOTE cameras.
- Page 2 If the strength is displayed you can deploy the camera. IMPORTANT – CuddeLink transmission distance varies with terrain and distance and can be from 2/10 of a mile to over a mile (1/4 mile typical in a forest).
- Page 3 The images taken with the HOME camera are in the 100CUDDY folder. Using CuddeLink is this easy. However, do yourself a favor and read this entire manual as there is more you should know to get the best from CuddeLink.
- Page 4 Remote refers to cameras that transmit images to the HOME node. Repeater refers to a device that acts as a relay station on a CuddeLink network. The REPEATER does not take pictures, it only transmits images from one node to the next node.
- Page 5 Refer to the sample deployment scenarios below. MORE THAN 16. A single CuddeLink network is limited to 16 cameras. If you require more than 16 cameras you can deploy additional networks. Each network must be assigned a unique CL CHANNEL.
- Page 6 HOME node and place them in Microsoft’s OneDrive folder to allow you to access the images anywhere with a smart phone, tablet or PC. Note – this feature is only available when CuddeLink Home Plus is attached to a Windows PC, however images can be viewed on any Internet capable device.
- Page 7 REPEATER. Press UP or DOWN to select, then press MORE to continue programming additional CuddeLink settings. OFF – use this if you do not want this camera to be part of a CuddeLink network. The CuddeLink radio will be disabled.
- Page 8 Background. The CuddeLink network, like all wireless networks, has limits to how much data can be transmitted in a specific amount of time. Think of the CuddeLink network as highway where only so much traffic can pass in a given amount of time, and the more traffic on the highway the slower it moves and the longer it takes to reach a destination.
- Page 9 CuddeLink Manual Step 5. Network Control - Program CL DELAY (Remote only) CL DELAY is somewhat like Camera Delay, except it controls how often images are transmitted. Let’s use an example to demonstrate how this feature works: <Insert diagram> Let’s assume you set a CAMERA DELAY of 5 seconds and a CL DELAY of 30 seconds.
- Page 10 CuddeLink Manual Experiment. We recommend you monitor the number of images in the camera’s queue and how quickly the images are getting home then adjust CL DELAY as required. Step 6. Network Control - Program CL COUNT (Remote only) CL COUNT allows you to set a maximum number of images that the camera can place in its transmit queue.
- Page 11 CuddeLink Manual It is good practice to enable CL LEVEL while next to a deployed camera, and then move away from that camera with the CL LEVEL displayed. This allows you to monitor the level as you move farther from the deployed camera.
- Page 12 6? Where was this image taken? To make camera and image management easy CuddeLink has 2 features to simplify image management. CL LOC. You probably do not want images from 15 cameras saved in one folder on your SD card.
- Page 13 Step 1 – Deploy the Home Camera 1. Assign one CuddeLink camera to be HOME by setting the CL MODE to HOME. 2. We recommend you place the included HOME sticker to the inside of the camera’s UI door.
- Page 14 CuddeLink Manual suspect interference change the CL Channel. Remember the channel number as all cameras must be assigned the same channel number. in your network 5. Set the other camera parameters as required. Selected EZ or ADV mode and set the delays, time lapse, etc.
- Page 15 ARM the camera before you deploy additional cameras. Continue deploying additional remote cameras as required. Step 4 – Verifying the CuddeLink Network After you have deployed all your cameras you should verify that they all can talk to the HOME node.
- Page 16 See section SD CARD below for how images are saved on the without having to visit them. CuddeLink cameras. Each REMOTE camera will periodically send a status image to the HOME camera. This status report can be displayed as a conventional image and shows basic stats about the REMOTE camera.
- Page 17 This completes the setup guidance section of this manual. As stated above, we recommend you go back to page 1 and read this section 1 more time. Doing so may save you considerable time and frustration when you first deploy your CuddeLink cameras. Understanding Transmission Range The CL LEVEL command is a signal strength meter you can use to verify radio reception.
- Page 18 100CUDDY – the home node will save the images it records in this folder 400CUDDY – this is the folder where CuddeLink remote images are saved. Within this folder are subfolders for each remote camera. LOC__000 – this is where images will reside for REMOTES that do not have a CL LOC set.
- Page 19 1. CuddeLink images are downsized to 50KB to maximize network performance. Trophy Room will display the images as if they were full size. 2. CuddeLink images saved on the SD card are sorted by camera ID, viewing and manually copying the images requires special care. Trophy Room handles this for you.
-
Page 20: Remote Access
CuddeLink and Cuddeback cameras. Plus, as new documents are released they will be automatically downloaded to Trophy Room. REMOTE ACCESS A great benefit of CuddeLink is that it allows the images to be accessed via the Internet. A few things are required to do this: 1. CuddeLink HOME PLUS product 2. - Page 21 PC user’s OneDrive folder. A special folder called CuddeLink was created to store the images. The best way to view these images is with Trophy Room. When the CuddeLink mode is enabled Trophy Room will display the folders in the Navigator.
- Page 22 Trophy Room Cuddeback folder. We also do not allow the full set of Trophy Room tools to operate on the CuddeLink images, as these tools can only be used on the full size images. However, if you want to use the full Trophy Room tools you can copy the CuddeLink folders to the Trophy Room Cuddeback folder.
- Page 23 Deploy REPEATERS on your property that establish a highway-type network that your CuddeLink cameras connect to. Doing so will allow you to move cameras at will without having to worry about connection. Use a GPS and topographical maps to help design a deployment strategy.
- Page 24 CuddeLink Manual Images and Video Files on the SD Card I__12345.jpg – Image when burst mode is off I_12345a.jpg – Image when burst mode is on, where a is a,b,c,d,e to represent the image in the burst sequence V__12345.m4v – Video file L__12345.jpg – Time‐Lapse image T__12345.jpg – Thumbnail image Version 2.20.2017 Page 24 of 24...
Need help?
Do you have a question about the CuddeLink and is the answer not in the manual?
Questions and answers