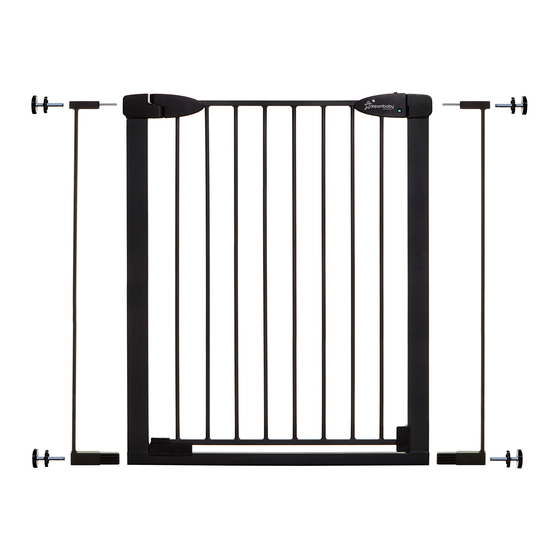
Table of Contents
Advertisement
Quick Links
IMPORTANT! READ AND FOLLOW THESE INSTRUCTIONS CAREFULLY
Read the entire Instruction before assembling and installing this product.
If you sell or give away this product, make sure you give this Instruction to the new owner.
INSTRUCTIONS:
Boston
AND KEEP FOR FUTURE REFERENCE
EN1930:2011
Conforms to:
1
F2062
F2027
F2028
F2023
F2044
F2026
Item numbers may also end in BB.
.
L2062.23.26.27.28..48.54.44.45.78.79_I.M_p1-p12_24.07.2020_X.03
F2045
F2078
F2048
F2079
F2054
PATENTED
Advertisement
Table of Contents

Summary of Contents for dreambaby Boston
- Page 1 F2054 Item numbers may also end in BB. PATENTED INSTRUCTIONS: Boston IMPORTANT! READ AND FOLLOW THESE INSTRUCTIONS CAREFULLY AND KEEP FOR FUTURE REFERENCE Read the entire Instruction before assembling and installing this product. If you sell or give away this product, make sure you give this Instruction to the new owner.
- Page 2 WARNING WARNING - Read the instructions before installation as incorrect installation can be dangerous. WARNING - Do not use the safety barrier if any components are damaged or missing. WARNING - The safety barrier must not be fitted across windows. WARNING - Never use without wall cups.
-
Page 3: Parts List
PARTS LIST Wood Screws Wood use only TOOLS REQUIRED Timber = 2mm (5/64in) drill bit Brick/masonry = 5.5mm (7/32in) drill bit One-Way Stopper NOTICE TO CUSTOMERS One-Way Stopper Screw (installed) THE GAP IN THIS GATE IS NOT A FAULT. Magnet The gap will disappear when the gate is correctly installed. -
Page 4: Installation
INSTALLATION Measure the width of the opening of where you intend to install the gate . For wider openings select the appropriate Gate Extension(s), sold separately. Ensure the surface you mount the gate is structurally sound such as solid timber, brick or masonry. For plaster / gyprock surface, locate the timber beam or stud behind and mount in this location (mounting on plaster / gyprock alone is not strong enough and not safe). - Page 5 For use on stairs. 15cm Landing Floor If the safety barrier is used at the If the safety barrier is used bottom of the stairs, it should be at the top of stairs, it should not positioned at the front of the be positioned below the top level.
- Page 6 ADDING EXTENSION FRAMES To use with Gate Extensions (sold separately). • Insert Extension pins (K) into the holes on the outside of the Gate Frame. Next, slip Extension Frames over the Pins. Extension Gate Finally, slide in the Tension Knobs and Bolts with Rubber Pads (E) . EXTENSION PIN 7cm (2.75in) 14cm (5.5in)
- Page 7 Insert the Bolts with Rubber Pads and Tension Knobs into the Gate Frame. Place the gate in the opening so that the bottom of the Gate Frame is completely flat on the floor, and it is perpendicular to the opening and the floor. Side view of gate Top view of gate Floor...
- Page 8 Tighten both of the lower Tension Knobs (E) by turning them at the same time. NOTE: Make sure the bottom of the gate frame remains completely flat on the floor. Next, tighten both of the upper Tension Knobs (E) by turning them at the same time. When correctly tightened, the distances between Tension Knobs and Rubber Pads should be equal.
- Page 9 7. Loosen the Tension Knobs and remove gate. Line up Wall cups with marks on wall. Fasten the Wall Cups to the wall with double sided tape and screws. NOTE: Ensure that they are aligned vertically, so that the Wall Cups at the top are directly above the ones at the bottom. WARNING - Never use without wall cups.
- Page 10 9. Reinstall gate inserting bolts with rubber pads into Wall Cups (C). 10 Tighten both of the lower Tension Knobs by turning them at the same time. NOTE: make sure that the bottom of the Gate Frame remains completely flat on the floor. Ensure gate is securely fastened at both top and bottom. 1.5mm (1/16") Keep this gap 15-35mm...
- Page 11 ONE WAY STOPPER It is important to choose which direction you want the gate to swing prior to installation. When using gate at top of stairs, gate must open away from stairs. 4.6mm Keep out of reach of children...
-
Page 12: Operation
• To clean, wipe surface with a damp cloth or sponge using mild detergent and warm water. Never clean with abrasive, ammonia based bleach based or spirit type cleaners. Tee-Zed acknowledges that its customers may be entitled to statutory Dreambaby ® products by consumer guarantees and does not seek to exclude or limit them.


Need help?
Do you have a question about the Boston and is the answer not in the manual?
Questions and answers