
Related Manuals for NEC AT-55M


Summary of Contents for NEC AT-55M
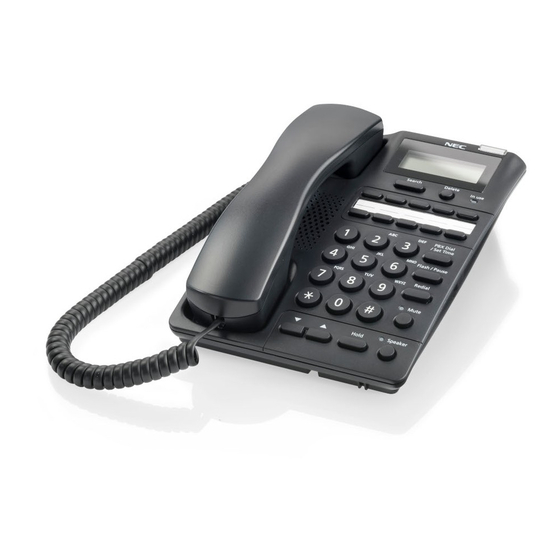
- Page 1 Business Telephone Caller ID Hands-Free AT-55M USER GUIDE GVT-053678-001 Issue 1.1 January, 2019...
- Page 2 IMPORTANT NOTICE IMPORTANT NOTICE Liability Disclaimer NEC Corporation reserves the right to change the specifications, functions, or features, at any time, without notice. NEC Corporation has prepared this document for use by its employees and customers. The information contained herein is the property of NEC Corporation and shall not be reproduced without prior written approval from NEC Corporation.
- Page 3 IMPORTANT NOTICE SAFETY INSTRUCTIONS When using this telephone, basic safety precautions should always be taken to reduce the risk of fire, electric shock, and injury to persons, by doing the following: 1. Read and understand all instructions. 2. Follow all warnings and instructions marked on the product. 3.
-
Page 4: Table Of Contents
FACE LAYOUT, KEY AND PARTS TABLE OF CONTENTS IMPORTANT NOTICE ........................ i FACE LAYOUT, KEY AND PARTS ..................1 INSTALLATION ......................... 3 Installing the Batteries ........................3 Connecting the Telephone Network ....................4 Wall Mounting ..........................5 INITIAL SETUP .......................... 7 Setting the Calendar........................ -
Page 5: Face Layout, Key And Parts
FACE LAYOUT, KEY AND PARTS FACE LAYOUT, KEY AND PARTS The following figures show the locations of key and parts of telephone. (17) (20) (18) (21) (19) (22) - Page 6 FACE LAYOUT, KEY AND PARTS Name Function Call Indicator/ Flashes to indicate an incoming call arrival. Also, indicate when Message Waiting Lamp messages have been received and notified by PBX system control. LCD Display Shows calendar and various information. Search Key Select IN /OUT history and scroll the call record.
-
Page 7: Installation
INSTALLATION INSTALLATION Installing the Batteries Install three high quality AA size batteries with following steps. (Alkaline batteries (LR6) are recommended.) Loosen the screw on the battery compartment cover. Open the battery compartment cover. Set Power Supply switch to “BATT”. Insert three batteries. Close the compartment cover and secure the screw. -
Page 8: Connecting The Telephone Network
INSTALLATION Connecting the Telephone Network Connect the telephone with telephone network with following steps. Connect the one end of the line cord to the LINE socket on the rear of telephone and the other end to your telephone network outlet. Lay the handset cord in the groove on the bottom of the telephone. -
Page 9: Wall Mounting
INSTALLATION Wall Mounting This telephone can be mounted on a wall with two screws. The screws shall be supplied by customer. Mark off the correct positions for the screws, 83.5mm apart vertically before drilling the wall. Install the screws into the wall. Mount the telephone on the wall so that the screw heads insert into the slots on the underside of the telephone. - Page 10 INSTALLATION If you wish to temporarily place the handset down during a conversation, hook the handset onto the top of the hanger hook as shown below.
-
Page 11: Initial Setup
INITIAL SETUP INITIAL SETUP Setting the Calendar This telephone is equipped with a calendar showing Year/Month/Day/Hour/Minute. The calendar is shown on the display while the phone is idle. Set the calendar with the following steps. NOTE When the telephone receives an incoming call the time and date will automatically be overwritten with the system time and date. -
Page 12: Selecting The Dialing Mode
INITIAL SETUP Selecting the Dialing Mode Set the Dialing Mode Switch on the rear of the telephone to either DP (Pulse) or MF (Tone) to select the signaling type. The signaling type depends on the requirements of the PBX to which the telephone is connected. -
Page 13: Basic Operation
BASIC OPERATION BASIC OPERATION Making a Call using the Handset Pick up the handset and wait for dial tone. Dial the desired number. Replace the handset when you finish the call. Or, to preview the dialed number: Dial the desired number with handset on-hook. You may press the DELETE key to erase dialed digits one at a time. -
Page 14: Receiving A Call Using Speakerphone
BASIC OPERATION Receiving a Call using Speakerphone Press the SPEAKER key when the phone rings. Converse with your caller. To end the call, press the SPEAKER key. NOTE Adjust the speaker volume if needed by pressing the VOLUME key. Switching between Handset and Speakerphone You can switch between Speakerphone and Handset while dialing a number, waiting for answer, or at any time during a call. -
Page 15: Features
FEATURES FEATURES FLASH Key The FLASH key works the same as the hook switch of the phone. When the FLASH key is pressed during a conversation, it may terminate the call or place the call on hold and you will hear dial tone allowing you to dial the next phone number. -
Page 16: Microphone Mute
FEATURES Microphone Mute The MUTE key allows you to switch off the handset and Speakerphone microphone temporarily. During this state, you can consult with another person and your voice will not be sent to the called party. To mute the call so that the called party cannot hear you: Press the MUTE key. -
Page 17: One-Touch Dialing
FEATURES Placing a Call on Hold: With a conversation in progress on the phone. Press the HOLD key. If using the handset, you may put the handset back in the cradle. To converse with the caller again, pick up the handset (or press the SPEAKER key). One-Touch Dialing This telephone is equipped with 10 one-touch dial memory keys for programming your most frequently dialed telephone numbers. -
Page 18: Caller Id (Cid)
FEATURES Caller ID (CID) This telephone will display Caller ID (CID) information received with incoming calls. The last 90 Caller ID numbers received are automatically stored in CID memory (up to 21 digits each). The numbers stored in CID memory may be reviewed, deleted, or dialed back if desired. When a new call is received with CID and goes unanswered, the NEW icon will flash. -
Page 19: Troubleshooting
TROUBLESHOOTING TROUBLESHOOTING Troubleshooting Guide Problem Solution Check that the hook switch is not depressed. Check that the line cord is connected. Make sure the SPEAKER key LED is lit (if using speakerphone). No dial tone /Will not dial out ... -
Page 20: Specifications
SPECIFICATIONS SPECIFICATIONS Item Specifications Exterior Dimensions (W × D × H) 148×219×77mm / 5.83×8.62×3.03 inch Weight Approx. 0.64 kg /1.40 lbs Operating Conditions 0~40 ℃ / 32~104 °F Operating Temperature Relative Humidity 10~90% RH(Non-condensing) Functions Caller ID receiver FSK (type I) Caller ID information CID number with date and time stamp Caller ID review, delete, dial back... -
Page 21: Quick Reference
QUICK REFERENCE QUICK REFERENCE Feature Access Code Operation: Dial Access Code + Option Code + # Function Dial Access Code Option Code 1: Low Tone (default) Ring Tone 2: Mid Tone 3: High Tone 0: Tone 1 (default) Hold Tone 1: Tone 2 PBX Trunk Access Code (default = not assigned) -
Page 22: Operations
QUICK REFERENCE Stored Data Function Contents of Data Hold Tone 0: Tone 1 (default) 1: Tone 2 PBX Trunk Access Code 0~9 (default = not assigned) Hook Flash Timing 00: 95ms 01: 100ms 02: 120ms 03: 180ms 04: 270ms 05: 300ms 06: 600ms (default) CID Receiving Mode NOTE... - Page 23 Caller ID Hands-free Business Telephone AT-55M USER GUIDE GVT-053678-001 December, 2018 Issue 1.0 January, 2019 Issue 1.1 NEC Corporation...
Need help?
Do you have a question about the AT-55M and is the answer not in the manual?
Questions and answers