
Related Manuals for Lifescan OneTouch Select Plus Simple


Summary of Contents for Lifescan OneTouch Select Plus Simple
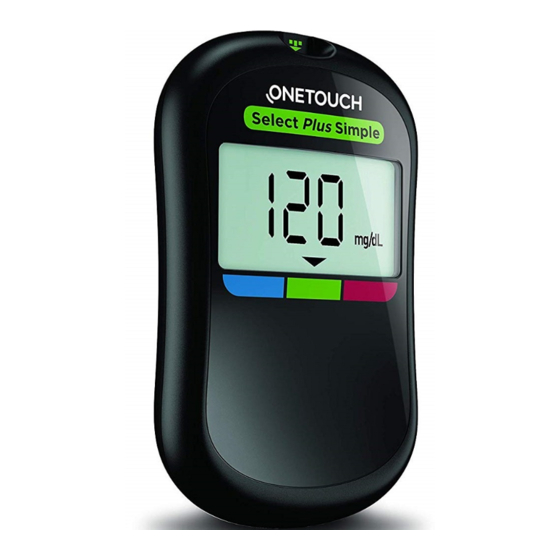
- Page 1 Blood Glucose Monitoring System Owner's Guide Instructions for Use Simply insert a test strip to turn the meter on and begin testing.
- Page 2 LifeScan self-test blood glucose monitoring devices conform to the following EU Directives: IVDD (98/79/EC): Blood Glucose Meter, Test Strips, and Control Solution MDD (93/42/EEC): Lancets Lancing Device LifeScan Europe GmbH Kindly contact Customer Gubelstrasse 34 Care at 1800 225544 or visit www.OneTouch.in.
-
Page 3: Table Of Contents
Table of contents Getting to know your system ......1 Blood glucose testing........6 Control solution testing ........22 Caring for your system ........27 Battery ............... 29 Troubleshooting ..........31 Detailed information about your system ..37... - Page 4 Meter symbols and icons Low battery Battery empty History mode (last result) Apply sample Range Indicator Arrow Other symbols and icons Cautions and Warnings: Refer to the Owner's Guide and inserts that came with your system for safety-related information. Direct current Consult Instructions for Use Manufacturer Lot Number...
- Page 5 IMPORTANT SAFETY INSTRUCTIONS: • This meter and lancing device are for single patient use only. Do Not share them with anyone else, including family members! Do Not use on multiple patients! • After use and exposure to blood, all parts of this kit are considered biohazardous.
- Page 6 The OneTouch Select Plus Simple Blood Glucose Monitoring ® System is not to be used for the diagnosis of or screening of diabetes or for neonatal use. The OneTouch Select Plus Simple Blood Glucose Monitoring ® System is not for use on critically ill patients, patients in shock, dehydrated patients or hyperosmolar patients.
-
Page 7: Getting To Know Your System
1 Getting to know your system Your OneTouch Select Plus Simple Blood ® Glucose Monitoring System Included with your kit: OneTouch Select Plus Simple Meter (CR2032 ® lithium coin cell battery included) Lancing device Lancets GET TING TO KNOW YOUR SYSTEM... - Page 8 NOTE: If any item is missing or defective in your kit, contact Customer Care. Contact information for Customer Care is listed at the end of this Owner's Guide. NOTE: If another type of lancing device was included, see the separate instructions for that lancing device. Available separately: Items listed below are required, but may not be included in your kit...
- Page 9 Getting to know your OneTouch Select Plus Simple Blood Glucose Monitoring System ® Meter Test strip port Colour Range Indicator Bars Battery icon Range Indicator Arrow Last result icon Display mg/dL is the pre-set Serial number unit of measure Battery cover GET TING TO KNOW YOUR SYSTEM...
- Page 10 Getting to know your OneTouch Select Plus ® Test Strip Test strip Edge to apply sample Confirmation window Contact bars Insert into test strip port GET TING TO KNOW YOUR SYSTEM...
- Page 11 The Range Indicator feature The OneTouch Select Plus Simple Meter automatically lets ® you know if your glucose result is below, above or within the meter's range limits. It does this by displaying your current glucose result with a Range Indicator Arrow pointing to a corresponding Colour Range Indicator Bar below the meter display.
-
Page 12: Blood Glucose Testing
2 Blood glucose testing Test your blood glucose Preparing for a test Have these things ready when you test: OneTouch Select Plus Simple Meter ® OneTouch Select Plus Test Strips ® Lancing device Sterile lancets NOTE: • Use only OneTouch Select ® Plus Test Strips. • Make sure your meter and test strips are about the same temperature before you test. - Page 13 NOTE: Comparing your blood glucose test results taken with this meter to your results taken from a different meter is not recommended. Results may differ between meters and are not a useful measure of whether your meter is working properly. To check your meter accuracy, you should periodically compare your meter results to those obtained from a lab.
- Page 14 Getting to know your OneTouch Delica Plus ® ® Lancing Device Release button Slider control Depth indicator Depth wheel Lancing device cap Protective cover BLOOD GLUCOSE TESTING...
- Page 15 NOTE: • The OneTouch ® Delica ® Plus Lancing Device uses OneTouch ® Delica ® or OneTouch ® Delica ® Plus Lancets. • If another type of lancing device was included, see the separate instructions for that lancing device. • The OneTouch Select Plus Simple Blood Glucose ®...
- Page 16 Preparing your lancing device 1. Remove the lancing device cap Remove the cap by rotating it and then pulling it straight off the device. 2. Insert a sterile lancet into the lancing device Align the lancet as shown here, so that the lancet fits into the lancet holder.
- Page 17 3. Replace the lancing device cap Place the cap back onto the device; turn the cap or push the cap straight on to secure it. Ensure the cap is aligned as shown in the image. 4. Adjust the depth setting The device has 13 puncture depth settings (each dot shown between numbers 1 to 7 on the Depth Wheel...
- Page 18 Prepare the meter and view the last result 1. Insert a test strip to turn the meter on Insert a test strip into the test strip port with the contact bars facing you. Contact bars Test strip port A start-up screen will appear for a few seconds.
- Page 19 Sampling blood from the fingertip Choose a different puncture site each time you test. Repeated punctures in the same spot may cause soreness and calluses. Before testing, wash your hands and the sample site with warm, soapy water. Rinse and dry completely. Contaminants on the skin may affect results.
- Page 20 Applying the sample Line up the test strip with the blood drop. Channel NOTE: Do Not apply blood on the top of the test strip. Gently touch the channel to the edge of the blood drop. BLOOD GLUCOSE TESTING...
- Page 21 Wait for the confirmation window to fill completely. The blood drop will be drawn into the channel and the confirmation window should fill completely. Confirmation window full Full Not full CAUTION: You may get an error message or an inaccurate result if the blood sample does not fill the confirmation window completely.
- Page 22 Viewing your result Your result appears on the display, along with the unit of measure. After your blood glucose result appears, the meter will display a Range Indicator Arrow below your glucose result to indicate if your result is below, above or within the meter's range limits (see “The Range Indicator feature”...
- Page 23 Below range In range Above range Above range Colour Bar: Blue Green Range Indicator Arrow: Blinks Does not blink Does not blink Blinks Screen: Blood glucose range: 20 mg/dL to 69 mg/dL 70 mg/dL to 179 mg/dL 180 mg/dL to 239 mg/dL 240 mg/dL to 600 mg/dL CAUTION: WARNING: Confirm that the unit of measure mg/dL is displayed.
- Page 24 Interpreting unexpected results Refer to the following cautions when your results are higher or lower than what you expect. CAUTION: Low results If your result is below 70 mg/dL or is shown as LO (meaning the result is less than 20 mg/dL), it may mean hypoglycaemia (low blood glucose).
- Page 25 CAUTION: Repeated unexpected results • If you continue to get unexpected results, check your system with control solution. • If you are experiencing symptoms that are not consistent with your results and you have followed all instructions in this Owner's Guide, call your healthcare professional. Never ignore symptoms or make significant changes to your diabetes management programme without speaking to your healthcare professional.
- Page 26 Removing the used lancet NOTE: This lancing device has an ejection feature, so you do not have to pull out the used lancet. 1. Remove the lancing device cap Remove the cap by rotating it and then pulling it straight off the device.
- Page 27 4. Replace the lancing device cap Place the cap back onto the device; turn the cap or push the cap straight in to secure it. Ensure the cap is aligned as shown in the image. It is important to use a new lancet each time you obtain a blood sample.
-
Page 28: Control Solution Testing
3 Control solution testing Control solution testing precautions OneTouch Select ® Plus Control Solution is used to check that the meter and test strips are working together properly and that the test is performing correctly. (Control solution is available separately.) NOTE: • When you first open a new vial of control solution, record the discard date on the vial label. - Page 29 Preparing your meter for a control solution test 1. Insert a test strip to turn the meter on Insert the test strip with the test strip port and contact bars facing you. Contact bars Test strip port 2. Wait for the flashing blood drop icon ( ) to appear on the display Preparing the control solution...
- Page 30 4. Wipe both the tip of the control solution vial and the top of the cap with a clean, damp tissue or cloth 5. Squeeze a drop into the small well on the top of the cap or onto another clean, non-absorbent surface Applying the control solution 1.
- Page 31 Viewing your control solution result After the control solution is applied, the meter will count down until the test is complete. Your result is displayed along with the unit of measure. Your meter will not display a Range Indicator Arrow with a control solution result.
- Page 32 Causes of out-of-range control solution results Out-of-range results may be due to: • Not following the instructions for performing a control solution test. • Control solution is contaminated, expired, or past its discard date. • Test strip or test strip vial is damaged or past its discard date. • Meter, test strips and/or control solution were not all at the same temperature when the control solution test was performed.
-
Page 33: Caring For Your System
4 Caring for your system Storing your system Store your meter, test strips, control solution and other items in a cool, dry place between 5°C and 30°C. Do Not refrigerate. Keep all items away from direct sunlight and heat. Cleaning and disinfection Cleaning and disinfection are different and both should be performed. - Page 34 1. Holding the meter with the test strip port pointed down, use a soft cloth dampened with water and mild detergent to wipe the outside of the meter Be sure to squeeze out any excess liquid before you wipe the meter. 2.
-
Page 35: Battery
5 Battery Replacing the battery Your OneTouch Select Plus Simple Meter uses one CR2032 ® lithium coin cell battery. IMPORTANT: Use only one CR2032 lithium coin cell battery with your meter. Do Not use rechargeable batteries. The meter will not function if an incorrect battery type is installed. If the meter does not turn on, you may need to replace the battery. - Page 36 2. Insert the new battery Insert one CR2032 lithium coin cell battery on top of the battery ribbon, with the plus (+) side up. 3. Replace battery cover by sliding it upwards onto the meter If the meter does not power on after you have replaced the meter battery, check that the battery is correctly installed.
-
Page 37: Troubleshooting
6 Troubleshooting LO and HI blood glucose messages What it means You may have a very low blood glucose level (severe hypoglycaemia), below 20 mg/dL. What to do This may require immediate treatment. Although this message could be due to a test error, it is safer to treat first and then do another test. - Page 38 Temperature messages What it means The meter is too hot (above 44°C) to perform a test. What to do Move the meter and test strips to a cooler area. Insert a new test strip when the meter and test strips are within the operating range (10-44°C).
- Page 39 Error and other messages What it means There is a problem with the meter. What to do Do Not use the meter. Contact Customer Care. What it means Error message could be caused either by a used test strip or a problem with the meter.
- Page 40 What it means The sample was applied before the meter was ready. What to do Repeat the test with a new test strip. Apply a blood or control solution sample only after the flashing symbol appears on the display. If this message continues to appear, contact Customer Care.
- Page 41 What it means The meter has detected a problem with the test strip. Possible cause is test strip damage. What to do Repeat the test with a new test strip. If the error message appears again, contact Customer Care. What it means Meter battery power is low but there is still enough battery power to perform a test.
- Page 42 What it means There is not enough battery power to perform a test. What to do Replace the battery immediately. What it means No result in memory, such as the first time use of the meter. Your meter was unable to recall the last result.
-
Page 43: Detailed Information About Your System
7 Detailed information about your system Comparing meter results to laboratory results If you wish to check your meter's accuracy, compare it to a lab result. See “Guidelines for obtaining an accurate meter to lab comparison”. Results obtained from the OneTouch Select Plus Simple Meter and laboratory tests are reported in plasma- ®... - Page 44 Guidelines for obtaining an accurate meter to lab comparison Before going to the lab: • Perform a control solution test to make sure your meter is working properly. • Do Not eat for at least 8 hours before you test your blood. • Take your meter and testing supplies with you to the lab.
- Page 45 Technical Specifications Assay method Glucose Oxidase biosensor Automatic shutoff Two minutes after last action Battery ratings 3.0 V d.c. (CR2032 lithium coin cell battery) Battery type One replaceable 3.0 Volt CR2032 lithium coin cell battery Biological source Aspergillus Niger Calibration Plasma-equivalent Memory Last glucose test result only...
- Page 46 System Accuracy Diabetes experts have suggested that glucose meters should agree within 15 mg/dL of a laboratory method when the glucose concentration is lower than 100 mg/dL, and within 15% of a laboratory method when the glucose concentration is 100 mg/dL or higher. Samples from 100 patients were tested using both the OneTouch Select Plus Simple System ®...
- Page 47 User Performance Accuracy A study evaluating glucose values from fingertip capillary blood samples obtained by 160 lay persons showed the following results: 96.6% within ±15 mg/dL of the medical laboratory values at glucose concentrations below 100 mg/dL, and 94.7% within ±15% of the medical laboratory values at glucose concentrations at or above 100 mg/dL.
- Page 48 Precision Within Run Precision (300 Venous Blood Samples Tested per Glucose Level) Data generated using the OneTouch Select Plus Simple Meter. ® Target Mean Glucose Standard Coefficient of Glucose (mg/dL) Deviation Variation (%) (mg/dL) (mg/dL) 25.43 1.50 5.88 40.33 1.56 3.86 63.01 2.11 3.35...
- Page 49 OneTouch Select ® Plus Test Strip. No test strip supplier other than LifeScan is authorised to grant such a licence. The accuracy of results generated with LifeScan meters using test strips manufactured by anyone other than LifeScan has not been evaluated by LifeScan.
Need help?
Do you have a question about the OneTouch Select Plus Simple and is the answer not in the manual?
Questions and answers