Advertisement
Quick Links
Advertisement

Subscribe to Our Youtube Channel
Related Manuals for Guinaz M3780


Summary of Contents for Guinaz M3780
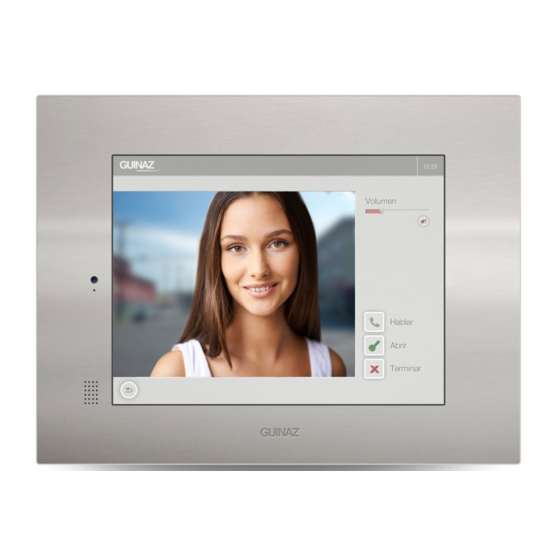
- Page 1 SMARTIVE MONITOR IP SYSTEM REF. M3780 USER MANUAL/INSTALLATION GUIDE...
-
Page 2: Section I - User Manual
Section I - User Manual 1.1 INTRODUCTION The GUINAZ 7" Smartive monitor is an intercommunication device for a video door entry system based on VoIP communication technology included in the GUINAZ S.L. catalogue of IP communication solutions. The VoIP technology allows the multichannel communication of data, audio and video using the TCP/IP communication SIP protocol through a network cable. - Page 3 The main functionalities available to the user in the GUINAZ 7" Smartive monitor are summarised below: Main Functionalities SIP Communications Using the SIP VoIP protocol, the monitor allows synchronised audio and video communications in the same session (SDP) seamlessly and without...
- Page 4 1.4.1 Main Menu Once connected to the power source, the Smartive 7" monitor starts automatically, showing a home screen with the GUINAZ logo After the start process, the Smartive 7" monitor application screen will be launched and it will show the main menu.
- Page 5 The time before the monitor goes into standby can be set in the "general settings" menu described in section 1.4.8. The Smartive 7" main menu screen appears next, showing the main functions: Communication menu Communication menu Camera streaming With street door entry With Smartive access menu system...
- Page 6 1.4.2 Start Communication Menu After selecting the "Start Communication" menu in the main menu, the screen will display its contents as shown below. The user must select the relevant back icon present in the menu to return to the main menu. Select door station Call selected door station...
- Page 7 1.4.3 Intercom Menu Using the intercom menu in the application main menu, the user will access the list of all Smartive 7" interior monitors present in the installation The user must select the relevant back icon present in the menu to return to the main menu Select Smartive Monitor contact Call selected...
- Page 8 1.4.4 Other Cameras Menu After selecting the "Other Cameras" menu in the main menu, the screen will display its contents as shown below. The user must select the relevant back icon present in the menu to return to the main menu Select RTSP video streaming When the user selects one of the RTSP video links configured in the installation, the monitor will show the...
- Page 9 In case of a missed call, the user has the option to return the call by pressing the relevant icon; in this case, a SIP communication will be established as described in section 1.4.2 and 1.4.3 The user may clear the entire saved call log by pressing on the option Clear Log. From then on, the events cleared will no longer be accessible in the system.
- Page 10 In IPBX mode the call will be diverted to an address with the following “bk_”+”selected contact address”. In P2P mode the call will be diverted to an IP address with the second octect value increased by one (i.e. 192.168.1.1 will be diverted to 192.168.2.1) Message recording and replay: If this option is selected then a predefined message will be reproduced at the door station.
- Page 11 If the call is enabled, when pressing the icon in the main menu see section 1.4.1, the monitor will make a SIP call to the address set up in the emergency contact option of the menu. This address must have the correct SIP or P2P format.
- Page 12 IT IS NOT RECOMMENDED TO CHANGE THE DEVICE INSTALLATION PARAMETERS UNLESS THIS IS DONE BY A GUINAZ QUALIFIED INSTALLER. The button “Restore Linphone Conf.” restores the Linphone parameters to the ones configured at the installation time.
-
Page 13: Section Ii - Installer Manual
Section II - Installer Manual 2.1 Introduction The GUINAZ Smartive 7" interior monitor is a touch device based on the Android operative system that can be embedded on a home wall for instance, together with the rest of GUINAZ items provided in the installation kit. - Page 14 1. If the Smartive monitor is to be fed with a power source (F1350 GUINAZ), connect the ground cables (black) to the power connector upper terminal and the voltage (red) to the power connector lower terminal. If the system is powered by PoE, this connection is not necessary.
- Page 15 Each installation has specific features with regards to data network, distances, operation modes, etc. and the installer must defined and assess them, as well as check their compatibility with the GUINAZ system. The GUINAZ Smartive monitor and their SIP technology admit two basic operation modes: P2P (local network) or IPBX (through a VoIP switchboard).
- Page 16 If the authentication is correct, the existing device installation options will be shown in the following screen Change SIP settings Edit Configuration file Configure entry doors Configure Android settings Generate Linphone configuration back-up The configuration file can be modified directly on the screen by pressing on it and editing its contents with the Android keypad interface, as shown in the image below.
- Page 17 Configuration in P2P Operation Mode The GUINAZ Smartive 7” monitor, together with the rest of the IP System products, such as the street panels, can be set up to operate in the P2P mode within a network of the same type (P2P), for instance, a...
- Page 18 When all steps have been completed, press on the Save Configuration File option and continue the setting with Data Network Settings in the next section to complete the street panel setting refer to the corresponding 1 push button street panel installation guide from GUINAZ ELECTRONICA S.L 2.3.2.2 Data Network Settings In order to configure the GUINAZ Smartive 7"...
- Page 19 DCHP On/Off selection IP Address selection Network mask selection Gateway selection DNS server selection 1. In the menu Settings->Installer press the “Network Settings” icon. 2. In the Android Setting drop-down menu select the “Disable DCHP” option 3. In the Android Setting drop-down menu select the box IP Address and enter the desired address value according to the desired value, the default value is 192.168.1.XXX 4.
- Page 20 Data Network Settings in the next section The default values checked are a recommendation from GUINAZ, but the correct configuration of the monitor network settings are responsibility of the installer and the network manager in the involved building/installation. GUINAZ does not take responsibility for the incorrect setting of the final installation data network.
- Page 21 4. The GUINAZ street panel configuration webserver will be shown on the monitor with all the different configuration options To access and configure the street panel, follow the instructions in the ALEA IP street panel installation manual from GUINAZ ELECTRONICA S.L. G503237E REV.3...
- Page 22 Setting the Smartive Monitors in P2P MODE The GUINAZ Smartive monitor includes a menu within the installer settings to set up the street panels for the existing exterior accesses in the installation, so they can be used with the monitor. Follow the procedure below in the P2P mode.
- Page 23 This parameters must not been modified. If the echo cancellation or the echo cancellation calibration are modified, the GUINAZ application data has to be deleted (see Adroid manual) and the reconfiguration of the Linphone parameters is required. The “Configuration editor”...
- Page 24 Configuration in IPBX Operation Mode The GUINAZ Smartive 7" monitor, together with the rest of the IP system products, such as street panels, can be set up to operate in IPBX mode, connected to a VoIP switchboard (local in the LAN or remote via...
- Page 25 2.3.2.1 to 2.3.2.7 in the ORDER INDICATED. 2.3.3.1 Mode Selection and Initial Settings Enter the Setting->Installer menu as seen in section 2.3.3 The installer must follow the next steps to set up the GUINAZ Smartive monitor in IPBX mode. Operating mode selection SIP Port...
- Page 26 Data Network Settings in the next section to complete the street panel setting refer to the corresponding 1 push button street panel installation guide from GUINAZ ELECTRONICA S.L When selecting IPBX mode (mode = 1) from P2P mode (mode = 0), the system asks for Linphone account 1.- Select “siguiente”.
- Page 27 Data Network Settings in the next section The default values checked are a recommendation from GUINAZ, but the correct configuration of the monitor network settings are responsibility of the installer and the network manager in the involved building/installation. GUINAZ does not take responsibility for the incorrect setting of the final installation data network.
- Page 28 Setting the Street Panels in IPBX MODE The GUINAZ Smartive monitor includes a menu within the installer settings to set up the street panels for the existing exterior accesses in the installation, so they can be used with the monitor. Follow the procedure below in the IPBX mode.
- Page 29 This parameters must not been modified. If the echo cancellation or the echo cancellation calibration are modified, the GUINAZ application data has to be deleted (see Adroid manual) and the reconfiguration of the Linphone parameters and account is required.
- Page 30 The configuration will be done using the following menus: WiFi ON/OFF (off by default) Enable ICE (ON by default) Enable ICE (OFF by default) Enable Random Ports (OFF by default) SIP Port (5060 by default) Protocol (UDP y default) The audio and video ports are 7078 (audio) and 9078 (video) by default and they cannot be modified from the Linphone settings.
- Page 31 If it was necessary to load a new SW version of the GUINAZ app for new functionalities or to remove any operational bugs, the technician in charge will have to follow the procedure below locally for EACH MONITOR.
- Page 32 Android system as illustrated in the top right image. 5. Move the file .apk (provided by Guinaz) from the PC folder to the image root folder and restart the Smartive device, reconnecting it to the power supply after it has been mounted again on the installation.
Need help?
Do you have a question about the M3780 and is the answer not in the manual?
Questions and answers