
Related Manuals for Kreg Moderate


Summary of Contents for Kreg Moderate
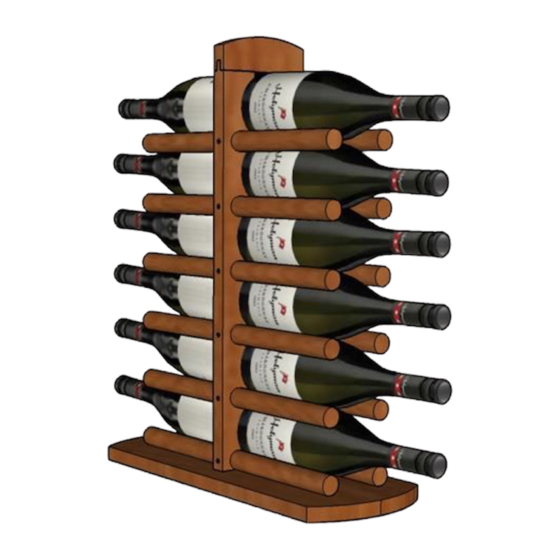
- Page 1 12 Bottle Wine Rack Difficulty Moderate Cherry wood 12 bottle wine rack. This is a perfect size to store a small wine collection. It fits in small spaces, such as a counter top or wall niche. Makes a great gift item.
- Page 2 Tools Materials Kreg Tools Wood Products Dowel Rods , 1 Inch Diameter , 48" Wood Project Clamp - 6" 3/4" Cherry , 1x8 , 48" Hardware & Supplies Precision Router Table System 1/4" X 1 3/4" Wood Dowel Pins Minwax Cherry Oil -Based Stain...
- Page 3 Cut List & Parts 3/4" Cherry Base , 3/4" X 18 3/4" X 7 1/4" 3/4" Cherry Dowel Holders , 3/4" X 21 1/2' X 2" 3/4" Cherry Top , 3/4" X 5 1/4" X 1 3/4" 1" Diameter Doweling Rods , 1" X 14 3/4" Page 3 of 11...
- Page 4 Directions Introduction Please be sure to read through complete instructions before you begin any work on this project. Cut the cherry parts Cut the wine rack top, base and dowel supports from 3/4" cherry. Page 4 of 11...
- Page 5 Cut a 1/4" X 1/2" X 2" tongue centered in the top of each dowel holder. I use a Freud (99-036) Adjustable Tongue and Groove Bit set mounted in a Kreg router table to cut the tongues. Alternatively you can use a table saw.
- Page 6 Place a 1/4" by 5 1/2" groove in the center of the bottom edge of the top. I use a Freud (99-036) Adjustable Tongue and Groove Bit set mounted in a Kreg router table to cut the groove. Alternatively you can use a table saw.
- Page 7 Cut the arc in the top piece Using the dimensions in the following diagram draw an arc on the side of the top piece. Using a band saw or a jig saw cut the arc. Assemble the top and dowel holders. Using wood glue attach the two dowel holders to the top.
- Page 8 Round over the edges Once the glue in the top/dowel holder assembly is dry use a roundover bit mounted in a router table to shape the outside edges of the assembly. How large you make the roundover is a matter of personal taste. I usually use a 1/2" radius bit set to a very shallow cut.
- Page 9 Completing the bottom Use the dimensions on the following diagram to draw arcs on either end of the base. Use a band saw or jig saw to cut the arcs. Then round over the base using the setup from step 9. Now sand the piece ending with 150 grit sandpaper. Attach the base Using wood glue attach the top/dowel holder assembly to the base by inserting the tenons into the mortises.
- Page 10 Insert dowel rods Insert the twelve dowel rods making sure that they are spaced properly and that the holes for the 1/4" dowel pins are aligned. One at a time, slide the dowel rods about 1/2" out of center and add glue there. Return the rod to its proper place. Add some glue to the 1/4"...
- Page 11 Finishing Now that the build is complete use 220 sandpaper to do a once over on all surfaces in preparation for the finish. Clean well to remove all dust. (I use compressed air and clean dry rags) I chose to use Minwax Cherry Oil-Based Wood Finish to stain the wine rack.
Need help?
Do you have a question about the Moderate and is the answer not in the manual?
Questions and answers