
Related Manuals for SMH Technologies FlashRunner Cube Series


Summary of Contents for SMH Technologies FlashRunner Cube Series
- Page 1 FlashRunner Cube Series User’s Manual http://smh-tech.com.cn sales@smh-tech.com.cn +86-15250087885...
- Page 2 http://smh-tech.com.cn sales@smh-tech.com.cn +86-15250087885...
- Page 3 FlashRunner Cube Series True parallel panel target standalone in-system programmer User’s Manual Revision. 1.3 - April 2012 DC10476 http://smh-tech.com.cn sales@smh-tech.com.cn +86-15250087885...
- Page 4 Copyright Information Copyright © 2011-2012 Systein Srl. No part of this manual may be reproduced in any form or by any means (including electronic storage and retrieval or translation into a foreign language) without prior agreement and written consent from Systein. Disclaimer The material contained in this document is provided “as is”, and is subject to being changed, without notice, in future editions.
- Page 5 Systein Warranty Information Systein warrants that this product will be free from defects in materials and workmanship for a period of one (1) year from the date of shipment. If any such product proves defective during this warranty period, Systein, at its option, either will repair the defective product without charge for parts and labor, or will provide a replacement in exchange for the defective product.
-
Page 6: Table Of Contents
Table of Contents Table of Contents 1. FR CUBE—At a Glance ............ 9 Overview ....................9 Features ....................10 Model Comparison ................11 Package Checklist .................12 Connectors Overview ................12 LEDs .......................13 Programming Drivers and Licenses .............14 2. Getting Started ............... 15 Guided Tutorial ..................15 Install Software ...............15 Launch the Project Generator... - Page 7 FlashRunner Cube User’s Manual Command Syntax ..................28 OK Answer ....................28 ERR Answer ...................28 BUSY Answer ..................28 FR CUBE Terminal ..................29 Command Reference ................29 Data In/Out Commands ................30 Execution Command ................31 File System Commands ................32 Programming Commands ..............33 Status Commands .................34 System Commands ................36 Time Commands...
- Page 8 Table of Contents FR_GetLastErrorMessage() ..............48 FR_ReceiveFile() ..................49 FR_SendFile() ..................50 FR_SendFrame() ..................51 FR_OpenCommPort() ................52 6. FR CUBE File System ............. 53 Overview ....................53 File System Structure ................54 7. Variable Data Programming ........... 55 Overview ....................55 Usage ......................55 8. Power and Relay Options ..........57 Power Supply Options ................57 Relays .....................57...
- Page 9 FlashRunner Cube User’s Manual Index of Figures Low-Level Interface Signals Timing ..........40 FRC_GP_02 ISP Connectors ............59 FRC_GP_04 ISP Connectors ............59 FRC_GP_08 ISP Connectors ............59 Index of Tables FR CUBE Model Comparison ............11 ISP Signal Definitions ..............60 Low-Level Interface Signals ............61 ATE and Target Ground Domains ...........62 http://smh-tech.com.cn sales@smh-tech.com.cn +86-15250087885...
- Page 10 http://smh-tech.com.cn sales@smh-tech.com.cn +86-15250087885...
-
Page 11: Cube-At A Glance
FlashRunner Cube User’s Manual 1. FR CUBE-At a Glance Overview Congratulations for purchasing a FR CUBE In-System Programmer. The FR CUBE Series of In-System Programmers are a breakthrough in the Programming industry. The programmers support a large number of devices (microcontrollers, memories, CPLDs and other programmable devices) from various manufacturers and have a compact size for easy ATE/ fixture integration. -
Page 12: Features
FR CUBE-At a Glance Features Support of microcontrollers, serial and parallel memories, CPLDs and other programmable devices High-speed, parallel programming Compact size (fixture friendly) Standalone operations or host controlled Designed for easy ATE interfacing Robust and reliable Support of several programming interfaces (JTAG, BDM, SPI, I UART, etc.) Large built-in internal memory for projects, images, etc. -
Page 13: Model Comparison
FlashRunner Cube User’s Manual Model Comparison The following table summarizes the main features of the various FR CUBE family models. FR CUBE Model Comparison Feature FR CUBE GP02 FR CUBE GP04 FR CUBE GP08 General Features Programming Sites Power Supply 12-25V 12-25V 12-25V... -
Page 14: Package Checklist
FR CUBE-At a Glance Package Checklist The FR CUBE package includes the following items: FR CUBE unit. 15V power supply. Serial and USB cables. FR CUBE test board. 48-way, female wire-wrap DIN41612 connector. Software CD. Connectors Overview FR CUBE has several connectors for interfacing to a host PC, to an Automatic Test Equipment (ATE), and to the target system(s) to be programmed. -
Page 15: Leds
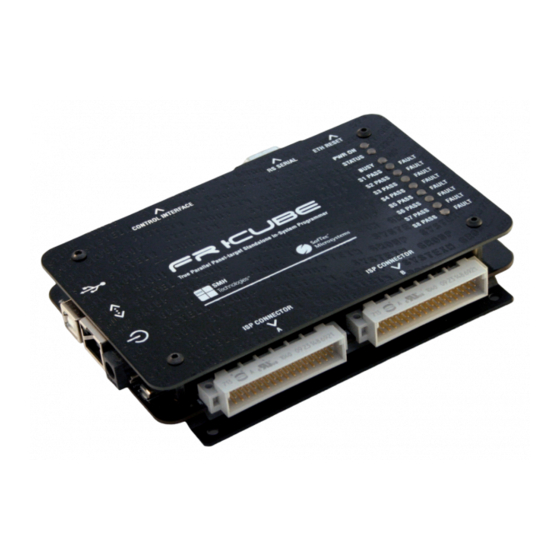
FlashRunner Cube User’s Manual For details and pinout of the various connectors, see the “Connectors” chapter on page 59. LEDs The LEDs on the top cover of the instrument, from top to bottom, indicate: POWER: the instrument is turned on. STATUS: indicates system warnings. -
Page 16: Programming Drivers And Licenses
FR CUBE-At a Glance Programming Drivers and Licenses FR CUBE comes with preinstalled programming drivers (algorithms) that support common microcontrollers and memories. When you purchase a new programming driver, you are supplied with a new driver file (.wnd) and an updated license file (.wnl). The license file enables the use of all of your purchased drivers on your specific FR CUBE unit. -
Page 17: Getting Started
FlashRunner Cube User’s Manual 2. Getting Started Guided Tutorial The following tutorial will guide you through the steps required to set up your FR CUBE programmer and create your first programming project. Install Software Insert the Setup CD into your PC and install the FR CUBE software. -
Page 18: Create A New Project
Getting Started Create a New Project Select File > New Project, give a name to your programming project, and then follow the Project Creation Wizard steps. Create a New Project, Step 1 of 3 In the first Wizard step, specify the target device, by clicking the “Edit”... -
Page 19: Create A New Project, Step 2 Of 3
FlashRunner Cube User’s Manual In the Output File section, specify the output filename by clicking the “...” button. Use the “Add” button to compose the data that will compose the Image file. Use the “...” button to specify the name of the Image file. - Page 20 Getting Started The number of tabs displayed in this window depends on the selected target device; however, three tabs (“Target I/O”, “Target Power Supply” and “Communication”) are always present and will be briefly discussed below. The first tab is “Target I/O”. The “Device I/O voltage” setting specifies the voltage of the ISP lines.
- Page 21 FlashRunner Cube User’s Manual If you decide to power the target board through the FR CUBE power supply line (SxPPS), specify in the “Target Power Supply” tab the electrical and timing parameters of the target power supply line. FR CUBE is able to power the target board through a dedicated programmable power supply output line per site.
- Page 22 Getting Started The content of the “Communication” tab depends on the selected target device. It allows you to select the communication protocol that will be used for programming (some target devices may provide more than one communication protocol) and its related settings, usually the communication speed and other parameters.
-
Page 23: Create A New Project, Step 3 Of 3
FlashRunner Cube User’s Manual Create a New Project, Step 3 of 3 In this step you select which programming operation to perform on the target. Click “Finish” to end the Wizard. At this point, a FR CUBE Programming Project will be created in the \Projects directory, relative to the Project Generator application location. -
Page 24: Configure Your Fr Cube Instrument
Getting Started Configure your FR CUBE Instrument Choose Project > Select FR CUBE Model, and specify your FR CUBE model and communication settings with the PC. Currently, FR CUBE can be connected only through a serial port. FR CUBE communicates at 115,200 bps by default. LAN and USB connections will be supported soon through a free software upgrade. - Page 25 FlashRunner Cube User’s Manual Connect to Target Device Connect FR CUBE to your target system through the ISP connector(s). To view the connections for your selected target device, select Debug > Show ISP Connections. See the table on page 60 for more details http://smh-tech.com.cn sales@smh-tech.com.cn +86-15250087885...
- Page 26 Getting Started Startup FR CUBE Connect FR CUBE to your PC through the provided serial cable. Finally, power up FR CUBE using the provided power supply. Program the Target Device Select Debug > Run Project. The Project file (.wnp) and Image file (.wni) will be automatically uploaded to FR CUBE and the project will be executed.
-
Page 27: Where To Go From Here
FlashRunner Cube User’s Manual Manual Project Editing The Project file created by the Project Wizard is located, by default, in the \Projects directory, relative to the Project Generator application location (this location can be changed by specifying a different “workspace” path: to do so, in the Project Generator, select Project >... - Page 28 http://smh-tech.com.cn sales@smh-tech.com.cn +86-15250087885...
-
Page 29: Commands
FlashRunner Cube User’s Manual 3. Commands Overview FR CUBE is a slave unit and is always awaiting for a new command incoming from the master (PC). When the programmer receives a SOF (Start Of Frame) character ( indicating the start of a new command, it loads all incoming characters in a buffer until the reception of the return character ( , ASCII code Maximum command length is 256 characters. -
Page 30: Command Syntax
Commands Command Syntax A FR CUBE command begins with the SOF character ( ), followed by the command name, followed by zero or more command switches, and ends with the return character ( This is an example of a FR CUBE valid command: #status -o ping{\n} OK Answer An OK answer is composed of zero or more characters, followed by... -
Page 31: Cube Terminal
FlashRunner Cube User’s Manual FR CUBE Terminal Commands can be sent (and answers received) using any terminal application. For your convenience, the Project Generator application includes a Terminal window that will simplify the communication with the instrument. Just select Tools > FR CUBE Terminal to open the Terminal window. -
Page 32: Command Reference
Commands Command Reference The following pages list all of the FR CUBE commands, grouped by function, together with their syntax and usage examples. Data In/Out Commands Syntax #data –o set –c <direction> -t file –f <filename> #data –o set –c <direction> -t volatile Parameters <direction>... -
Page 33: Execution Command
FlashRunner Cube User’s Manual Execution Command Syntax #exec -o prj -f <project> -s <sites> Parameters The Project filename to execute. <project> A 8 bit value indicating the programming sites to be enabled. <sites> Description Executes the specified Project over the specified programming sites. In case of error, a 32 bit value is returned. -
Page 34: File System Commands
Commands File System Commands Syntax #fs –o rmdir –d <directory> #fs –o mkdir –d <directory> #fs –o dir –d <directory> #fs –o del –f <filename> #fs –o send –d <filename> #fs –o receive –d <filename> Parameters Full path of a directory. <directory>... -
Page 35: Programming Commands
FlashRunner Cube User’s Manual Programming Commands Syntax #load –l <driver> -m <manufacturer> -d <device> #dev –o begin #dev –o end #dev –o set –p <parameter> -v <value> #conf –o begin #conf –o end #conf –o set –p <parameter> -v <value> #prog –o begin #prog –o end #prog –o cmd –c pps -v <pps value>... -
Page 36: Status Commands
Commands Status Commands Syntax #status –o ping #status –o get –p err –v <site> –l <errlevel> Parameters to get programming site errors. Use to return system errors. <site> <errlevel> Description Get instrument status or error information. When retrieving error information, one or more error lines (depending on parameter) are returned. - Page 37 FlashRunner Cube User’s Manual Examples Pings the instrument to check if communication is OK: #status –o ping pong> Retrieves the last generated errors, on programming site 1, with different error levels: #status -o get -p err -v 1 -l 1 H50000023 >...
-
Page 38: System Commands
Commands System Commands Syntax #sys –o set –p br –v <baud rate> #sys –o get –p br #sys –o get –p sn #sys –o get –p ver –v <code> #sys –o set –p lliop –s <prj sel> -f <prj filename> #sys –o get –p lliop –s <prj sel>... -
Page 39: Time Commands
FlashRunner Cube User’s Manual Time Commands Syntax #time –o set –p date –d <date> #time –o set –p time –d <time> #time –o get –p date #time –o get –p time Parameters A date in the format <date> yyyy/mm/dd A time in the format <time>... -
Page 40: Volatile Memory Commands
Commands Volatile Memory Commands Syntax #volatile –o write –s <site> -a <start address> - l <len> -d <data> #volatile –o read –s <site> -a <start address> - l <len> Parameters Programming site. to set specific site data, to set <site> the same data for all sites. -
Page 41: Standalone Mode
FlashRunner Cube User’s Manual 4. Standalone Mode Overview FR CUBE can work with no connection to a PC (standalone mode). In standalone mode, the instrument is controlled through a low-level connection interface. Signals Signals needed to control the instrument in standalone mode are located in the “Low-Level Interface”... -
Page 42: Low-Level Interface Signals Timing
Standalone Mode The following diagram illustrates the timing for the Low-Level Interface signals. PRJ_SELx PRJ_SELx and START_ENAx lines are sampled at the START falling edge, and must remain stable until BUSYrising edge START_ENAx START BUSY OK/ERRx lines become valid at the BUSY falling edge OK/ERRx Previous state... -
Page 43: Project Assignment
FlashRunner Cube User’s Manual Project Assignment Before working in standalone mode, you must associate PRJ_SELx lines to a Project filename to execute. To do so, in the FR CUBE Project Generator application select Project > Hardware Settings. In the window that will appear, associate PRJ_SEL values to project names by clicking the “Set Project”... - Page 44 http://smh-tech.com.cn sales@smh-tech.com.cn +86-15250087885...
-
Page 45: Cube Api
FlashRunner Cube User’s Manual 5. FR CUBE API Overview You can build your own PC software that interfaces to the instrument, by using the provided FR CUBE Application Programming Interface (API). The FR CUBE API consists of a series of functions, contained in the fr_comm DLL, which allow you to set up and control the programmer. -
Page 46: Function Reference
FR CUBE API The typical program flow for interfacing with FR CUBE is the following: 1. Open communication (FR_OpenCommPort()function) 2. Execute commands(FR_ExeCommand()function) 3. Transfer files to/from the instrument’s internal memory (FR_SendFile()andFR_ReceiveFile()functions) 4. Close communication(FR_CloseCommPort()function) Function Reference API functions are listed and explained alphabetically in the following pages. http://smh-tech.com.cn sales@smh-tech.com.cn +86-15250087885... -
Page 47: Closecommport()
FlashRunner Cube User’s Manual FR_CloseCommPort() Prototype FR_COMM_ERR WINAPI FR_CloseCommPortA (FR_COMM_HANDLE handle); FR_COMM_ERR WINAPI FR_CloseCommPortW (FR_COMM_HANDLE handle); Description Closes the communication channel with the instrument. Return Value The function call was successful. The function call was unsuccessful. Call the function to get error FR_GetLastErrorMessage() information. -
Page 48: Execommand()
FR CUBE API FR_ExeCommand() Prototype FR_COMM_ERR WINAPI FR_ExeCommandA (FR_COMM_HANDLE handle, const char *command, char *answer, unsigned long maxlen, unsigned long timeout_ms, FR_ANSWER_TYPE *type); FR_COMM_ERR WINAPI FR_ExeCommandW (FR_COMM_HANDLE handle, const wchar_t *command, wchar_t *answer, unsigned long maxlen, unsigned long timeout_ ms, FR_ANSWER_TYPE *type); Description Executes a FR CUBE command. -
Page 49: Getframe()
FlashRunner Cube User’s Manual FR_GetFrame() Prototype FR_COMM_ERR WINAPI FR_GetFrameA (FR_COMM_HANDLE handle, char *answer, unsigned long maxlen, unsigned long timeout_ms); FR_COMM_ERR WINAPI FR_GetFrameW (FR_COMM_HANDLE handle, wchar_t *answer, unsigned long maxlen, unsigned long timeout_ms); Description Reads the answer to the command sent by the function. -
Page 50: Getlasterrormessage()
FR CUBE API FR_GetLastErrorMessage() Prototype void WINAPI FR_GetLastErrorMessageA (char *error_msg, unsigned long tring_len); void WINAPI FR_GetLastErrorMessageW (wchar_t *error_msg, unsigned long string_ len); Description Returns a string containing the last FR CUBE error message. Parameters The string that will receive the error message. error_msg Length, in characters, of the error message buffer. -
Page 51: Receivefile()
FlashRunner Cube User’s Manual FR_ReceiveFile() Prototype FR_COMM_ERR WINAPI FR_ReceiveFileA (FR_COMM_HANDLE handle, const char *protocol, const char *src_filename, const char *dst_path, bool force_transfer, FR_ FileTransferProgressProc progress); FR_COMM_ERR WINAPI FR_ReceiveFileW (FR_COMM_HANDLE handle, const wchar_t *protocol, const wchar_t *src_filename, const wchar_t *dst_path, bool force_ transfer, FR_FileTransferProgressProc progress);... -
Page 52: Sendfile()
FR CUBE API FR_SendFile() Prototype FR_COMM_ERR WINAPI FR_SendFileA (FR_COMM_HANDLE handle, const char *protocol, const char *src_filename, const char *dst_path, bool force_transfer, FR_FileTransferProgressProc progress); FR_COMM_ERR WINAPI FR_SendFileW (FR_COMM_HANDLE handle, const wchar_t *protocol, const wchar_t *src_filename, const wchar_t *dst_path, bool force_ transfer, FR_FileTransferProgressProc progress);... -
Page 53: Sendframe()
FlashRunner Cube User’s Manual FR_SendFrame() Prototype FR_COMM_ERR WINAPI FR_SendFrameA (FR_COMM_HANDLE handle, const char *command); FR_COMM_ERR WINAPI FR_SendFrameW (FR_COMM_HANDLE handle, const wchar_t *command); Description Sends a command to the instrument. Use the function to FR_GetFrame() retrieve the answer. Return Value The function call was successful. The function call was unsuccessful. -
Page 54: Opencommport()
FR CUBE API FR_OpenCommPort() Prototype FR_COMM_HANDLE WINAPI FR_OpenCommPortA (const char *com_port, const char *com_settings); FR_COMM_HANDLE WINAPI FR_OpenCommPortW (const wchar_t *com_port, const wchar_t *com_settings); Description Opens a RS-232, Ethernet or USB communication channel with the instrument. Return Value alid communication handle to use in subsequent >0 functions. -
Page 55: Cube File System
FlashRunner Cube User’s Manual 6. FR CUBE File System Overview FR CUBE has a large, built-in non-volatile memory, used to store the various files required by the instrument: programming projects, image files, etc. This memory is organized by a file system. You can explore the FR CUBE files either by using a Terminal application and sending file-system related commands, or (more simply) by using the File Manager window of the Project Generator application. -
Page 56: File System Structure
FR CUBE File System File System Structure The files required by the instrument are organized in various folders, as explained below: \drivers folder: contains programming algorithms (.wnd files). These files are provided by Systein. \sys folder: contains systems files, such as programming licenses, firmware files, etc. -
Page 57: Variable Data Programming
FlashRunner Cube User’s Manual 7. Variable Data Programming Overview FR CUBE has built-in, dedicated memory banks for each programming site. This memory can be used to temporarily store variable data that will be written to the target device during programming. This is useful for serial numbering and for any other variable data that needs to be written to the target device at programming time. - Page 58 Variable Data Programming You will then be asked for the target device address range to be programmed and the offset of the memory bank that will contain the variable data. Proceed to the end of the Project Creation wizard. Your programming project is now ready to accept variable data.
-
Page 59: Power And Relay Options
FlashRunner Cube User’s Manual 8. Power and Relay Options Power Supply Options FR CUBE can be powered in two ways: With the provided power supply (which supplies 15V DC); By providing a power supply to the PWR pin of the Low-Level Interface connector (see “Low-Level Interface Connector”... - Page 60 http://smh-tech.com.cn sales@smh-tech.com.cn +86-15250087885...
-
Page 61: Connectors
FlashRunner Cube User’s Manual 9. Connectors ISP Connectors FR CUBE GP02 PASS and FR CUBE GP04 PASS models have one ISP connector; the FR CUBE GP08 PASS model has two ISP connectors. FRC_GP_02 ISP Connector FRC_GP_04 ISP Connector FRC_GP_08 ISP Connectors http://smh-tech.com.cn sales@smh-tech.com.cn +86-15250087885... -
Page 62: Isp Signal Definitions
Connectors http://smh-tech.com.cn sales@smh-tech.com.cn +86-15250087885... -
Page 63: Low-Level Interface Connector
FlashRunner Cube User’s Manual Low-Level Interface Signals FR CUBE GP02 FR CUBE GP04 FR CUBE GP08 Signal Description Input Power Supply (12-25V) A5/B5 A5/B5 A5/B5 Power Supply Ground A10/B12/ A10/B12/ A10/B12/ GNDI Low-Level Interface Ground C15/C16 C15/C16 C15/C16 TX_RS232 RS-232 TX (Output) RX_RS232 RS-232 RX (Input) Project Selector 0 (Input, internal... -
Page 64: Ground Domains
Connectors All low-level interface lines are isolated from system GND (and are referenced to GNDI), except for the PWR line, which is referenced to GND. Ground Domains The following diagram illustrates the two ground domains of the programmer. ATE and Target Ground Domains In order to avoid undesired current paths between the programmer and the target board, we suggest to use a power supply with a floating output (ground not referenced to the... -
Page 65: Specifications
FlashRunner Cube User’s Manual 10. Specifications Electrical Specifications Feature Value Maximum Ratings Power supply voltage ISP SxL0[1..7] voltage -0.7-6.5V ISP SxL0[1..7] current ±60mA ISP SxPPS voltage -0.7-18V ISP SxPPS current 380mA ISP SxRLY voltage -1.0-30V Low level interface PRJ_SELx, START, START_ENAx, BUSY, PASS/FAULTx -0.7-6.0V voltage... -
Page 66: Isp Connectors
Specification ISP Connectors ISP and Low-Level Interface connectors are DIN48 male connectors. We suggest using the following compatible female connectors. For wire wrapping: DIN41612 connector, 3 rows, 48 pins, 180° female, C style Manufacturer: Conec Manufacturer Part Number: 122A10619X Catalog Part Number: Mouser 706-122A10619X For soldering: DIN41612 connector, 3 rows, 48 pins, female, R/A C style Manufacturer: FCI... - Page 67 http://smh-tech.com.cn sales@smh-tech.com.cn +86-15250087885...
- Page 68 Systein Italia Srl VAT (P.I./C.F.) n. IT01697470936 Phone +39 0434 421111 Registered office/sede legale: Via Giovanni Agnelli, 1 Fax +39 0434 639021 V.lo del Forno 9 33083 Villotta di Chions (PN) Italy info@smh-tech.com Zip/Cap 33170 Pordenone (PN) Italy www.smh-tech.com Share Capital/Capitale Sociale € 10.000 http://smh-tech.com.cn sales@smh-tech.com.cn +86-15250087885...
Need help?
Do you have a question about the FlashRunner Cube Series and is the answer not in the manual?
Questions and answers