Advertisement
Quick Links
"Fast Start" Setup and Instructions Summary
®
®
®
®
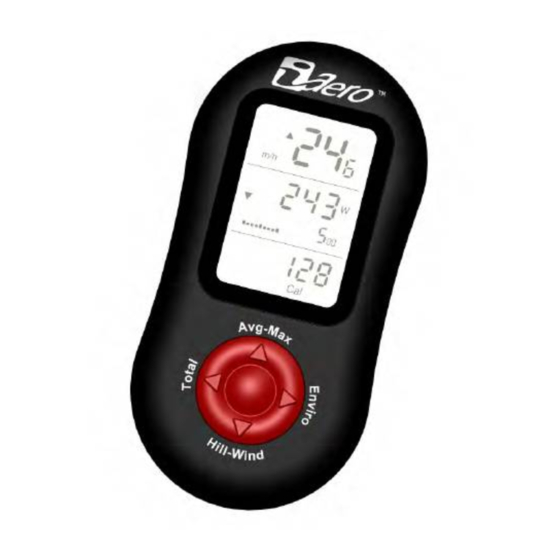
iBike
iSport
/iPro
/iAero
Wireless Power Meter
FW 424+
November 2010
"Fast Start"
is the way to set up your iBike. Do these three steps, one time for each bike.
NOTE: MAKE SURE FW 424 OR HIGHER IS INSTALLED ON YOUR GEN III IBIKE.
TO GET THE LATEST FIRMWARE FOR YOUR IBIKE USE YOUR IBIKE
SOFTWARE; GO TO "HELP/CHECKOLINE FOR FW UPDATE"
1. INSTALL WIRELESS MOUNT AND SENSORS
1) Remove iBike battery door. Insert battery with + side showing. Replace door.
2) While standing behind the bike, place mount on the stem/handlebar so mount looks like this:
o
o
o iBike o
o o
If mount is positioned incorrectly the iBike will point backwards when connected to the mount.
3) Stem mount: position mount so that wind sensor is located just behind front edge of stem.
4) Handlebar mount: Handlebar mount should be reasonably level. For small handlebars (26mm)
use supplied bulb-shaped adapter.
5) TT bike: refer to "iBike Mount Installation" instructions, pgs 7-9
6) Peel off one side of green sticker. Position a sticker on the top where mount will rest, and the
other sticker on the bottom, where u-shaped clamp rests. Peel off the other cover of each sticker.
7) Lightly set mount on the top sticker.
8) Connect u-shaped clamp to mount with 2 screws supplied; do not tighten screws.
9) Install iBike on mount, rotating iBike from 10PM to 12PM position. With iBike in the
position you want, tighten mount screws so that iBike and mount cannot move at all. Do not
over-tighten screws.
CRITICAL: PROPERLY FASTENED MOUNTS DO NOT FLEX OR ROTATE AT ALL
10) Next, attach speed (iSport) or speed/cadence (iPro/iAero) sensor. The speed sensor's
magnetic area is beneath the black vertical notch, located in the upper right corner of the side of
the sensor with white lettering (speed) or top left corner on the side with battery (speed/cadence).
11) Using zip ties, loosely fasten speed or speed/cadence sensor on chain stay opposite the chain.
12) Position wireless speed sensor on rear wheel, near the rim (outside edge) of the wheel. Speed
sensor: white lettering faces inwards, towards spokes. Speed/cadence sensor: white lettering
faces outwards, away from spokes. Use zip ties to loosely fasten sensor to chain stay.
13) Speed/cadence sensor: Use zip tie to loosely fasten black cadence magnet to crank opposite
chain. Locate cadence sensor on chain stay, near pedal, so that cadence magnet sweeps by the
middle of the cadence sensor; fasten loosely with zip ties. Position cadence sensor so that cadence
magnet passes within 1-2 coin widths of cadence sensor. Tighten zip ties.
14) Position silver spoke magnet on spoke near rim so that magnet sweeps by the vertical notch
of the speed sensor. Tighten spoke magnet with screw driver (don't overtighten). Position speed
sensor so spoke magnet passes within 1-2 coin widths of speed sensor notch. Tighten zip ties.
15) Check all zip ties to be sure they are tight, then cut excess material.
16) Wake-up speed (or speed/cadence) sensor by spinning wheel. With factory-calibrated units,
after a few moments you'll see "SPD FOUND" (iSport)" OR "SPCD FOUND" and "HR
FOUND" (iPro/iAero). If "WLS FAIL" appears, make sure iBike is fully locked on to mount
(when locked-in a click will be felt), battery is installed in mount and iBike, then try again. If
"SPD FAIL" appears then see the Scan procedure on page 7.
1
Advertisement

Related Manuals for iBike iSport


Summary of Contents for iBike iSport
- Page 1 FOUND” (iPro/iAero). If “WLS FAIL” appears, make sure iBike is fully locked on to mount (when locked-in a click will be felt), battery is installed in mount and iBike, then try again. If “SPD FAIL” appears then see the Scan procedure on page 7.
- Page 2 3) Enter “Set Up” by press-holding iBike’s UP arrow for two seconds (UP arrow for set-UP). 4) You should see the screen “Yes Fast Start”. If you don’t see this screen, detach the iBike from its mount, remove the iBike’s battery, insert battery backwards momentarily, then reinsert battery normally and replace battery cover.
- Page 3 10) Tilt Calibration A) Make sure your iBike is fastened to your mount and that your mount is ROCK SOLID tight. B) Find a reasonably smooth, rock and crack-free place to set your bike. Point bike straight ahead and note exactly where each wheel touches the ground.
- Page 4 Tilt and Cal Wind steps again; the iBike automatically guides you through these two calibrations. 6) When your iBike is ready for the Cal Ride the word “Start” will flash. Click the center button. 7) The top window shows speed, middle window shows distance, bottom window says “Out”.
- Page 5 1) Use iBike software to erase ride memory from your iBike. Consult iBike SW instructions. 2) OR, on your iBike go to Setup/Eras Data. Click center button, select “yes” with up arrow then click center button. Wait until “Eras Data” returns.
- Page 6 6) To reset User intervals, perform Trip Reset. Obtain iBike Serial Number (USB Adapter and Software ships with iPro and iAero only) 1) Connect your iBike and USB Adapter; launch iBike software. Go to Device/iBike SN & FW version... For more details on any of these steps, please refer to the “iBike Operating Instructions”...
- Page 7 Scan does not need to be performed. 1) Make sure there is a battery installed both in your iBike and in your wireless mount. 2) Attach your iBike to your wireless mount. Make sure the iBike clicks solidly into place.