Table of Contents
Advertisement
Available languages
Available languages
Quick Links
Advertisement
Chapters
Table of Contents

Subscribe to Our Youtube Channel
Related Manuals for ZANKER KXAK82FR


Summary of Contents for ZANKER KXAK82FR
- Page 1 KXAK82FR EN User Manual Refrigerator DE Benutzerinformation Kühlschrank...
-
Page 2: Table Of Contents
CONTENTS 1. SAFETY INFORMATION...................2 2. SAFETY INSTRUCTIONS.................4 3. INSTALLATION....................6 4. CONTROL PANEL.................... 7 5. DAILY USE......................8 6. HINTS AND TIPS....................8 7. CARE AND CLEANING..................9 8. TROUBLESHOOTING..................10 9. NOISES......................14 10. TECHNICAL DATA..................14 11. INFORMATION FOR TEST INSTITUTES.............14 Subject to change without notice. - Page 3 Children shall not carry out cleaning and user maintenance • of the appliance without supervision. Keep all packaging away from children and dispose of it • appropriately. 1.2 General Safety This appliance is intended to be used in household and •...
-
Page 4: Safety Instructions
Do not store explosive substances such as aerosol cans • with a flammable propellant in this appliance. If the supply cord is damaged, it must be replaced by the • manufacturer, its Authorised Service Centre or similarly qualified persons in order to avoid a hazard. 2. - Page 5 2.3 Use 2.5 Care and cleaning WARNING! WARNING! Risk of injury, burns, electric shock or Risk of injury or damage to the fire. appliance. • Before maintenance, deactivate the appliance and disconnect the mains plug The appliance contains flammable gas, from the mains socket.
-
Page 6: Installation
• The insulation foam contains flammable • Do not cause damage to the part of the gas. Contact your municipal authority for cooling unit that is near the heat information on how to discard the exchanger. appliance correctly. 3. INSTALLATION WARNING! WARNING! Refer to Safety chapters. -
Page 7: Control Panel
3.3 Electrical connection ³ the height, width and depth of the appliance including the handle, plus the space • Before plugging in, ensure that the voltage necessary for free circulation of the cooling and frequency shown on the rating plate air, plus the space necessary to allow door correspond to your domestic power opening to the minimum angle permitting... -
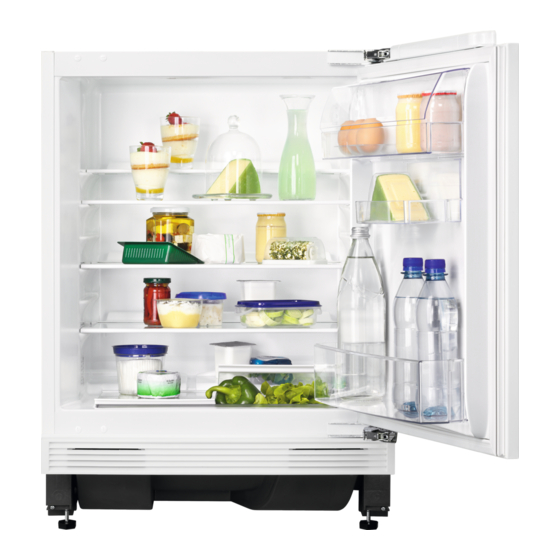
Page 8: Daily Use
4.3 Temperature regulation A medium setting is generally the most suitable one. The temperature is regulated automatically. To operate the appliance: However, you can set a temperature inside the appliance yourself. 1. Turn the temperature regulator clockwise to obtain a lower temperature inside the Choose the setting keeping in mind that the appliance. -
Page 9: Care And Cleaning
6.3 Hints for food refrigeration set the temperature control toward higher temperature to allow automatic defrosting • Fresh food compartment is the one and to save energy this way. • Ensure a good ventilation. Do not cover marked (on the rating plate) with the ventilation grilles or holes. -
Page 10: Troubleshooting
during normal use. The defrost water drains 2. Clean the ventilation grid. out through a trough into a special container 3. Carefully pull the air deflector out (C), at the back of the appliance, over the motor checking that there is no water left from compressor, where it evaporates. - Page 11 8.1 What to do if... Problem Possible cause Solution The appliance does not operate. The appliance is switched off. Switch on the appliance. The mains plug is not connected Connect the mains plug to the to the mains socket correctly. mains socket correctly.
- Page 12 Problem Possible cause Solution Temperature set in the appliance Set a higher temperature. Refer is too low and the ambient tem‐ to "Control Panel" chapter. perature is too high. Water flows on the rear plate of During the automatic defrosting This is correct.
- Page 13 3. Replace the bulb with the one that has identical characteristics and is specifically designed for household appliances. 4. Reassemble the lamp cover. It is strongly recommended to use 5. Tighten the screw to the lamp cover. original spare parts only. 6.
-
Page 14: Noises
9. NOISES SSSRRR! BRRR! CLICK! HISSS! BLUBB! 10. TECHNICAL DATA The technical information is situated in the It is also possible to find the same information https:// rating plate on the internal side of the in EPREL using the link eprel.ec.europa.eu and the model name and appliance and on the energy label. - Page 15 12. ENVIRONMENTAL CONCERNS appliances marked with the symbol with Recycle materials with the symbol . Put the the household waste. Return the product to packaging in relevant containers to recycle it. your local recycling facility or contact your Help protect the environment and human municipal office.
-
Page 16: Sicherheitshinweise
INHALTSVERZEICHNIS 1. SICHERHEITSHINWEISE................16 2. SICHERHEITSANWEISUNGEN..............18 3. MONTAGE.......................20 4. BEDIENFELD....................22 5. TÄGLICHER GEBRAUCH................23 6. TIPPS UND HINWEISE...................23 7. REINIGUNG UND PFLEGE................24 8. FEHLERSUCHE....................25 9. GERÄUSCHE....................29 10. TECHNISCHE DATEN.................. 29 11. INFORMATIONEN FÜR PRÜFINSTITUTE...........29 Änderungen vorbehalten. SICHERHEITSHINWEISE Lesen Sie vor der Montage und dem Gebrauch des Geräts zuerst die Bedienungsanleitung. - Page 17 Halten Sie Kinder unter 3 Jahren vom Gerät fern, wenn sie • nicht ständig beaufsichtigt werden. Kinder dürfen nicht mit dem Gerät spielen. • Kinder dürfen keine Reinigung und Wartung ohne • Beaufsichtigung durchführen. Halten Sie sämtliches Verpackungsmaterial von Kindern •...
-
Page 18: Sicherheitsanweisungen
Reinigen Sie das Geräts mit einem weichen, feuchten Tuch. • Nur neutrale Reinigungsmittel verwenden. Benutzen Sie keine Scheuermittel, scheuernde Reinigungsschwämmchen, Lösungsmittel oder Metallgegenstände. Wenn das Gerät längere Zeit leer steht, schalten Sie es • aus, tauen Sie es ab, reinigen und trocknen Sie es und lassen Sie die Tür offen, um Schimmelbildung im Gerät zu vermeiden. - Page 19 • Stellen Sie keine elektrischen Geräte (z. B. Eisbereiter) in das Gerät, wenn solche WARNUNG! Geräte nicht ausdrücklich vom Hersteller für diesen Zweck zugelassen sind. Achten Sie bei der Montage des Geräts • Wird der Kältekreislauf beschädigt, stellen darauf, dass das Netzkabel nicht Sie bitte sicher, dass es keine Flammen eingeklemmt oder beschädigt wird.
-
Page 20: Montage
2.7 Entsorgung gegebenenfalls. Bei verstopftem Wasserabfluss sammelt sich das Abtauwasser am Boden des Geräts an. WARNUNG! 2.6 Wartung Verletzungs- und Erstickungsgefahr. • Zur Reparatur des Geräts wenden Sie • Trennen Sie das Gerät von der sich an den autorisierten Kundendienst. Stromversorgung. - Page 21 3.1 Abmessungen eine Türöffnung bis zu dem minimalen Winkel zu ermöglichen, der die Entfernung der Gesamtabmessungen ¹ gesamten Innenausstattung erlaubt 3.2 Standort Um die beste Funktionalität des Gerätes zu gewährleisten, sollten Sie das Gerät nicht in der Nähe von Wärmequellen (Backöfen, ¹...
-
Page 22: Bedienfeld
• Das Gerät entspricht den EC-Richtlinien. 3.4 Anforderungen an die Belüftung Es muss möglich sein, das Gerät vom Netz zu trennen. Daher muss der Stecker nach der Installation zugänglich VORSICHT! bleiben. Das Gerät muss entsprechend der 3.3 Elektroanschluss Montageanleitung installiert werden, um die erforderliche Belüftung zu •... -
Page 23: Täglicher Gebrauch
5. TÄGLICHER GEBRAUCH Dieses Modell ist mit einem variablen Lagerfach ausgerüstet, das sich seitlich VORSICHT! verschieben lässt. Dieses Kühlgerät eignet sich nicht zum 5.2 Verstellbare Ablagen Einfrieren von Lebensmitteln. Die Wände des Kühlschranks sind mit einer 5.1 Positionieren der Türablagen Reihe von Führungsschienen ausgestattet, die verschiedene Möglichkeiten für das Die Türablagen können in verschiedener... -
Page 24: Reinigung Und Pflege
• Decken Sie die Lebensmittel mit • Fleisch (alle Sorten): Wickeln Sie Fleisch Verpackungsmaterial ab, um ihre Frische in geeignetes Verpackungsmaterial ein und ihr Aroma zu bewahren. und legen Sie es auf die Glasablage über • Verwenden Sie immer geschlossene der Gemüseschublade. -
Page 25: Fehlersuche
7.3 Abtauen des Kühlschranks 2. Reinigen Sie das Belüftungsgitter. 3. Ziehen Sie das Luftleitblech (C) vorsichtig Bei normalem Betrieb wird Reif automatisch heraus und prüfen Sie, dass sich hier aus dem Verdampfer des Kühlschranks kein Tauwasser angesammelt hat. entfernt. Das Tauwasser sammelt sich in 4. - Page 26 8.1 Was tun, wenn... Problem Mögliche Ursache Lösung Das Gerät funktioniert nicht. Das Gerät ist ausgeschaltet. Schalten Sie das Gerät ein. Der Netzstecker ist nicht richtig in Stecken Sie den Netzstecker die Netzsteckdose eingesteckt. richtig in die Netzsteckdose. Die Netzsteckdose hat keine Schließen Sie ein anderes Elekt‐...
- Page 27 Problem Mögliche Ursache Lösung Die Temperatur ist falsch einge‐ Siehe Kapitel „Bedienfeld“. stellt. Das Gerät ist voll von Lebensmit‐ Stellen Sie eine höhere Tempera‐ teln und auf die niedrigste Tem‐ tur ein. Siehe Kapitel „Bedien‐ peratur eingestellt. feld“. Die Temperatur im Gerät ist zu Stellen Sie eine höhere Tempera‐...
- Page 28 2. Nehmen Sie die Lampenabdeckung in Pfeilrichtung ab. Wenn die Ratschläge nicht zum gewünschten Ergebnis führen, wenden Sie sich an das nächste autorisierte Servicezentrum. 8.2 Austauschen der Lampe 3. Ersetzen Sie die Lampe durch eine Das Gerät ist mit einer langlebigen LED- Lampe mit denselben Eigenschaften, die Innenbeleuchtung ausgestattet.
-
Page 29: Geräusche
9. GERÄUSCHE SSSRRR! BRRR! CLICK! HISSS! BLUBB! 10. TECHNISCHE DATEN Die technischen Daten befinden sich auf dem Es ist auch möglich, die gleichen Typenschild innen im Gerät sowie auf der Informationen in EPREL zu finden, indem Sie https://eprel.ec.europa.eu sowie den Energieplakette. - Page 30 entsprechen. Für weitere Informationen, einschließlich der Beladungspläne, wenden Sie sich bitte an den Hersteller. 12. UMWELTTIPPS mit diesem Symbol nicht mit dem Recyceln Sie Materialien mit dem Symbol Hausmüll. Bringen Sie das Gerät zu Ihrer Entsorgen Sie die Verpackung in den örtlichen Sammelstelle oder wenden Sie sich entsprechenden Recyclingbehältern.
- Page 32 211626863-A-382020...
Need help?
Do you have a question about the KXAK82FR and is the answer not in the manual?
Questions and answers