
Related Manuals for EGO BC1500E-F


Summary of Contents for EGO BC1500E-F
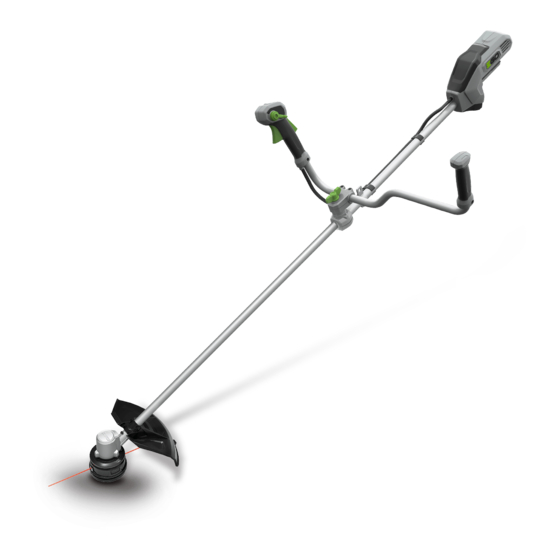
- Page 1 REPAIR GUIDELINE Bike Handle Line Trimmer _BC1500E-F Version:1 : Issue Data 12/02/2016...
-
Page 2: Table Of Contents
Table of Contents BC1500E-F Bike Handle Line Trimmer Contents Page Troubleshooting Tool list Part1: Replacing the Connecting Tube 5-12 Part2: Replacing the Motor Assembly 13-34 Part3: Replacing the PCB Assembly 35-48... -
Page 3: Troubleshooting
Troubleshooting BC1500E-F Bike Handle Line Trimmer Fault Problem Possible Cause Test & Solution Position Replace the cutting line. (e.g. 2.4mm Not feeding line Poor cutting line Trimmer line nylon line) Lower Support of the lower housing Unable to wind up line... -
Page 4: Tool List
Tool List For Repair BC1500E-F Bike Handle Line Trimmer Tool List SPEC Remark Phillips Socket wrench 14mm Torx screwdriver T-15 Hex wrench Electric soldering iron Heat gun Heat shrinkable sleeves Scissors To remove the shrinkable sleeve... -
Page 5: Part1: Replacing The Connecting Tube
Part 1: Replacing the Connecting Tube... - Page 6 Replacing the Connecting Tube BC1500E-F Bike Handle Line Trimmer 1. Stop the motor and remove the battery pack from the line trimmer. 2. Rotate the wing bolt counterclockwise to separate the connecting tube base set from the shaft base set and put the connecting tube aside.
- Page 7 Replacing the Connecting Tube BC1500E-F Bike Handle Line Trimmer Remove the label on the right handle housing to expose the screw which is beneath it and continue to loosen the 4 screws and 1 bolt on the right handle housing to open it.
- Page 8 Replacing the Connecting Tube BC1500E-F Bike Handle Line Trimmer 4. Loosen the two screws on the left handle housing set to separate it from the connecting tube. NOTICE: if the left handle housing set is broken or worn replace it with a new one.
- Page 9 Replacing the Connecting Tube BC1500E-F Bike Handle Line Trimmer 5. Loosen screws on the shaft base set and connecting tube base set and disassemble them. Replace the connecting tube with a new one. NOTICE: If the connecting tube base set or the shaft base set is worn or broken replace it with a new one.
- Page 10 Replacing the Connecting Tube BC1500E-F Bike Handle Line Trimmer 6. Assemble the connecting tube base set and connecting tube as well as assembling the shaft base set and shaft with screws. 7. Align the slot on the connecting tube with the rib on the left handle housing as well as aligning the hole on the connecting tube with the pole on the left handle housing.
- Page 11 Replacing the Connecting Tube BC1500E-F Bike Handle Line Trimmer 8. Align the slot on the connecting tube with the rib on the housing, as well as aligning the location pole on the housing with the hole on the connecting tube to mount the right handle housing set onto the connecting tube.
- Page 12 Replacing the Connecting Tube BC1500E-F Bike Handle Line Trimmer 10. Rotate the wing bolt to connect the shaft base set with the connecting tube base set.
-
Page 13: Part2: Replacing The Motor Assembly
Part 2: Replacing the Motor Assembly... - Page 14 Replacing the Motor Assembly BC1500E-F Bike Handle Line Trimmer 1. Stop the motor and remove the battery from the string trimmer. 2. Loosen the two hex bolts in the guard with the M5 hex wrench, remove the guard from the shaft.
- Page 15 Replacing the Motor Assembly BC1500E-F Bike Handle Line Trimmer Press the release tabs on the lower housing assembly to remove the lower housing assembly. Release tab Description Part Number Qty. Lower Housing 2824808001 Assembly...
- Page 16 Replacing the Motor Assembly BC1500E-F Bike Handle Line Trimmer 4. Pull the spring out of the motor shaft .
- Page 17 Replacing the Motor Assembly BC1500E-F Bike Handle Line Trimmer 5. Rotate the nut counterclockwise to remove the nut.
- Page 18 Replacing the Motor Assembly BC1500E-F Bike Handle Line Trimmer 6. Pull washer out of the motor shaft.
- Page 19 Replacing the Motor Assembly BC1500E-F Bike Handle Line Trimmer 7. Pull the upper housing assembly out of the motor shaft and then pull the outer flange out of the motor shaft.
- Page 20 Replacing the Motor Assembly BC1500E-F Bike Handle Line Trimmer 8. Loosen the three screws on the shield cover, remove the shield cover from the motor assembly. Shield cover Washer Screw Description Part Number Qty. Shield cover 3127655001 Screw 5610059007 washer...
- Page 21 Replacing the Motor Assembly BC1500E-F Bike Handle Line Trimmer 9. Loosen the 7 screws in the rear housing. Remove the housing, upper cover and lower cover. Rear housing Lower cover Description Part Number Qty. Upper cover Rear housing 2824012001 Lower cover...
- Page 22 Replacing the Motor Assembly BC1500E Bike Handle Line Trimmer 10. Loosen and remove the locking screw on the fixed ring to separate the shaft from the housing. Move the shaft to the side and pull out the three cables wrapped with heat-shrinkable sleeves.
- Page 23 Replacing the Motor Assembly BC1500E-F Bike Handle Line Trimmer 11. Take out the motor assembly from the motor housing. 12. Remove the heat-shrinkable sleeves from the cables and disconnect the cables. Motor housing Motor assembly Motor assembly...
- Page 24 Replacing the Motor Assembly BC1500E-F Bike Handle Line Trimmer 13. Replace the damaged motor with a new one. 14. The motor housing can be replaced as well if it is broken or worn. 15. Place new heat-shrinkable sleeves through the cables. Connect the cables with electric soldering iron.
- Page 25 Replacing the Motor Assembly BC1500E-F Bike Handle Line Trimmer 16. Move the heat-shrinkable sleeves to cover the soldering points and use a hot air gun to shrink the sleeves. 17. Position the motor assembly into the motor housing; mount the shield cover on the motor assembly and lock it with three screws and washers.
- Page 26 Replacing the Motor Assembly BC1500E-F Bike Handle Line Trimmer 18. Put the outer flange onto the shaft and then put the upper housing assembly onto the shaft.
- Page 27 Replacing the Motor Assembly BC1500E-F Bike Handle Line Trimmer 19. Mount the washer onto the motor shaft.
- Page 28 Replacing the Motor Assembly BC1500E-F Bike Handle Line Trimmer 20. Mount the nut onto the motor shaft and then rotate the nut clockwise with socket wrench.
- Page 29 Replacing the Motor Assembly BC1500E-F Bike Handle Line Trimmer 21. Mount the spring onto its position.
- Page 30 Replacing the Motor Assembly BC1500E-F Bike Handle Line Trimmer 22. Align the tabs on the lower housing assembly with the holes on the upper housing assembly to mount the lower housing assembly onto the upper housing assembly.
- Page 31 Replacing the Motor Assembly BC1500E-F Bike Handle Line Trimmer 23. Rotate the lower housing assembly counterclockwise as necessary to align the mark “LOAD” on the lower housing assembly with the eyelets on the upper housing assembly.
- Page 32 Replacing the Motor Assembly BC1500E-F Bike Handle Line Trimmer 24. Cut one piece of trimmer line 16ft (5m) long. Insert the line into the eyelet on the upper housing assembly. Push until the end of the line comes out of the other side of the upper housing assembly.
- Page 33 Replacing the Motor Assembly BC1500E-F Bike Handle Line Trimmer 26. Put the cables into its groove and assemble shaft with the rear housing with fixed ring. Fixed ring Screw Plain washer Description Part Number Qty. Fixed ring 3705178001 Screw 5610032004...
- Page 34 Replacing the Motor Assembly BC1500E-F Bike Handle Line Trimmer 27. Mount the lower cover and upper cover onto the rear housing and assemble the rear housing with screws. Lower cover Upper cover Description Part Number Qty. Rear housing 2824012001 Lower cover...
-
Page 35: Part3: Replacing The Pcb Assembly
Part 3: Replacing the PCB Assembly... - Page 36 Replacing the PCB Assembly BC1500E-F Bike Handle Line Trimmer 1. Disassemble the right handle housing set as shown in “Replacing the Connecting Tube” section.
- Page 37 Replacing the PCB Assembly BC1500E-F Bike Handle Line Trimmer Disassemble the rear housing as shown in the “Replacing the motor” section, and then loosen the locking screw on the fixed ring to separate the shaft from the housing. Plain washer...
- Page 38 Replacing the PCB Assembly BC1500E-F Bike Handle Line Trimmer 3. Remove the heat-shrinkable sleeves from the connectors with a scissor. 4. Move the transparent sleeves aside and pull the connectors to separate. PULL Heat-shrinkable Transparent sleeve sleeve...
- Page 39 Replacing the PCB Assembly BC1500E-F Bike Handle Line Trimmer Remove the PCB assembly from the housing and replace it with a new one. PCB assembly Description Part Number Qty. PCB assembly 2830211001...
- Page 40 Replacing the PCB Assembly BC1500E-F Bike Handle Line Trimmer Place new heat-shrinkable sleeves over the connectors. Plug the three connectors, ensuring they are fully inserted. Correct direction: blue to green, white to white, black to black. Move the transparent sleeves and the heat-shrinkable sleeves to cover the connectors and use heat gun to shrink the sleeves.
- Page 41 Replacing the PCB Assembly BC1500E-F Bike Handle Line Trimmer 9. Align the hole in the shaft with the pole on the housing and then fasten the fixed ring with the screw and the washer to connect the shaft with the rear housing.
- Page 42 Replacing the PCB Assembly BC1500E-F Bike Handle Line Trimmer Place the wires in the housing grooves in sequence. a) Align the thin cables (green, white and black) into the bottom of the housing groove through channel 1. b) Align the two red cables into the groove through channel 1.
- Page 43 Replacing the PCB Assembly BC1500E-F Bike Handle Line Trimmer Align the cables connected with the motor through channel 2. Channel 2...
- Page 44 Replacing the PCB Assembly BC1500E-F Bike Handle Line Trimmer 11. Position the PCB assembly into the housing. 12. The battery release button, battery ejection lever , latch or springs can be replaced when the rear handle housing is open. Battery ejection lever...
- Page 45 Replacing the PCB Assembly BC1500E-F Bike Handle Line Trimmer Assemble the rear housing.
- Page 46 Replacing the PCB Assembly BC1500E-F Bike Handle Line Trimmer 14. Align cables and position parts into the right handle housing. a) Align the hole in the switch trigger with the pole on the right handle housing. b) Place the switch in position and align the thin wires as shown.
- Page 47 Replacing the PCB Assembly BC1500E-F Bike Handle Line Trimmer c) Place the interlock switch into the correct position aligning the two red cables one by one. d) Place the interlock trigger into the right handle housing. NOTICE: if the switch trigger or interlock trigger is broken or worn, replace it with a new one.
- Page 48 Replacing the PCB Assembly BC1500E-F Bike Handle Line Trimmer 15. Assemble the right handle housing set as shown in the “Replacing the Connecting Tube” section. THE END...
Need help?
Do you have a question about the BC1500E-F and is the answer not in the manual?
Questions and answers