Advertisement
Quick Links
Advertisement

Related Manuals for EGO BAX1500


Summary of Contents for EGO BAX1500
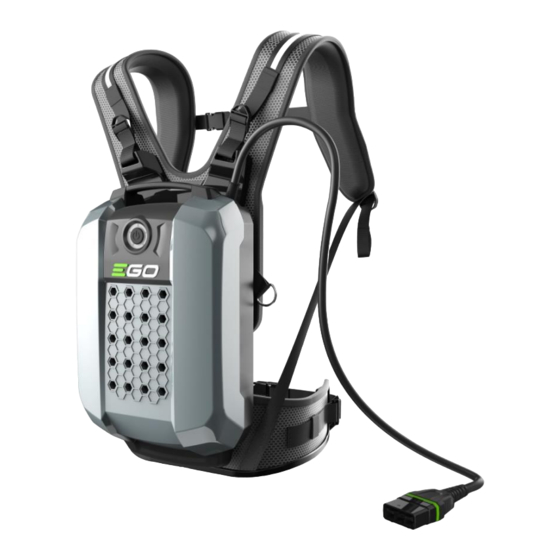
- Page 1 REPAIR GUIDELINE Backpack Battery_BAX1500 Version: 1 Issue Date: 2018/03/16...
-
Page 2: Table Of Contents
G1 Measurement BAX1500 Backpack Battery Contents Page Maintenance equipment Replace external parts (Without removing housing cover) 5-13 Replace the PCBA 14-18 Replace the housing cover 19-27 Assembly flow chart 28-42... - Page 3 BAX1500 Backpack Battery DANGER!: You must follow the steps described in this manual very strictly. Any deviations from the described actions may cause a fire or an explosion. It may lead to serious injury or even death.
-
Page 4: Maintenance Equipment
Maintenance Equipment BAX1500 Backpack Battery Notice: Make sure you have got all the recommended equipment before proceeding with the repair. -
Page 5: Replace External Parts (Without Removing Housing Cover)
Replace The External Parts (Without Removing Housing Cover) 1. Remove the backpack harness from battery pack referring to user manual. Battery pack Backpack harness... - Page 6 Replace The External Parts (Without Removing Housing Cover) 2. Loosen the six screws and remove the belt mounting plate from the lower housing. If the belt mounting plate is damaged, replace with a new one. Belt mounting plate Screw Description Part Number Screw 5610329001...
- Page 7 Replace The External Parts (Without Removing Housing Cover) 3. Loosen the ten screws and remove the harness mounting plate from the lower housing. If the harness mounting plate is damaged, replace with a new one. Lower housing Harness mounting plate Screw Description Part Number...
- Page 8 Replace The External Parts (Without Removing Housing Cover) 4. Loosen the two screws #2 and remove the leaf spring from the lower housing. If the leaf spring is damaged, replace with a new one. Leaf spring Description Part Number Screw #2 5610250001 Leaf Spring 3706275001...
- Page 9 Replace The External Parts (Without Removing Housing Cover) 5. Loosen the two screws and remove fuse cover and seal ring #1 from the battery pack. If they are damaged, replace with a new one. Fuse cover Screw Description Part Number Seal ring #1 Screw 5610329001...
- Page 10 Replace The External Parts (Without Removing Housing Cover) 6. Take out the fuse from the mounting groove directly. Measure the fuse referring to “G1 Measurement”, and if the fuse is damaged, replace with a new one. Fuse Fuse Description Part Number Fuse 4970316001...
- Page 11 Replace The External Parts (Without Removing Housing Cover) 7. Loosen the seven screws and remove service cover and seal ring #2 from the battery. If they are damaged, replace with a new one. Screw Service cover Seal ring #2 Description Part Number Screw 5610329001...
- Page 12 Replace The External Parts (Without Removing Housing Cover) 8. Disconnect the two connectors and remove the cable. Measure the cable referring to “G1 Measurement”, and if the cable is damaged, replace with a new one. Seal ring #3 Cable Connectors Notice: The green seal ring #3 in the cable can be replaced independently.
- Page 13 Replace The External Parts (Without Removing Housing Cover) 9. The two rubber covers can be replaced with new ones if necessary. Left rubber cover Right rubber cover Protective Film Rubber cover Description Part Number Right Rubber Cover 3128880001 Left Rubber Cover 3128881001 Protective Film 3706274001...
-
Page 14: Replace The Pcba
Replace The PCBA BAX1500 Backpack Battery 1. Referring to “Replace The Housing Cover”, remove upper cover from the battery pack. Notice: Before you remove the upper cover, wear your antistatic gloves or antistatic wrist strap or other antistatic device. - Page 15 Replace The PCBA BAX1500 Backpack Battery in sequence 2. Remove the three screws with washer insulate the joint with insulating tape to prevent accidental electrical risks (See next slide). Description Part Number Screw with Washer 5620618001...
- Page 16 Replace The PCBA BAX1500 Backpack Battery Joint Insulating tape...
- Page 17 Replace The PCBA BAX1500 Backpack Battery 3. Disconnect the 5 connectors in sequence (4-8).
- Page 18 Replace The PCBA BAX1500 Backpack Battery 4. Remove the six screws to separate the PCBA from the battery pack. If it is damaged, replace with a new one. PCBA Screw Description Part Number Screw 5610283001 PCBA 2830248001...
-
Page 19: Replace The Housing Cover
Replace The Housing cover BAX1500 Backpack Battery 1. Referring to “Replace the external parts”, remove the cable, leaf spring, fuse and belt mounting plate from the battery pack. - Page 20 Replace The Housing cover BAX1500 Backpack Battery 2. Remove the 12 screws from the lower housing and separate the upper housing from the battery pack. WARNING: Take out all the screws from its mounting groove and take away from the cell assembly.
- Page 21 Replace The Housing cover BAX1500 Backpack Battery 3. Loosen the two screws and replace the handle assembly if any part is damaged. Left guide bush Right guide bush Screw Handle assembly Description Part Number Screw 5620617001 Left Guide Bush 2825131001...
- Page 22 Replace The Housing cover BAX1500 Backpack Battery 4. Referring to “Replace the PCBA”, remove the PCBA from the cell assembly. PCBA...
- Page 23 Replace The Housing cover BAX1500 Backpack Battery 5. Remove the two screws to disconnect the cell assembly from lower housing. Cell assembly Description Part Number Screw 5610329001...
- Page 24 Replace The Housing cover BAX1500 Backpack Battery 6. Take out the cell assembly from the lower housing and put the cell assembly on a clean flat surface. If the cell assembly is broken, it is recommended to buy a new battery pack.
- Page 25 Replace The Housing cover BAX1500 Backpack Battery 7. If any wire harness is broken, remove it from the cell assembly and replace with a new one. Cell assembly Wire harness #1 Wire harness assembly Description Part Number Wire Harness #1...
- Page 26 Replace The Housing cover BAX1500 Backpack Battery 8. Remove the two screws and take out the USB/DC port. If it is damaged, replace with a new one. USB/DC port Description Part Number Screw 5610330001 USB/DC Port 2830251001...
- Page 27 Replace The Housing cover BAX1500 Backpack Battery 9. Remove the magnetic ring from the wire harness and separate the wire harness from the lower housing. If they are damaged, replace with a new one. Wire harness Magnetic ring Description Part Number...
-
Page 28: Assembly Flow Chart
Assembly Flow Chart BAX1500 Backpack Battery... - Page 29 Assembly Flow Chart BAX1500 Backpack Battery...
- Page 30 Assembly Flow Chart BAX1500 Backpack Battery...
- Page 31 Assembly Flow Chart BAX1500 Backpack Battery...
- Page 32 Assembly Flow Chart BAX1500 Backpack Battery WARNING: You must connect the wire to the PCBA in sequence.
- Page 33 Assembly Flow Chart BAX1500 Backpack Battery WARNING: You must connect the wire to the PCBA in sequence.
- Page 34 Assembly Flow Chart BAX1500 Backpack Battery WARNING: You must connect the wire to the PCBA in sequence.
- Page 35 Assembly Flow Chart BAX1500 Backpack Battery WARNING: You must connect the wire to the PCBA in sequence.
- Page 36 Assembly Flow Chart BAX1500 Backpack Battery...
- Page 37 Assembly Flow Chart BAX1500 Backpack Battery...
- Page 38 Assembly Flow Chart BAX1500 Backpack Battery...
- Page 39 Assembly Flow Chart BAX1500 Backpack Battery...
- Page 40 Assembly Flow Chart BAX1500 Backpack Battery...
- Page 41 Assembly Flow Chart BAX1500 Backpack Battery...
- Page 42 Assembly Flow Chart BAX1500 Backpack Battery Upon continuous product improvement, please using the latest SBOM & Parts list to order spare parts if necessary.
Need help?
Do you have a question about the BAX1500 and is the answer not in the manual?
Questions and answers