Advertisement
Available languages
Available languages
Good Earth Lighting
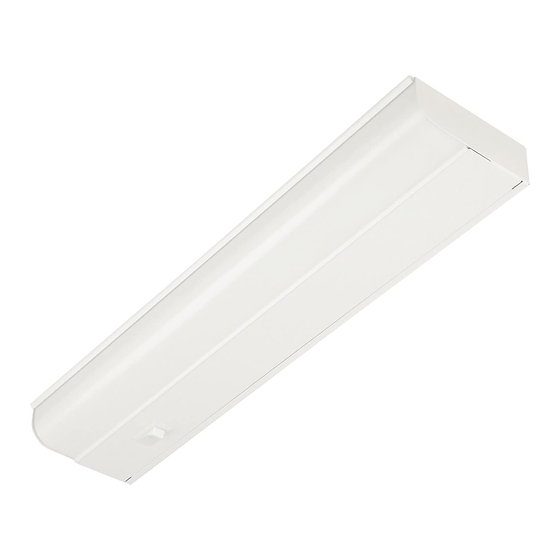
Direct Wire Fluorescent Under Cabinet Light Fixture
Lampe fluorescente à raccordement fixe luminaire pour
dessous de meuble
(Page 4)
Fluorescente de cableado directo accesorio de iluminación
para debajo de gabinetes
To Begin/Pour commencer/Para comenzar
WARNING: Review important safety instructions before installation. Check to
make sure you have the following:
AVERTISSEMENT: lisez ces instructions importantes relatives à la sécurité
avant l'installation. Vérifiez que vous disposez des équipements suivants:
ADVERTENCIA: Revise las instrucciones de seguridad importantes antes de
realizar la instalación. Asegúrese de que tiene lo siguiente:
Key Slot Mounting Holes
Trous de montage en forme de serrure
Agujeros de montaje de ranura de bocallave
Wire Compartment Locking Tab
Languette de verrouillage du compartiment des fils
Lengüeta de fijación del compartimiento de cables
Ballast
Ballast
Equilibrador
Hardware Kit
* Actual hardware kit may differ from illustration
Kit de visserie
* Le matériel réel peut être différent de celui qui est illustré
Juego de tornillería
* La tornillería real puede diferir de la que se muestra en la ilustración
Required/Requis/Se necesitan
Installation Time: 45 Minutes
Durée de l'installation : 45 minutes
Tiempo de instalación: 45 minutos
Flathead Screwdriver
Tournevis à lame plate
Destornillador de cabeza plana
Phillips Screwdriver
Tournevis à pointe cruciforme
Destornillador en cruz
Safety Glasses
Lunettes de sécurité
Anteoios de seguridad
Soft Cloth
Tissu doux
Paño suave
Model: G9318D-T8-WH-I,
G9124D-T8-WH-I, G9336-T8-WH-I
Modéle: G9318D-T8-WH-I,
G9124D-T8-WH-I, G9336-T8-WH-I
®
Modelo: G9318D-T8-WH-I,
G9124D-T8-WH-I, G9336-T8-WH-I
(Página 9)
Wire Compartment
Compartiment des fils
Compartimento de cables
Bulb Socket
Douille d'ampoule
Portalámara
Bulb
Diffuser
Ampoule
Diffuseur
Bombilla
Difusor
Wire Cutters
Coupe-fil
Alicates para
cortar alambre
Wire Strippers
Outil à dénuder
Pelacables
Pliers
Tenailles
Alicates
Electrical Tape
Ruban isolant
Cinta aislante
- 1 -
english
Preparation
You will need a standard trade size connector for a flexible whip or NM cable.
DO NOT USE THIS FIXTURE WITH A DIMMING CIRCUIT. If you presently have dimmer controls, you will
need to remove them, and replace them with regular electrical switches. If you have a three way dimmer,
(Page 1)
you will have to replace it with a regular three way switch. If you are unfamiliar with electrical
installations, we recommend you have a qualified electrician do your installation.
1
2
IMPORTANT: Fluorescent bulbs are included with your Good Earth Lighting fixture
protect the bulb during shipment, your bulb(s) may be packed in a separate area of the packing
materials. Additionally, your bulbs may already be placed into their respective sockets, but may
have a protective corrugated support collar slipped over the bulb. Do NOT operate your fixture with
this corrugated support collar in place. You can either cut this collar off or remove the bulb from the
sockets, and slide the support collar off the bulb. Discard the corrugated support collar. You may
want to put the bulb(s) in a safe place until your assembly is complete.
Switch
Interrupteur
Fixture Installation
Interruptor
You will need a standard trade size connector for a flexible whip or NM cable.
1
Fig. 1
2
3
Fig. 3
Fig. 3
4
5
6
normal installation.
7
knock-out did not break free, use pliers and bend it back and forth until it snaps off.
WARNING: Shut off power at the circuit breaker or fuse panel
Fig. 1
before removing the old fixture (Fig. 1).
OFF
Remove the old fixture. Make yourself a sketch of how the fixture is
Fig. 2
wired (index the sketch by wire color) or mark the wires
themselves with masking tape and a pencil so you will know how
to connect the wires to your new fixture (Fig. 2). If several wires
are involved or if the wiring seems more complicated and perhaps
even includes a red wire, take note of the connections before you
disconnect them.
Remove the diffuser by pulling back and up on the top edge
of the diffuser using your fingertips (Fig. 1).
Remove the bulb from the fixture by placing your thumbs on
the metal ends of the bulb. While applying slight pressure
on the bulb, roll the bulb toward you until the contact pins
Fig. 2
on the ends of the bulb disengage from the socket. Pull the
bulb straight out from the socket and set aside during
mounting (Fig. 2).
Place fixture up to mounting surface and mark position of the
narrow end of the keyslot holes on the mounting surface
with a pencil (Fig. 3). The screw hole locations must be exact
for the fixture to mount properly. Using a small drill or nail,
make two small starter holes at the marked locations.
WALL STUD MOUNTING
For mounting over the wall stud, drill two small pilot holes for the
screws (Fig. 4). Screw both wood screws into the wooden studs.
Approximately 1 /2 in. of the screw should still be protruding from
the wall.
Fig. 4
DRYWALL MOUNTING
For mounting into drywall, drill 3 /16 in. holes for the plastic wall
anchors. Insert the plastic wall anchors into the proper holes and
tap them into place so they are flush with the surface of your
drywall. Screw both screws into the plastic anchors (Fig. 5).
Approximately 1 /2 in. of the screw should still be protruding from
the wall.
Fig. 5
Place fingertips above the locking tab on
the face of the chassis cover, press on the
cover and lift up (Fig. 6 & Fig. 7). NOTE: You
may have to disengage each one
individually before it can freely be removed.
Once the wire compartment is free, remove
Fig. 7
it and set it aside. NOTE: Inside you will find
Fig. 6
the hardware kit that contains all the hardware necessary for a
Once you have determined the position the fixture will be
mounted, mark the corresponding knock-out closest to the
insulated multi-wire end and remove it (Fig. 8). CAREFULLY
REMOVE THE KNOCK-OUT BY HAMMERING A FLATHEAD
Fig. 8
SCREWDRIVER OR PUNCH UNTIL THE SURFACE BREAKS. If the
- 2 -
. In order to
®
Advertisement
Table of Contents

Related Manuals for Good Earth Lighting G9318D-T8-WH-I


Summary of Contents for Good Earth Lighting G9318D-T8-WH-I
- Page 1 AVERTISSEMENT: lisez ces instructions importantes relatives à la sécurité IMPORTANT: Fluorescent bulbs are included with your Good Earth Lighting fixture . In order to ® avant l'installation. Vérifiez que vous disposez des équipements suivants: protect the bulb during shipment, your bulb(s) may be packed in a separate area of the packing materials.
-
Page 2: Troubleshooting Guide
In the unlikely event the Good Earth Lighting fixture fails to perform as it was designed to do within one (1) year from date of purchase, we will repair or replace (at our option) the unit in the original Fig. -
Page 3: Installation Du Luminaire
IMPORTANT : des ampoules fluorescentes sont jointes à votre luminaire Good Earth Lighting®. bien assujetti (Fig. 10). Laissez suffisamment de longueur de fil Afin de protéger l'ampoule pendant l'expédition, celle-ci peut avoir été conditionnée dans une pour permettre de réaliser la connexion. -
Page 4: Dépannage
1-800-291-8838 entre 8 h 30 et 17 h 00, Heure centrale, du lundi au vendredi. Au cas peu probable où le luminaire Good Earth Lighting ne fonctionnerait pas comme prévu Ne remplacez l'ampoule que par une ampoule fluorescente linéaire : N˚ G9318D-T8-WH-I, F15T8; N˚... - Page 5 Reemplace la bombilla únicamente con una bombilla fluorescente lineal: extremo roscado (desde el exterior del accesorio para Bombilla G9318D-T8-WH-I No. F15T8; bombilla G9124D-T8-WH-I No. F18T8; bombilla iluminación) a través del destapadero (Fig. 9). Sujete G9336D-T8-WH-I No. F25T8. No la reemplace con una bombilla fluorescente de otro vatiaje. Estas firmemente el acoplamiento de cable al chasis del aplique de bombillas se pueden obtener en un centro local de artículos para el hogar y en la mayoría de las...
-
Page 6: Guía De Resolución De Problemas
EE.UU., de lunes a viernes. En el poco probable caso de que el aplique de luz de Good Earth Lighting, Inc., no funcione en la forma prevista dentro del plazo de un (1) año a partir de la fecha de compra, repararemos o reemplazaremos la unidad (a nuestra opción) en el color y el estilo...
Need help?
Do you have a question about the G9318D-T8-WH-I and is the answer not in the manual?
Questions and answers
I need for replacement of lens of #GU93180D-T8WHI under cabinet Light Fixtures
You can find a replacement lens for the Good Earth Lighting G9318D-T8-WH-I under cabinet light fixture by referring to the hardware kit or replacement parts list in the manual. Keep the guide handy for ordering replacement parts. If you need assistance or are missing a part, you can contact the Customer Care Center at 1-800-291-8838.
This answer is automatically generated
We have Under Cabinet Light Fixtures , Lens is Broken , Need only Lenths Model No Gu93180D-T8WHI