Table of Contents
Advertisement
Quick Links
Advertisement
Table of Contents

Related Manuals for Zmorph i500


Summary of Contents for Zmorph i500
- Page 1 ZMORPH i500 MANUAL GUIDE zmorph3d.com...
-
Page 2: Table Of Contents
3.3 Claim processing period ..................13 3.4 Zmorph’s liability ..................... 13 4. Certificates ........................14 5. What is Zmorph i500 ....................15 6. How to use your Zmorph i500 printer ............... 16 7. Box content ........................17 8. Machine specification ....................18 8.1 Overview ........................18 8.2 Specification ...................... - Page 3 Table of content 9. Setting up Zmorph i500 ....................25 9.1 Location requirements .....................25 9.2 Unboxing ........................26 9.3 First use ........................28 9.4 Safety features removal ..................29 9.5 Assembling air filtration system ................30 9.6 Assembling the garbage collector ................31 10. Maintenance ........................33 10.1 Communication and File Delivery .................
- Page 4 13. Firmware upgrades ......................62 13.1 General informations .....................62 13.2 Updating firmware ....................63 14. Help and support ......................65 14.1 Support request ......................65 14.2 Troubleshooting ..................... 66 14.2 Handy resources ....................67 Product Manual - ZMORPH i500 back to table of content >>...
-
Page 5: Introduction
2.1 Markings contained in the instructions guide and on the device This manual contains warnings and safety information for your ZMorph i500 product. The manual also indicates situations to which special attention should be paid, and warnings about misuse or neglect of the device. - Page 6 Manual safety and operating instructions Avoid unsafe operation or maintenance CAUTION Moving parts hazard - Keep away from moving fan blades. MOVING FAN BLADES Keep fingers clear of fan. Product Manual - ZMORPH i500 back to table of content >>...
-
Page 7: General Safety Information
▪ Due to their size and specificity, Zmorph devices are not intended for use by children under 14 years of age and persons with reduced manual, motor and psychomotor skills. If the device is operated by handicapped or elderly people, the Manufacturer recommends using assistance or supervision of appropriately trained personnel. -
Page 8: Occupational Hygiene
Handle the sharp accessories and tools included with the kit with special caution. 2.4 Electrical safety and risk Zmorph i500 devices have been tested to comply with the Low Voltage Directive. In order to ensure max- imum safety of use, including protection against short circuits, overloads, overvoltages and overheating of the product, the following provisions must be observed: ▪... -
Page 9: Safety And Mechanical Risks
2.7 Instructions for safe storage and transport Recommendations for storage ▪ Store Zmorph i500 devices at -10 to 40°C. ▪ The storage place should be free from moisture and extreme weather conditions. ▪... -
Page 10: Electromagnetic Compatibility (Emc)
2.8 Electromagnetic compatibility (EMC) Every Zmorph device is electromagnetically compatible in accordance with the EMC directive. It was tested in laboratory conditions meeting the standards of the European certificate of conformity. Its operation meets the following conditions in accordance with the EMC Directive: ▪... -
Page 11: Manufacturer's Warranty And Liability
Warranty and liability 3. Manufacturer’s warranty and liability Zmorph i500 3D Printer is designed to be reliable. In case of technical difficulty with any parts, it can be easily removed and replaced. 3.1 Scope of the warranty 3.1.1 Zmorph S.A. with its registered office in Wrocław, 53-238 Wrocław, ul. Aleksandra Ostrowskiego 9, Poland (“Zmorph”) provides a one-year warranty for its 3D printers. -
Page 12: Acceptance Of Warranty Claim
Customer’s expense to the Zmorph registered office or a service point indicated by Zmorph, and in the case of export shipments, the Customer should first use the services of a courier company indicated by Zmorph. -
Page 13: Claim Processing Period
Zmorph is not required to modernize or modify the existing products after launching their new versions. 3.4.2 Zmorph shall not be liable for any damages incurred by the Buyer due to the defect of the product, especially damages related to damage of other devices, loss of potential benefits or cost of replacement of the product. -
Page 14: Certificates
Certificates 4. Certificates Product Manual - ZMORPH i500 back to table of content >>... -
Page 15: What Is Zmorph I500
File delivery is available through a flash drive or via LAN and WiFi. The Voxelizer software is a dedicated software to work with the Zmorph i500 machine which is available on the manufacturer’s website: zmorph3d.com/Voxelizer It allows to optimize models using filters and support structures. -
Page 16: How To Use Your Zmorph I500 Printer
6. How to use your Zmorph i500 printer Working with Zmorph i500 starts by preparing a 3D model in a modeling software that supports files in one of the standard formats .stl, .step or delivering a finished model acquired from external sources. -
Page 17: Box Content
Wi-fi module filament spools Dust filter (G4) HEPA/Carbon filter Zmorph i500 Adhesive agent Spatula Garbage collector Filter socket Ethernet cable Carrying straps Power cable USB flash drive Product Manual - ZMORPH i500 back to table of content >>... -
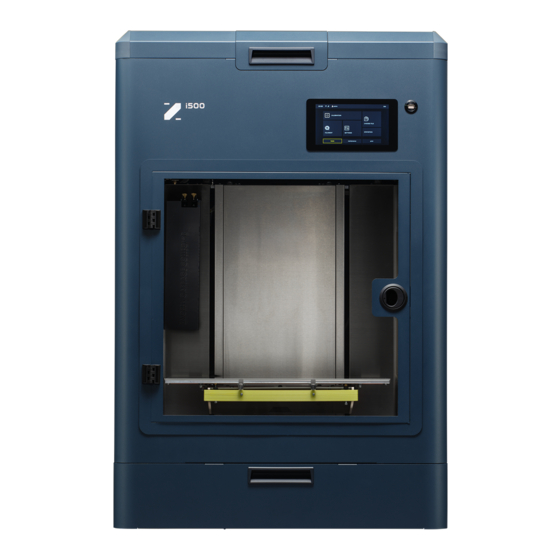
Page 18: Machine Specification
Machine specification 8. Machine specification 8.1 Overview Front doors Top doors LCD screen USB Slot Heated bed Automatic Filament Loading System Filaments spoolholders Material station G4 Input Air Filtration Product Manual - ZMORPH i500 back to table of content >>... - Page 19 Machine specification HEPA/Carbon Output Air Filtration Ethernet slot Power button USB Slot Power socket Product Manual - ZMORPH i500 back to table of content >>...
-
Page 20: Specification
10 - 110 [mm/s] Travel speed 350 [mm/s] Electrical parameters 110 [VAC] ~ 9-10 [A] 50/60 [Hz] Input current 240 [VAC] ~ 5 [A] 50/60 [Hz] Maximum power consumption 1000 [W] Product Manual - ZMORPH i500 back to table of content >>... -
Page 21: Components
Y axis motor and linear rail as guiding element. Used for movement of Zmorph Dual Drive Dual Extruder in X-axis. Must be periodically lubricated to ensure a long life of the machine. X axis... - Page 22 Iglidur ® trapezoidal nut. Guiding elements are two linear rails. Used for movement of heated bed in Zmorph i500 machine. Must be periodically lubricated to ensure a long life of the machine. Materials Station...
- Page 23 Zmorph Dual Drive Dual Extruder has two separate hotends, it can be easily disconnected and replaced. As deafult we have on left Zmorph Build Hotend with 0.4 mm nozzle and on right a Zmorph Support Hotend with 0.6 mm nozzle...
-
Page 24: List Of 3D Printing Materials
Zmorph Dual Drive Dual Extruder properly. ▪ Air Flow System – Zmorph i500 is equipped in two filter systems, G4 Input Air Filtration and HEPA/Carbon Output Air Filtration. ▪... -
Page 25: Setting Up Zmorph I500
Do not cover the machine with any materials during operation. ▪ The machine should not be exposed to moisture. ▪ The electrical installation of Zmorph i500 requires it to be connected to a grounded wall outlet. ▪ Do not use extension cords. ▪... -
Page 26: Unboxing
The cardboard can be easily opened on one side, unhook it and take it off the machine. Take off the top foam tray and unfasten the Velcro band that binds the foam corners and the carrying straps. Product Manual - ZMORPH i500 back to table of content >>... - Page 27 The machine should be stable into warmer areas. Condensation on the printer on the flat surface. If necessary, indicates the need for an acclimation period until the condensation disappears. adjust the leveling legs. Product Manual - ZMORPH i500 back to table of content >>...
-
Page 28: First Use
During the first run log in to the machine with the data provided in the Quick Start Guide. The Quick Start Guide is included with the machine box. Product Manual - ZMORPH i500 back to table of content >>... -
Page 29: Safety Features Removal
Open the front door and remove the two fasteners from inside of the machine. Once you remove the belt fasteners go to the SETTINGS menu located on the HOME screen. Then open the UTILITIES menu. Product Manual - ZMORPH i500 back to table of content >>... -
Page 30: Assembling Air Filtration System
Put the filter holders in appropriate sockets on the machine. NOTE For more informations check the signs in the filter sockets. Dust filter (G4) Product Manual - ZMORPH i500 back to table of content >>... -
Page 31: Assembling The Garbage Collector
The machine may ask you to home the Z-axis first, it will show the warning on the LCD screen. Product Manual - ZMORPH i500 back to table of content >>... - Page 32 Make sure the worktable is not blocking the accesibility to the garbage collector holder by moving it upwards or downwards Mount the garbage collector on the holder, the magnets should snap it on place. Product Manual - ZMORPH i500 back to table of content >>...
-
Page 33: Maintenance
Save a file you want to print to on an USB flash drive. Insert the USB flash drive into the USB slot near the right top corner of the LCD screen. Connecting the machine via Ethernet Connect the Ethernet cable to the Zmorph i500. Machine will automatically establish 14:30 user_name... - Page 34 Maintenance Connecting the machine via Wi-Fi Connect the Wi-Fi module to the rear USB port. The Wi-Fi module is included with the Zmorph i500 accessories. The Wi-Fi module LED will turn green when its active. To connect the Zmorph i500 with the Wi-Fi...
-
Page 35: Loading The Filament
Prepare the material. The spools are included in the package. Take out the filament roll from the plastic foil, remove the moisture absorber. You can find out what kind of filament you own by looking at the sticker on the filament roll. Zmorph i500 package comes with PET and BVOH filaments. -
Page 36: Removing The Filament
10.3 Removing the filament Choose the „FILAMENT” from the 14:30 user_name ready to use main menu on LCD screen. Calibration CUWWSE FILE STATISTICS FILAMENT SETTINGS home maintenance print Product Manual - ZMORPH i500 back to table of content >>... - Page 37 After you choose the proper extruder, the three buttons will show (replace, load, unload). Choose load button and follow the instructions on the LCD screen, machine will guide you in next steps. Product Manual - ZMORPH i500 back to table of content >>...
-
Page 38: Calibration
USB slot. Before the operation please make sure the bed is empty and the nozzle is clean. 3. On the HOME screen go to the CHOOSE FILE menu and select “USB memory”. Product Manual - ZMORPH i500 back to table of content >>... - Page 39 9. Finally the Extruder will end on the rear right corner. Check the “Z probe” base value if it is the same. If it has changed, then start the procedure once more, the difference between measuring points shouldn’t be bigger than 0.05mm. Product Manual - ZMORPH i500 back to table of content >>...
- Page 40 4. From main menu go to the “choose file” tab and select “USB memory”. Go to the Calibration folder and select the “XY calibration.gcode” file. At next start the gcode (the XY calibration procedure will start). Please note, the XY calibration require both filaments loaded. Product Manual - ZMORPH i500 back to table of content >>...
- Page 41 10.4.3 Z Offset Calibration Z offset calibration allows to set the offset between nozzles in Z-axis. To perform the Z axis calibration: 1. From main menu go to the CALIBRATION menu. Product Manual - ZMORPH i500 back to table of content >>...
- Page 42 4. The extruder will go to the left rear corner to perform the Z offset calibration, once done press the “Refresh” button and apply the z offset value with by pressing “Set Z”. Product Manual - ZMORPH i500 back to table of content...
-
Page 43: Files Preparation - Voxelizer Industry
In this view you need to choose Print Mode, if it be Single or Dual material Printing. Product Manual - ZMORPH i500 back to table of content >>... - Page 44 Clicking on the Save button result in saving the G-code on a computer. It is also possible to load previously prepared G-code file for visual checking. Product Manual - ZMORPH i500 back to table of content >>...
-
Page 45: Starting The Print
Machine will inform you about filament status, axis positions and hotend temperature. Select “CHOOSE FILE”, machine will show general information about gcode file. To begin the print select “CONFIRM” button. Product Manual - ZMORPH i500 back to table of content >>... - Page 46 Maintenance At next choose “START” and the print will begin. Product Manual - ZMORPH i500 back to table of content >>...
-
Page 47: Removing A Printout From The Platform
To check in which liquid our support will dissolve refer to the materials library zmorph3d.com/product/materials NOTE Use safety goggles when removing the support material, small pieces may suddenly brake and scratch your eyes. Product Manual - ZMORPH i500 back to table of content >>... -
Page 48: Cleaning Garbage Collector
“MAINTENANCE” screen and choose “MOVE AXES” menu Choose ”Z Movement”, and the heated bed at the bottom of the machine. Park the heated bed at the bottom of the machine. Product Manual - ZMORPH i500 back to table of content >>... - Page 49 Maintenance Open the machine front door and disconnect the garbage collector. Utilize the material leftover. Insert the garbage collector back to the machine. Product Manual - ZMORPH i500 back to table of content >>...
-
Page 50: Service Instructions
Checking the surface of Before each job the glass worktable for any damage Changing the Waste ▪ 2.5mm Allen Key when noticeable wear Cleaning garbage collector Remover Tip Product Manual - ZMORPH i500 back to table of content >>... - Page 51 ▪ dry cloth, lubricating them ▪ paper towel Checking the tension of Every 1500 working hours the timing belts of the X and Y axis Product Manual - ZMORPH i500 back to table of content >>...
-
Page 52: Service Instructions
Detach the front cooling fan by pulling it Disconnect the hotend thermistor out (it is mounted by magnets). and heater wires. Product Manual - ZMORPH i500 back to table of content >>... - Page 53 Remember to connect the hotend wires. Connect the cooling fan and connect the fan wires. NOTE After replacing the hotend part remember to perform XY and Z offset calibration for the new hotend. Product Manual - ZMORPH i500 back to table of content >>...
- Page 54 “Z movement”, park the heated bed at bottom posi- tion and then turn off the machine. Detach the front cooling fan by pulling it Unscrew the left and right fan mounting. out (it is mounted by magnets). Product Manual - ZMORPH i500 back to table of content >>...
- Page 55 Service instructions Pull out the left and right cooling fans. Insert the new cooling fans and connect the wires. Product Manual - ZMORPH i500 back to table of content >>...
- Page 56 “MAINTENANCE” screen and choose “MOVE AXES” menu Press ”Z movement” and park the heated bed at the bottom of the machine. Park the heated bed at the bottom of the machine. Product Manual - ZMORPH i500 back to table of content >>...
- Page 57 Unscrewthe waste remover tip holding screws. garbage collectorto get easier access to waste remover tip. Remove the old waste remover tip and slide a new Tighten the waste remover tip holding screws. one. Product Manual - ZMORPH i500 back to table of content >>...
- Page 58 “MAINTENANCE” screen and choose “MOVE AXES” menu Press ”Z movement” and park the heated bed at the bottom of the machine. Park the heated bed at the bottom of the machine. Product Manual - ZMORPH i500 back to table of content >>...
- Page 59 After the clips are loosened remove the heated bed. Loosen the heated bed glass clips. glass plate from heated bed surface. Put the new glass into heated bed surface and tighten the heated bed clips. Product Manual - ZMORPH i500 back to table of content >>...
- Page 60 For the HEPA/Carbon filter make sure that the FILTRATION - INPUT [DUST FILTER] Carbon filter is on the outside. HEPA/carbon filter Dust filter (G4) Attach the filtration system back to the machine. Product Manual - ZMORPH i500 back to table of content >>...
-
Page 61: Spare Parts
In case of physical damage or failure one of the machine parts, do not install spare parts other than the ones recommended by the Manufacturer. Please contact Technical Support to receive the list of available spare parts or their replacements. Product Manual - ZMORPH i500 back to table of content >>... -
Page 62: Firmware Upgrades
Firmware upgrades 13. Firmware upgrades 13.1 General informations Once in a while Zmorph releases a firmware update for its i500 model. The current firmware version is available to download at the Zmorph Knowledge Base: zmorph3d.com/support To check the firmware version of the machine on the main screen from the main menu go to the SETTINGS menu and choose “About Printer”. -
Page 63: Updating Firmware
How to update the firmware on Zmorph i500: 1. Create a catalog “updates” on a USB flash drive and drag the Zmorph update file (.raucb format) into it. You can download the update file at the Zmorph Knowledge Base: zmorph3d.com/support . - Page 64 Firmware upgrades 5. The update will take a few minutes. After a while, the machine will turn on and inform about the successful update procedure. Product Manual - ZMORPH i500 back to table of content >>...
-
Page 65: Help And Support
14. Help and support 14.1 Support request In concern for Zmorph Fab customers, our company provides technical support to solve the problems. In case of problems with the machine, review the troubleshooting suggestions in this instruction. If the information provided with the instruction is insufficient you should contact your local supplier from... -
Page 66: Troubleshooting
▪ The cooling fan is not ▪ Make sure that the .gcode file is designed working. correctly ▪ Make sure the cooling fan is working during the print Product Manual - ZMORPH i500 back to table of content >>... -
Page 67: Handy Resources
▪ zmorph3d.com/product/materials Zmorph Materials Library is an essential resource that gives a comprehensive outlook on a wide range of manufacturing materials supported by Zmorph Fab Multitool 3D Printers. The document provides detailed information about almost 50 materials including easy-to-read data, technical information, working param- eters, features, and applications. - Page 68 Consumers can drop off their used electrical appliances at no cost at one of the local collection points or contact the seller, the Manufacturer or the importer of the product for more information on where to dispose the waste equipment. Product Manual - ZMORPH i500 back to table of content >>...
- Page 69 Welcome to the ZMORPH community! Additional instructions available zmorph3d.com/support zmorph3d.com Zmorph3D Zmorph3D Zmorph-sa @zmorph3d...
Need help?
Do you have a question about the i500 and is the answer not in the manual?
Questions and answers