Table of Contents
Advertisement
Advertisement
Table of Contents

Related Manuals for Eagle Explorer


Summary of Contents for Eagle Explorer
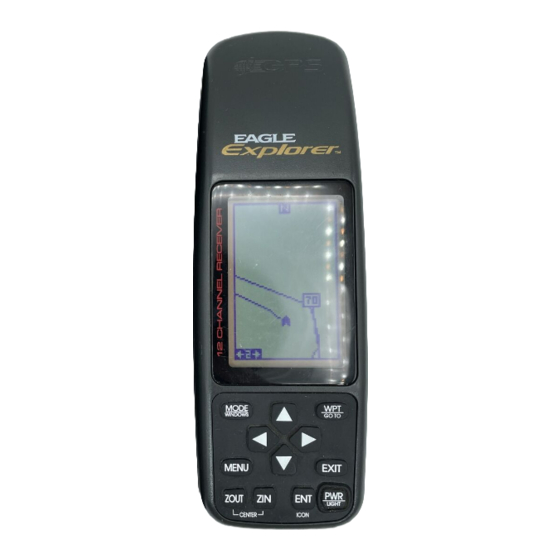
- Page 1 Eagle Explorer INSTALLATION AND OPERATION INSTRUCTIONS...
- Page 2 For more information, consult the factory customer service depar t- ment. All features and specifications subject to change without notice. Eagle Electronics may find it necessary to change or end our policies, regulations, and special offers at any time. We reserve the right to do so without notice.
-
Page 3: Table Of Contents
CREATE A ROUTE ... 28 SELECT WAYPOINTS FOR ROUTE ... 29 FINISHING THE ROUTE ... 30 DELETE A WAYPOINT FROM ROUTE ... 30 EXPLORER WAYPOINT DETAIL ... 30 FOLLOW A ROUTE ... 31 DELETE A ROUTE ... 32 NAVIGATION ... 32 NAVIGATE TO A WAYPOINT ... - Page 4 SERIAL COMMUNICATION SETUP ... 38 RESET OPTIONS ... 38 RESET GROUPS ... 38 SYSTEM INFO ... 39 GPS SETUP ... 39 EXECUTE GPS COLD START ... 39 DATUM ... 40 PCF ... 40 POSITION PINNING ... 41 ALARMS ... 42 MESSAGES ...
-
Page 5: Introduction
The Government’s accuracy specification is 100 meters horizontally and 150 meters vertically 95% of the time. In other words, the position shown on your Eagle Explorer could be up to 100 meters in any direction from your actual position, and the altitude could be plus or minus 150 meters from what’s shown on the screen, 95% of... -
Page 6: Installation
GPS receiver and see what it does. Please sit down with the unit and this manual and familiarize yourself with them before using the Eagle Explorer in the “real world”. A simulator is built in, which lets you practice. -
Page 7: External Power
The Explorer is now ready for use. EXTERNAL POWER Instead of batteries, the Explorer can operate on 6 to 16 volts DC from an external power source. To use external power, an adapter cable must be purchased (model CA-2) that will plug into your vehicle’s cigarette... -
Page 8: Operation
Finding Your Position Cold Start When the Eagle Explorer is turned on for the very first time, it doesn’t know where it is, nor what the local time or date is. If you tell it your position, time, and date, the unit will take much less time to lock-on to the satellites and give you a fix or position. -
Page 9: Initialization
To use your Explorer, first make certain you have a clear view of the sky, free from any obstructions such as trees or buildings. Also, don’t try to use it under a carport, covered boat dock, or inside a building. Turn the power on, press the EXIT key to erase the opening message and watch the display. - Page 10 (Note: This position does not have to be very accu- rate. If you can get it within one degree of your actual position, that will be fine.) When it’s set, press the ENT key. The Explorer accepts your entry and returns to the GPS setup menu.
-
Page 11: Position/Navigation Displays
You can customize the navigation screens to show differ- ent data than the ones chosen by Eagle. See the “Customize Screen” section for more details. - Page 12 Nav Screen #1 This screen is dominated by a compass rose (See the screen at right.) Your position is in the center of the circle, designated by an arrow that always points straight up. Your track (direction of travel) is indicated by an arrow pointing down toward the compass rose at the top center of the screen.
- Page 13 0.2 mile to the left of the de- sired course. You can adjust the CDI’s range through the “ALARMS/CDI” menu. Using the CDI with the plotter helps you visualize your position in relation to the course. The CDI is on several of the Explorer’s windows.
-
Page 14: Plotter Screens
Plotter The plotter lets you see your course and track from a “birds-eye” view. If you’ve recalled a way- point, the plotter show your star ting location, present position, and destination. However, you don’t have to recall a waypoint to use the plotter. To use the plotter, simply press the MODE key, then press the up or down arrow keys until the “Plot”... -
Page 15: Plotter Options
However, if you travel any other direction, the plotter doesn’t line up with your view of the world. To correct this problem, the Eagle Explorer has a track-up mode that rotates the plotter as you turn. Thus, what you see on the left side of the screen should always be to your left, and so on. -
Page 16: Clear Plot Trail
“ClearTrail” label on the Plotter Options menu, then press the right arrow key. A message box appears, asking you if you really want to erase the plot trail. Follow the directions on this message box. The Explorer returns to the plotter screen with the plot trail erased from the screen. -
Page 17: Grid Lines
Press the EXIT key to erase the plotter menu. ICONS The Eagle Explorer has fifteen symbols or “icons” available. These icons can be placed anywhere on the plotter screens. These can be used to mark fishing or hunting spots, boat ramps, rest stops, or whatever. You can place an icon at your present position, or at the cursor location. -
Page 18: Place Icon - Cursor Location
Place Icon - Cursor Location To place an icon at cursor's location, first use the arrow keys to move the cursor to the position that you want to place the icon. Next, press the ENT key. Now select the desired icon using the arrow keys. When it's selected, press the ENT key again. -
Page 19: Windows
To remove only icons of a certain type, highlight the “DEL ICON TYPE” label. Press the right ar- row key. The icon selection menu appears. Use the arrow keys to highlight the icon style that you wish to erase. Press the ENT key when you’re ready to erase the icons. -
Page 20: Satellite Information Screen
Satellite Information Screen (Group O) This screen shows technical information about the status of the GPS receiver. The receiver has twelve channels. Data for each channel is shown as bar graphs on the right side of the display. Every sat- ellite in the constellation has a number assigned to it, called the PRN. -
Page 21: Clock Alarm
7:00 a.m., also. Timers The Eagle Explorer has two timers built in. One is a countdown timer and the other is a count-up timer. The countdown timer counts down from the time you put in to zero. The count-up timer starts at zero and counts up to the time you entered. -
Page 22: Reprogram Boxes
shown in the display is correct, then press the ENT key. To start the timer, press the MENU key, then move the black box to the “Dn Tmr Off On” label. Press the right arrow key to start the timer. The timer continues counting until you stop it. -
Page 23: Waypoints
Use this same method to change the NAV screens. WAYPOINTS The Eagle Explorer gives you the capability of creating your own data- base of locations, called “waypoints”. You can save your present position, cursor position, or enter a latitude/longitude and save it as a waypoint. -
Page 24: Saving Your Present Position
waypoint number it just used. Wait a few seconds and the menu will clear automatically. Press the EXIT key to erase the cursor. Saving Your Present Position as a Waypoint (Select Number Method) The method shown above doesn’t let you choose the waypoint number. -
Page 25: Edit Waypoint Lat/Lon
WAYPOINT NAMES The Explorer automatically assigns the waypoint number as a name when the waypoint position is saved. You can find a waypoint by highlighting the name on the waypoint menu as shown below left. Now press the right arrow key. -
Page 26: Move A Waypoint
Edit Name The Eagle Explorer also lets you assign a name to each waypoint. The name can have up to eight characters. To name a waypoint, first select the waypoint number that you wish to name. Now highlight the “WPT Options” label and press the right arrow key. -
Page 27: Distance Between Wayponts
DISTANCE BETWEEN WAYPOINTS The Eagle Explorer can easily give you the dis- tance between two user waypoints. To do this, first press the WPT key, highlight the “Options” menu and press the right arrow key, then high- light the “Dist Btwn WPTS” label and press the right arrow key. -
Page 28: Delete A Waypoint
ROUTES You can connect several user waypoints together to form a route. When you recall the route, the Eagle Explorer will show you navigation informa- tion to the first waypoint in the route, then when you reach that waypoint, it switches to the next waypoint, and so on until you reach the last way- point in the route. -
Page 29: Select Waypoints For Route
that form the route. To select the first waypoint in the route, press the right arrow key. A new menu appears as shown below right. This menu lets you go to the waypoint selection menu, delete a waypoint from the route, or see details about any waypoint in the route. Since we want to add a waypoint to the route, press the right arrow key on the “Insert From WPTS”... -
Page 30: Finishing The Route
As you add waypoints to the list, their bearing and distance from each other is shown to the right of the waypoint name. On the screen at right, way- point 2 is on a bearing of 133° and 4.68 miles from waypoint 1. -
Page 31: Follow A Route
WPT key. When you have everything on this screen set as desired, press the ENT key to start the Eagle Explorer navigating to the first waypoint on the route. As you travel to the first waypoint, the unit shows navigation data to the waypoint. -
Page 32: Delete A Route
“1”, and our present position. Navigating to a cursor location The Eagle Explorer lets you navigation to a location without storing it in the waypoint database by using the plotter and cursor. To do this, first switch to the plotter screen. Now move the cursor to the location that you want to navigate to. -
Page 33: Navigating To A Waypoint Using The Plotter
CAUTION! The Eagle Explorer does NOT take land features, altitudes, restricted or prohibited areas, or any other feature into account when it projects the track line on the screen. Therefore, you must use care when navigating on the track line and avoid any object that may be in your path to the destination. -
Page 34: System Setup
Press the EXIT key to erase this screen. Units of Measure The Eagle Explorer can show data in many different formats. For ex- ample, distance can be displayed in statute miles (MI), nautical miles (NM), or kilometers (KM). -
Page 35: Position Format
Read your other product’s owner’s manual for more wiring infor- mation. Once the cables are wired, turn the Explorer on, press the menu key, and select NMEA / DGPS from the System Setup menu. A screen similar to the one at the top of the next page appears. -
Page 36: Nmea Output
If you have any other Magnavox or Starlink compatible DGPS receiver connected to the Eagle Explorer, you may need to change the settings. To do this, move the black box to the “Configure DGPS Beacon Receiver”... - Page 37 TO EXPLORER EXPLORER’S WIRES WHITE WIRE RED WIRE TO +12V BLACK WIRE GROUND WIRES OTHER DEVICE’S WIRES OTHER DEVICE’S RECEIVE DATA WIRE TO EXPLORER EXPLORER’S GREEN WIRE WIRES WHITE WIRE RED WIRE TO +12V BLACK WIRE GROUND WIRES DGPS RECEIVER’S...
-
Page 38: Serial Communication Setup
RESET OPTIONS To return the Eagle Explorer to its original factory settings, highlight the “Preset Options” menu on the System Setup screen. Now press the right arrow key. A message appears, asking if you want to restore the original options. -
Page 39: System Info
The screen at right appears. GPS Cold Start When the Eagle Explorer is turned on for the first time “out of the box”, it automatically sends a “cold- start” message to the GPS receiver. You can also send a cold start message to the receiver at any time. -
Page 40: Datum
WGS-84 datum, which covers the entire world. Other datums may also cover the entire world, or just a small portion. By default, the Eagle Explorer shows your position on the map using the WGS-84 datum. However, it can show your position using one of 189 different datums. -
Page 41: Position Pinning
.047 minutes north latitude. Using the PCF feature, you can make the Eagle Explorer match the char t you’re using. If you move, the unit will continuously add the change to all posi- tion, navigation, and mapping displays. -
Page 42: Alarms
“Pinning” label. Finally, press the left arrow key. ALARMS The Eagle Explorer has several alarms. You can set an arrival alarm to flash a warning message when you cross a preset distance from a way- point. For example, if you have the arrival alarm set to .1 mile, then the alarm will flash a message when you come within .1 mile of the recalled... -
Page 43: Messages
Arrival Alarm - If you set the arrival alarm’s distance to zero (0), and you run a route (see the routes section), the Eagle Explorer may not show navigation data to the next waypoint, once you arrive at the first one. -
Page 44: Starting Position
Now press the right arrow key. The screen shown at right appears. If you simply press the right arrow key, turning the simulator on, the Eagle Explorer will start from your present position and follow a track of 355° at 100 miles per hour. -
Page 45: Backlight
Note: Your plot trail will be erased when you turn the simulator on or off. BACKLIGHT The Explorer’s display has lights that can be turned on for night use. To turn the lights on, sim- ply press the PWR key. To turn them off, press the PWR key again. - Page 46 GS ... Ground Speed - Your actual speed. TTG ... Time To Go - Time remaining at your present speed until you reach a waypoint. VOLTS ... Electrical system voltage. VMG ... Velocity Made Good - Your ground speed towards a re- called waypoint, airport, etc.
-
Page 47: Window Groups
WINDOWS The following is a listing of windows groups A through O. GROUP “A” GROUP “D” GROUP “G” GROUP “B” GROUP “E” GROUP “H” GROUP “C” GROUP “F” GROUP “I”... - Page 48 GROUP “J” GROUP “K” GROUP “L” GROUP “M” GROUP “N” GROUP “O”...
-
Page 49: Warranty Statement
EAGLE ELECTRONICS FULL ONE-YEAR WARRANTY “We", “our”, or “us” refers to EAGLE ELECTRONICS, a division of LEI, the manufacturer of this product. “You” or “your” refers to the first person who purchases this product as a consumer item for personal, family, or household use. -
Page 50: Ups Return Service
There are six easy steps: 1. Call Eagle at the toll-free number on the back of this manual for a Return Authorization (RA) number and instructions about what acces- sories to return. Do not return a product to the factory without a Return Authorization (RA) Number! 2. -
Page 51: Accessory Ordering
2) LEI Extras, Inc. P .O. Box 129 Catoosa, OK 74015-0129 or call 800-324-0045 (USA orders only.) Eagle Electronics may find it necessary to change or end our shipping policies, regulations, and special offers at any time. We reserve the right to do so without notice. -
Page 53: How To Obtain Service - International
(Canadian Customers Only) We back your investment in quality products with quick, expert service and genuine Eagle replacement parts. If you need service or repairs, contact the Eagle Factory Customer Service Department at the toll-free number listed below. A technician may be able to solve the problem and save you the inconvenience of returning your unit. -
Page 54: How To Obtain Service - U.s.a. Only
Your unit is covered by a full one-year warranty. (See page 63 inside this manual for complete warranty details.) If your unit fails and the failure is not covered by the original warranty, Eagle has a flat-rate repair policy that covers your unit and accessories packed with the unit at the factory.
Need help?
Do you have a question about the Explorer and is the answer not in the manual?
Questions and answers