Table of Contents
Advertisement
Advertisement
Table of Contents

Related Manuals for Eagle Expedition II


Summary of Contents for Eagle Expedition II
- Page 1 Expedition II INSTALLATION AND OPERATION INSTRUCTIONS...
- Page 2 For more information, consult the factory customer service department. All features and specifications subject to change without notice. Eagle Electronics may find it necessary to change or end our policies, regulations, and special offers at any time. We reserve the right to do so without notice.
-
Page 3: Table Of Contents
INTRODUCTION ... 1 S/A - What is it? ... 2 Don’t Get Lost ... 2 GETTING STARTED ... 3 Power ..3 BATTERIES ... 3 Battery Installation ... 3 NiMH Battery ... 3 OPERATION ... 4 Keyboard ... 4 Menus . - Page 4 DGPS ... 37 Serial Communication Setup ... 39 Reset Options ... 39 Reset Groups ... 39 System Info ... 40 GPS SETUP ... 40 Position Format ... 40 DATUM ... 41 PCF (Position Correction Factor) ... 41 POSITION PINNING ... 42 POWER SAVE ...
-
Page 5: Introduction
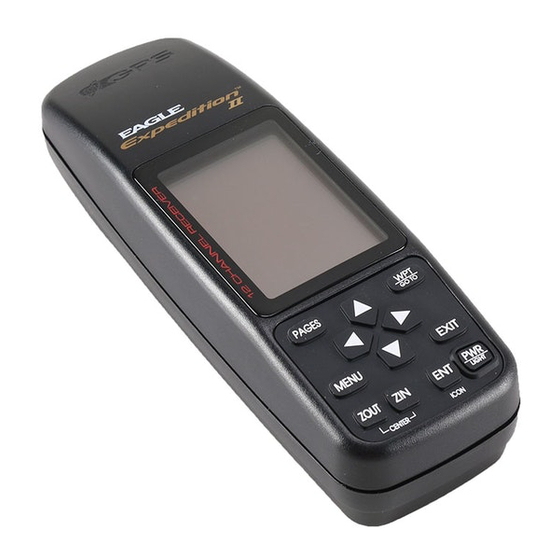
INTRODUCTION Welcome to the exciting world of GPS! Whether you’re a first-time user or a professional navigator, you’ll find the Expedition II is a full-featured GPS receiver at a price that was impossible just a few years ago. The Rock- ®... -
Page 6: S/A - What Is It
Not exactly pinpoint accuracy, but then few people need positioning accuracy greater than this. However, if you do want better performance, (and who doesn’t?) many manufacturers (including Eagle) sell a DGPS receiver that attaches to your GPS receiver. The DGPS system transmits correction signals that nullify the effects of SA. -
Page 7: Getting Started
GPS receiver and charges the DR-121. You can even use the receiver while the battery is charging! To install the NiMH battery, remove the battery cover and place the bat- tery into the compartment as shown on the next page. -
Page 8: Operation
The Eagle model EA-2 antenna plugs directly into this connector. Other an- tennas may work. If you use an antenna other than Eagle, it will need to be a passive antenna. This unit does not supply power to the antenna. -
Page 9: Turning Power On
The GPS receiver is tracking satellites that are sur- rounded by a black box. If the satellite number is not surrounded by a box, then the receiver hasn’t locked onto that satellite and it isn’t being used to... -
Page 10: Finding Your Position
It begins searching for the satellites using the above data that it ac- quired the last time it was turned on. This probably was at the Eagle fac- tory. Since it’s almost certain that you’re not at the Eagle factory, it’s prob- ably looking for the wrong satellites. -
Page 11: Quick Initialization
“Quick Initialization” feature. To do this, first turn the unit on, then press the MENU key. The screen shown at right appears. Now press the down arrow key until the “GPS SETUP” label is highlighted. Press the right arrow key. The “INIT GPS”... -
Page 12: Position Acquisition
The unit returns to the full initialization screen. Repeat this for each of the other settings until they’re correct for your location and time. Note: The position doesn’t have to be very accurate. If you enter a posi- tion within one degree of your actual location, the unit will be able to acquire the proper satellites. -
Page 13: Navigation Screens
To change modes, simply press the PAGES key. A screen similar to the one at right appears. Use the up or down arrow keys to change modes. (The windows mode is shown as “GRP” (groups); group “A” is the first windows group.) Press the right arrow key while the above menu is show- ing to switch between different versions of each mode. -
Page 14: Course Deviation Indicator (Cdi)
distance you are off-course to the side of the desired course line. The course line is an imaginary line drawn from your position when you started navigating to the destination waypoint. It’s shown on the screen as a vertical dotted line. The default for the cross track error range is 0.25 mile. -
Page 15: Plotter
in the center. If you drift off course to the left, the line moves to the right . This signifies that you need to steer to the right to get back on course. This is called “chasing the needle”. If you steer towards the line (needle), you’ll always be heading in the correct direction to get back on course. -
Page 16: Cursor
Plot-3 (see at the top of the next page) is similar to plot-2. The major difference is the steering arrow and waypoint information at the bottom of the screen. When you navigate to a waypoint, the waypoint’s name and number show at the bottom of this screen. The steer- ing arrow always points in the direction to the waypoint. -
Page 17: Plotter Orientation
From the Plotter Options menu, choose Update Options to change the update rate or type. Select the option that you wish to change, use the left or right arrow keys to adjust it, then press the EXIT key to erase the menu. -
Page 18: Plot Trails
The course-up mode locks the top of the screen into the original bearing to the waypoint when navigation was first started. (See the navigation section for more information on course, track, and waypoint navigation.) To select a plotter orientation, highlight the “ROTATE” label on the “Plotter Options”... -
Page 19: Grids
RINGS BOTH GRIDS ICONS The plotter has 28 symbols or “icons” available that can be placed any- where on the screen. They can be used to mark fishing or hunting loca- tions, landmarks, boat ramps, and virtually any point of interest. An icon can be placed at your present position or at the cursor’s location. -
Page 20: Place Icon - Cursor Position
Place Icon - Cursor Position To place an icon at the cursor’s position, first use the arrow keys to move the cursor to the location that you wish to place the icon. Next, press the ENT key. Now select the icon using the arrow keys. When it’s highlighted, press the ENT key. -
Page 21: Windows
You can delete individual icons by selecting the DEL FROM PLOTTER menu from the Icon Options menu. Once this menu is selected, the unit returns to the plot- ter screen with the cursor activated as shown at right. Use the arrow keys to move the cursor to the icon that you want to erase. - Page 22 Group C This group consists of bearing, track, distance to go, and estimated time en route. Group D Bearing, distance to go, track, ground speed, estimated time of arrival, estimated time en route, velocity made good (VMG), estimated time of arrival, and CDI show on this screen.
- Page 23 CDI. The clock shows the time based upon the setting in the initialization. It’s an offset from UTC, which is the time the GPS system uses. If this time is incorrect, you can reset it by press- ing the MENU key, then highlight System Setup and press the right arrow key.
- Page 24 Group J - Clock Alarm This group has both estimated time of arrival and en route, plus the clock and a clock alarm. To set the clock alarm, press the MENU key while this group is show- ing, then highlight the Clock Alm Set label and press the right arrow key.
- Page 25 DGPS receiver connected to the unit. The DGPS corrections at the top of the screen show the corrections the GPS receiver is using. The satellite’s number is follow by an identifier showing its status. They...
-
Page 26: Reprogram Boxes
Reprogram Boxes The digital boxes on the PLOT-2 and both NAV screens can also be re- programmed, using a method similar to the one used to reprogram the window groups. To customize a screen, first switch to the screen that you want to custom- ize. -
Page 27: Waypoints
WAYPOINTS This GPS receiver gives you the ability to create your own database of locations, called “waypoints’. You can save your present position, cursor position, or enter a coordinate and save it as a waypoint. For example, you may wish to store the location of your parked car as a waypoint be- fore starting on a hike. -
Page 28: Saving Your Present Position As A Waypoint (Select Number Method)
Saving The Cursor Position as a Waypoint When the cursor is showing on the plotter and you press the WPT key twice, the cursor’s position is placed into the first available waypoint num- ber. In the example screen shown below, the cursor is placed at the desired location. -
Page 29: Selecting A Waypoint
SELECTING A WAYPOINT In order to edit or navigate to a waypoint, you must first select it. There are three ways to do this: by waypoint number, waypoint list, or nearest. All waypoint selection methods are on the main waypoint menu shown at the top of this page. -
Page 30: Edit Name
Edit Name You can assign a name to each waypoint. The name can have up to eight characters. To do this, first select Name Edit from the Options menu. A screen similar to the one at right appears. Press the up or down arrow keys to select the first let- ter in the name. -
Page 31: Waypoint Navigation
WAYPOINT NAVIGATION The Expedition II makes it easy to navigate to any waypoint. All you have to do is select the waypoint (see page 26), then highlight the “GO TO” label on the waypoint screen and press the right arrow key. The unit im- mediately shows navigation information to the waypoint on all navigation, plotter, and windows screens. -
Page 32: Navigating To A Waypoint Using The Plotter
Navigating to a Waypoint using the Plotter The unique “birds-eye” view used by the plotter gives you an easy way to navigate to a waypoint. On the plotter screen shown above, the diamond with a cross in it is your present position. The box with the “S” in it was your starting location when you recalled the waypoint. -
Page 33: Distance Between Waypoints
pears. Again, in this example, we chose to move waypoint number 1 to waypoint number 9, so we pressed the right arrow key until “9” appeared. As you can see on the screen below, waypoint number 1 is showing in the “From”... -
Page 34: Project A Waypoint
Project a Waypoint You can save a waypoint even if you don’t know it’s position or location on the plotter. This unit lets you project the location of a waypoint from a known way- point using only bearing and distance from the known waypoint. -
Page 35: Position Averaging
Position Averaging The effects of Selective Availability, described in the Introduction, can be minimized or virtually eliminated using position averaging. You can only save a waypoint using this method, however the location saved can be much more accurate than any other method without using DGPS. The downside to this method is twofold-It only works to save a waypoint and the unit must be in the location that you want to save, preferably for an hour. -
Page 36: Create A Route
Create a Route To create a route, first press the MENU key, highlight the “PLAN/EDIT ROUTES” label, and press the right arrow key. The screen shown at right appears. This unit can store up to 50 routes. Route number one shows on this page. -
Page 37: Delete A Waypoint
unit returns to the waypoint list screen. The second waypoint shows be- neath the first one, with bearing and distance from the first waypoint in the route to the second showing under the second waypoint’s name. The total route distance shows at the bottom of the screen. Continue selecting way- points in this manner until all of the waypoints in the route are on the list. -
Page 38: Following A Route
Following a Route Before starting the route, you’ll need to decide if you want to start at the beginning and travel forward or start at the last waypoint in the route and travel backwards (reverse) to the first waypoint. The default is forward. To change it, press the MENU key, then select the “PLAN/EDIT ROUTES”... -
Page 39: Delete A Route
Delete a Route To erase a route, first press the MENU key, then highlight the “Plan/Edit Routes” label and press the right arrow key. Now select the route you want to erase at the top of the screen, then highlight the “Delete Route” label and press the right arrow key. -
Page 40: Sound
The time delay is adjustable from 5 to 240 seconds by selecting Light Dly from the System Setup menu . You can also turn the lights on continu- ously from this menu. Highlight this menu, then press the right arrow key to increase the time the lights are on, the left arrow key to decrease it. -
Page 41: Nmea Output
DGPS receivers. DGPS gives you more accurate positions than is otherwise possible. All wiring connections to the Expedition II are made through the power cable. See the sample wiring diagrams on the next page for general wir- ing procedures. -
Page 42: Dgps Receiver
TO EXPEDITION II EXPEDITION II WIRES WHITE WIRE RED WIRE TO +12V BLACK WIRE GROUND WIRES OTHER DEVICE’S WIRES OTHER DEVICE’S RECEIVE DATA WIRE TO EXPEDITION II EXPEDITION II GREEN WIRE WIRES WHITE WIRE RED WIRE TO +12V BLACK WIRE... -
Page 43: Serial Communication Setup
(Note: If you have a Magnavox DGPS receiver connected, the Expedition II can’t send NMEA data.) With the exception of serial communications, typically no other setup needs to be made with these receivers. If you have any other Magnavox or Starlink compatible DGPS receiver connected to the Expedition II, you may need to change the settings. -
Page 44: System Info
GPS Setup and press the right arrow key. The screen shown at right appears. Position Format The Expedition II can show the position in degrees, minutes, and thousandths of a minute (36° 28.700') or degrees, minutes, seconds, and tenths of a second (36°... -
Page 45: Datum
EXIT key. A list of the datums used by the Expedition II is in the back of this manual. PCF (Position Correction Factor) Another method used to make your display match a chart or map is called “PCF”... -
Page 46: Position Pinning
Expedition II and the one on our chart. After you’ve entered the latitude/longitude correction, press the ENT key to accept it. The Expedition II erases the PCF entry screen and returns to the navigation or mapping screens with the correc- tion factor applied. -
Page 47: Power Save
ALARMS The Expedition II has several alarms. You can set an arrival alarm to flash a warning message when you cross a preset distance from a waypoint. For example, if you have the arrival alarm set to .1 mile, then the alarm will flash a message when you come within .1 mile of the recalled waypoint. -
Page 48: Messages
Arrival Alarm - If you set the arrival alarm’s distance to a small number, and you run a route (see the routes section), the Expedition II may not show navigation data to the next waypoint, once you arrive at the first one, since you may not be able to come close enough to the first waypoint to trip the arrival alarm. -
Page 49: Sunrise/Set Moonrise/Set Calculator
The screen shown at right appears. If you simply press the right arrow key, turning the simu- lator on, the Expedition II will start from your present position and follow a track of 355° at 100 miles per... - Page 50 “WPT#” label until the desired starting waypoint number appears. Now highlight the “Start At” label and press the right arrow key. The Expedition II returns to the Simu- lator Setup menu using the waypoint you specified as the starting way- point.
-
Page 51: Definition Of Terms/Abbreviations
DEFINITION OF TERMS/ABBREVIATIONS Due to space considerations, the digital displays use abbreviations for some names. They are as follows: ALT ... Altitude - Your height above sea level. BRG ... Bearing - The direction from your present position to a waypoint. - Page 52 DATUMS WGS 84 ... WGS 1984 DEFAULT Default ADINDAN ... Adindan MEAN Mean for Ethiopia, Sudan ADINDAN ... Adindan BURKINA Burkina Faso FASO ADINDAN ... Adindan CAMEROON Cameroon ADINDAN ... Adindan ETHIOPIA Ethiopia ADINDAN ... Adindan MALI Mali ADINDAN ... Adindan SENEGAL Senegal...
- Page 53 CARTHAGE ... Carthage - Tunisia TUNISIA CH-1903 ... Switzerland CHATHAM ... Chatham Island Astro 1971 ISLAND ASTRO New Zealand (Chatham Island) NEW ZEALAND CHUA ASTRO ... Chua Astro PARAGUAY Paraguay CORREGO ... Corrego Alegre ALEGRE Brazil BRAZIL DABOLA ... Dabola GUINEA Guinea DJAKARTA ...
- Page 54 IRELAND ... Ireland 1965 1965 Ireland ISTS 061 ... ISTS 061 Astro 1968 ASTRO 1968 South Georgia Islands S GEORGIA ISTS 073 ... ISTS 073 Astro 1969 ASTRO 1969 Diego Garcia DIEGO GARCIA JOHNSTON ... Johnston Island 1961 ISLAND Johnston Island 1961 KANDAWALA ...
- Page 55 N AMERICAN ... North American 1927 1927 CANAL Canal Zone ZONE N AMERICAN ... North American 1927 1927 CUBA Cuba N AMERICAN ... North American 1927 1927 Greenland (Hayes Peninsula) GREENLAND N AMERICAN ... North American 1927 1927 MEXICO Mexico N AMERICAN ...
- Page 56 RT 90 ... Sweden SANTO (DOS) ... Santo (DOS) ’65 ESPIRITO 1965 Espirito Santo Island SANTO ISLAND SAO BRAZ ... Sao Braz AZORES Azores (Sao Miguel, Santa Maria Islands) SAPPER HILL ... Sapper Hill 1943 1943 EAST East Falkland Island FALKLND ISLE SCHWARZECK ...
- Page 57 EAGLE ELECTRONICS FULL ONE-YEAR WARRANTY “We", “our”, or “us” refers to EAGLE ELECTRONICS, a division of LEI, the manufacturer of this product. “You” or “your” refers to the first person who purchases this product as a consumer item for personal, family, or household use.
- Page 58 There are six easy steps: 1. Call Eagle at the toll-free number on the back of this manual for a Return Authorization (RA) number and instructions about what acces- sories to return. Do not return a product to the factory without a Return Authorization (RA) Number! 2.
-
Page 59: Accessory Ordering Information
2) LEI Extras, Inc. P.O. Box 129 Catoosa, OK 74015-0129 or call 800-324-0045 (USA orders only.) Eagle Electronics may find it necessary to change or end our shipping policies, regulations, and special offers at any time. We reserve the right to do so without notice. -
Page 61: How To Obtain Service
(Canadian Customers Only) We back your investment in quality products with quick, expert service and genuine Eagle replacement parts. If you need service or repairs, contact the Eagle Factory Customer Service Department at the toll-free number listed below. A technician may be able to solve the problem and save you the inconvenience of returning your unit. - Page 62 Your unit is covered by a full one-year warranty. (See page 53 inside this manual for complete warranty details.) If your unit fails and the failure is not covered by the original warranty, Eagle has a flat-rate repair policy that covers your unit and accessories packed with the unit at the factory.
Need help?
Do you have a question about the Expedition II and is the answer not in the manual?
Questions and answers