Table of Contents
Advertisement
Available languages
Available languages
Quick Links
ITEM #0986286, 31885199
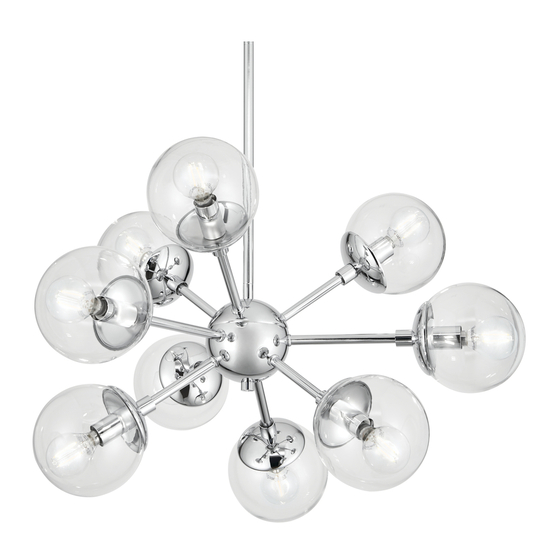
9-LIGHT CHANDELIER
MODEL #82261
Français p. 9
Español p. 17
ATTACH YOUR RECEIPT HERE
Serial Number
Purchase Date
Questions, problems, missing parts? Before returning to your retailer, call our customer
service department at 1-800-554-6504, 8 a.m. - 4:30 p.m, EST, Monday - Friday.
kichler.com/customer-care/contact-us
1
Advertisement
Table of Contents

Subscribe to Our Youtube Channel
Related Manuals for Kichler Lighting 82261


Summary of Contents for Kichler Lighting 82261
- Page 1 ITEM #0986286, 31885199 9-LIGHT CHANDELIER MODEL #82261 Français p. 9 Español p. 17 ATTACH YOUR RECEIPT HERE Serial Number Purchase Date Questions, problems, missing parts? Before returning to your retailer, call our customer service department at 1-800-554-6504, 8 a.m. - 4:30 p.m, EST, Monday - Friday.
-
Page 2: Package Contents
PACKAGE CONTENTS PART DESCRIPTION PART DESCRIPTION Canopy Screw Collar Loop Mounting Bracket Fixture Loop Threaded Nipple Chain Link Hex Nut 6” Threaded Pipe Socket 12” Threaded Pipe Coupling Shade Retaining Cap LED Bulb Outer Decorative Cap Screw Collar Ring... -
Page 3: Hardware Contents
HARDWARE CONTENTS Wire Connector Short Qty: 3 Thread Locking Machine Compound Screw Qty: 2 Qty: 1 SAFETY INFORMATION Please read and understand this entire manual before attempting to assemble, operate or install the product. WARNING • CAUTION – RISK OF SHOCK – Disconnect Power at the main circuit breaker panel or main fusebox before starting and during the installation. - Page 4 ASSEMBLY INSTRUCTIONS 1. Place a drop of locking compound (CC) on the threads on the threaded pipes.Screw 6 in. threaded pipe (L) onto 12 in. threaded pipe (M). Connect the assembled pipes onto coupling (F). Screw fixture loop (J) onto 12 in. threaded pipe (M).
- Page 5 ASSEMBLY INSTRUCTIONS 4. Connect mounting bracket (B) to the outlet box Outlet Box with short machine screws (BB). Hardware Used Short Machine Screw 5. To open chain links: CORRECT Locate the split in the chain link (K) you're removing. Put one pair of pliers (not included) on each side of the split and rotate the pliers in opposite directions to open the link's split.
- Page 6 ASSEMBLY INSTRUCTIONS Connect screw collar loop (I) to fixture loop (J) using chain link (K). Use pliers (not included) to close chain link (K). 7. Wire connection guide: BARE COPPER, Ground wire: OR GREEN • For installation in the United States: Wrap GROUND BARE COPPER, FIXTURE...
- Page 7 ASSEMBLY INSTRUCTIONS 8. Pass canopy (A) over the screw collar loop (I). Attach screw collar ring (H) to screw collar loop (I) to secure canopy (A). 9. Insert E12 LED bulb (G) included into socket (E). Repeat for remaining sockets.
-
Page 8: Care And Maintenance
1. Check wiring. Fixture does not light. 1. Fixture may be wired incorrectly. 1. Check wiring. 2. Worn or broken bulb. 2. Replace bulb. Distributed by: Kichler Lighting LLC 7711 E. Pleasant Valley Rd. Cleveland, OH 44131 Printed in China REV 29-SEP-2021... - Page 9 ARTICLE #0986286, 31885199 LUSTRE À 9 LUMIÈRES MODÈLE #82261 JOIGNEZ VOTRE REÇU ICI Numéro de série Date d’achat Des questions, des problèmes, des pièces manquantes? Avant de retourner le produit à votre détaillant, appelez notre service à la clientèle au 1-800-554-6504, entre 8 h et 16 h 30...
-
Page 10: Contenu De L'emballage
CONTENU DE L’EMBALLAGE PIÈCE DESCRIPTION QTÉ PIÈCE DESCRIPTION QTÉ Pavillon Anneau de suspension du pavillon Support de fixation Anneau de suspension du luminaire Raccord fileté Maillon de chaîne Écrou hexagonal Tube fileté de 15,2 cm Douille Tube fileté de 30,5 cm Accouplement Abat-jour Capuchon retenir... -
Page 11: Quincaillerie Incluse
QUINCAILLERIE INCLUSE Adhésif frein-filet Capuchon de connexion Vis à Qté: 3 Adhésif métaux frein-filet courte Qté: 1 Qté: 2 CONSIGNES DE SÉCURITÉ Veuillez vous assurer de lire et de comprendre l’intégralité du présent guide avant d’assembler, d’utiliser ou d’installer ce produit. AVERTISSEMENT •... -
Page 12: Instructions Pour L'assemblage
INSTRUCTIONS POUR L'ASSEMBLAGE 1. Placez une goutte d'adhésif frein-filet (CC) sur le filetage des tubes filetés. Vissez le tube fileté de 15,24 cm (L) au tube fileté de 30,48 cm (M). Raccordez les tubes assemblés au raccord (F). Vissez l'anneau de suspension du luminaire (J) sur le tube fileté... - Page 13 INSTRUCTIONS POUR L'ASSEMBLAGE 4. Fixez le support de fixation (B) à la boîte de Boîte de sortie sortie à l'aide des vis à métaux courtes (BB). Quincaillerie Utilisée Vis à métaux courte 5. Pour ouvrir la maillon de chaîne: CORRECT Localiser la séparation maillon de chaîne (K) vous retirez.
- Page 14 INSTRUCTIONS POUR L'ASSEMBLAGE Reliez l'anneau de suspension du pavillon (I) à l'anneau de suspension du luminaire (J) à l'aide du maillon de chaîne (K). Utilisez des pinces (non fournies) pour refermer le maillon de chaîne (K). 7. Guide de raccordement électrique FIL DE MISE À...
- Page 15 INSTRUCTIONS POUR L'ASSEMBLAGE 8. Faites passer le pavillon (A) sur l'anneau de suspension du pavillon (I). Attachez la bague de l’anneau du pavillon (H) à l'anneau de suspension du pavillon (I) pour fixer le pavillon (A). 9. Insérez une ampoule DEL de type E12 de 60 watts max.
-
Page 16: Entretien
Le luminaire 1. Le luminaire est mal branché. est bien branché. ne s’allume pas. 2. L’ampoule est usée ou brisée. 2. Remplacez l’ampoule. Distribué par: Kichler Lighting LLC 7711 E. Pleasant Valley Rd Cleveland, OH 44131 Imprimé en Chine REV 29-SEP-2021... - Page 17 ARTÍCULO #0986286, 31885199 ARAÑA DE 9 LUCES MODELO #82261 ADJUNTE SU RECIBO AQUÍ Número de serie Fecha de compra ¿Preguntas, problemas, piezas faltantes? Antes de devolverlo a la tienda, llame a nuestro departamento de servicio al cliente al 1-800-554-6504, de 8:00 a.m. a 4:30 p.m. hora del...
-
Page 18: Contenido Del Paquete
CONTENIDO DEL PAQUETE PIEZA DESCRIPCIÓN CANT PIEZA DESCRIPCIÓN CANT Cubierta Bucle de cuello roscado Soporte de montaje Bucle para colgar la lámpara Manguito roscado Eslabón de cadena Tuerca hexagonal Tubo roscado de 15,2 cm Portalámpara Tubo roscado de 30,5 cm Pantalla Acoplamiento Tapa de rentención... -
Page 19: Información De Seguridad
HARDWARE CONTENTS Composé de verrouillage de filetage Conector de cables Tornillo Cant.: 3 Composé de para verrouillage de metales filetage cortos Cant.: 1 Cant.: 2 INFORMACIÓN DE SEGURIDAD Lea y comprenda completamente este manual antes de intentar ensamblar, usar o instalar el producto. -
Page 20: Instrucciones De Ensamblaje
INSTRUCCIONES DE ENSAMBLAJE 1. Coloque una gota de compose de verroillage de filetage (CC) en las roscas de los tubos roscados. Enrosque los tubos roscados de 15,24 cm (L) en el tubo roscado de 30,48 cm (M). Conecte los tubos ensamblados en el acoplador (K). - Page 21 INSTRUCCIONES DE ENSAMBLAJE 4. Conecte el soporte de montaje (B) a la caja Caja de salida eléctrica con tornillos cortos para metal (BB). Aditamentos utilizados Tornillo para metales cortos 5. Para abrir enlaces de cadena: Correcto Ubicar la separación en cadena de enlace (K) Usted está...
- Page 22 INSTRUCCIONES DE ENSAMBLAJE Conecte la argolla de cuello roscado (I) al aro de suspensión de la lámpara (J) usando el eslabón (K). Use alicates (no se incluyen) para cerrar el eslabón (K). 7. Guía de conexión de conductores: Cable a tierra: CONDUCTOR DE DE PUESTA A TIERRA DE LA •...
- Page 23 INSTRUCCIONES DE ENSAMBLAJE 8. Pase la cubierta (A) sobre el bucle de cuello roscado (I). Fije el anillo de cuello roscado (H) al bucle de cuello roscado (I) para fijar la cubierta (A). 9. Inserte un foco LED de tipo E12 de máximo 4W (G) en el portalámparas (E).
-
Page 24: Cuidado Y Mantenimiento
La lámpara no se 1. Inspeccione el cableado. incorrectamente cableada. enciende. 2. La bombilla está quemada o rota. 2. Reemplace la bombilla. Distribuido por: Kichler Lighting LLC 7711 E. Pleasant Valley Rd Cleveland, OH 44131 Impreso en China REV 29-SEP-2021...
Need help?
Do you have a question about the 82261 and is the answer not in the manual?
Questions and answers