Chapters
Table of Contents

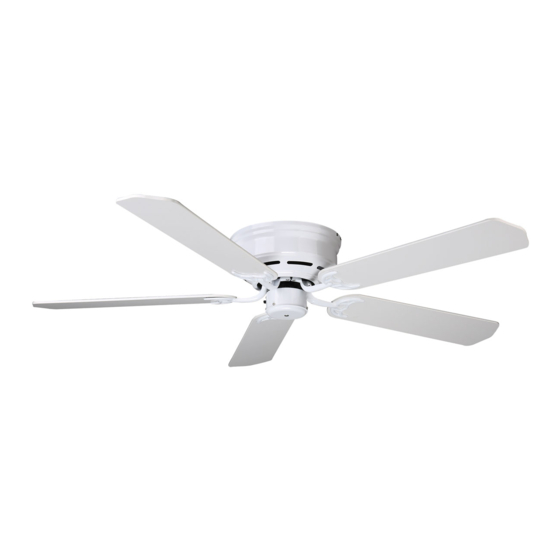
Related Manuals for Fanelite CANOUAN


Summary of Contents for Fanelite CANOUAN
- Page 1 FRANÇAIS ENGLISH www.fanelite.com MODE D’EMPLOI NOTICE DE MONTAGE, D’INSTALLATION ET D’UTILISATION USER MANUAL INSTALLING AND OPERATING MANUAL POUR MODÈLE FOR MODEL 52YFT-1021 CANOUAN...
-
Page 2: Table Of Contents
SOMMAIRE FRANÇAIS 1. Votre nouvel appareil 2. Consignes de sécurité 3. Garantie 4. Notes 5. Hauteur sous les pales 6. Contrôle au déballage 7. Fixation du support plafond 8. Installation du bloc moteur 9. Connexions électriques du brasseur d’air 10. Installation du cache moteur 11. -
Page 3: Consignes De Sécurité
2. CONSIGNES DE SÉCURITÉ Veuillez lire attentivement les consignes de sécurité avant d’utiliser votre appareil. Pour réduire les risques d’incendie, de choc électrique, de blessures corporelles et de dommages matériels, lisez et respectez scrupuleusement les consignes suivantes : - Cet appareil peut être utilisé par des enfants âgés d’au moins 8 ans et par des per- sonnes ayant des capacités physiques, sensorielles ou mentales réduites ou dénuées d’expérience ou de connaissance, s’ils (si elles) sont correctement surveillé(e)s ou si des instructions relatives à... - Page 4 - De par sa construction cet appareil n’est pas prévu pour une utilisation à l’extérieur, usage intérieur uniquement. - Retirez tous les éléments de l’emballage et retirez les rubans adhésifs empêchant le fonctionnement de l’appareil avant utilisation. - Assemblez entièrement l’appareil avant de l’utiliser. Il ne doit en aucun cas être ali- menté...
-
Page 5: Garantie
à la réglementation en vigueur et aux instructions figurant dans cette notice d’utilisation et de montage. FANELITE se réserve le droit de ne pas appliquer la garantie en cas de négligence du client, d’installations défectueuses, mal adaptées ou non conformes aux normes en vigueur. -
Page 6: Notes
Une boite de raccordement est requise. Ne jamais utiliser de boite de raccordement en plastique. Les brasseurs d’air FANELITE peuvent peser avec leurs accessoires jusqu’à 25 kg. Assurez-vous quoique vous fassiez que le support plafond est solidement fixé et que votre installation puisse supporter un poids d’au moins 68 kg. -
Page 7: Fixation Du Support Plafond
5 pales 5 supports pales Goujons d’ancrages, Variateur 3 vis et rondelles vitesses 7. FIXATION DU SUPPORT PLAFOND ATTENTION : La fixation devra être faite de façon sûre dans la structure même du plafond par une personne qualifiée. En fonction de la structure de votre plafond, utilisez des vis et des chevilles ap- propriés. -
Page 8: Installation Du Bloc Moteur
8. INSTALLATION DU BLOC MOTEUR Prenez le bloc moteur et positionnez le correctement dans son support plafond. Aidez-vous du petit crochet de sécurité situé sur le support. Serrez ensuite les 4 écrous et rondelles à l’aide d’une clé adaptée. Assurez-vous d’un bon serrage afin d’évi- ter toute chute du brasseur d’air. -
Page 9: Installation Des Pales
Dévissez à moitié Dévissez entièrement 11. INSTALLATION DES PALES Assemblez les pales avec leurs supports à l’aide des vis et rondelles fournies. Attention, serrez les vis soi- gneusement pour ne pas endommager les fils ou les pales. Positionnez chaque ensemble pale / support pale sur le moteur (les vis et rondelles peuvent être déjà pré-montées sur le moteur) et resserrez les vis. -
Page 10: Installation Du Kit Lumière (Optionnel)
1/ Connectez le fil noir du variateur à la phase du moteur. 2/ Connectez le fil rouge du variateur à la phase secteur. Assurez-vous qu’aucun fil ne dépasse et que le commutateur de la commande murale soit en position 0 (OFF) puis ré-assemblez votre variateur (remettre le commutateur et la plaque). -
Page 11: Utilisation Du Variateur
3/ Effectuez les 3 connexions électriques ci-dessous et assemblez le kit lumière avec le brasseur d’air en remettant les vis et rondelles. Installez soigneusement le globe fourni en le tournant dans le sens horaire jusqu’à qu’il se bloque. a/ Reliez le connecteur du fil rouge ou marron du kit lumière à celui du fil rouge du brasseur d’air. b/ Connectez le connecteur du fil bleu du kit lumière à... -
Page 12: Spécifications Techniques
Veuillez-vous adresser à votre municipalité pour connaître la déchetterie compétente. 18. INFORMATIONS COMPLÉMENTAIRES Cette notice est également disponible en ligne sur notre site internet : www.fanelite.com Vous souhaitez nous contacter par e-mail : contact@fanelite.com Vous souhaitez nous contacter par téléphone : (+590) 590 29 44 64 Vous pouvez aussi nous contacter à... - Page 13 SUMMARY ENGLISH 1. Your new appliance 2. Important safety instructions 3. Guarantee 4. Notes 5. Height under blades 6. Unpacking check 7. Fix the ceiling mounting bracket 8. Install the motor block 9. Electrical connections of the ceiling fan 10. Install the motor cover 11.
-
Page 14: Important Safety Instructions
2. IMPORTANT SAFETY INSTRUCTIONS Please read the safety instructions carefully before using your appliance. To reduce the risk of fire, electric shock, personal injury and damage, read and strictly follow the instructions below : - This appliance can be used by children at least 8 years old and by people with re- duced physical, sensory or mental capacities or lacking in experience or knowledge, if they are properly supervised or if they have been given instructions on how to use the appliance safely and if the risks involved have been understood. - Page 15 eration of the appliance before use. - Assemble the appliance completely before using it. Under no circumstances it should be connected to power supply before it is fully assembled and ready for use. - Electrical connections must be made in accordance with current regulations and by a qualified electrician.
-
Page 16: Guarantee
FANELITE reserves the right to apply or not the guarantee in case of negligence of the customer, defective installations, poorly adapted or not in conformity with the regulations in force. -
Page 17: Notes
A connection box is required. Never use a plastic box. FANELITE ceiling fans can weigh up to 25 kg with accessories. Make sure that your ceiling fan mounting bracket is firmly attached and that your installation can support a weight of at least 68 kg. -
Page 18: Fix The Ceiling Mounting Bracket
5 blades 5 blades supports Hanger studs, Wall control screws and washers 3 speeds 7. FIX THE CEILING MOUNTING BRACKET WARNING : The fixing must be done securely in the structure of the ceiling by a qualified person. Depending on the structure of your ceiling, use suitable screws and washers. Do not fix the ceiling support in a structure thinner than 50 mm or in hollow elements, in order to avoid any risk of falling. -
Page 19: Install The Motor Block
8. INSTALL THE MOTOR BLOCK Take the motor block and position it correctly in its mounting bracket. Help you with the small safety hook on the mounting bracket. Then tighten the 4 nuts and washers by using a suitable wrench. Make sure that you tighten the nuts properly to prevent a fall. -
Page 20: Install The Blades
Unscrew halfway Unscrew completely 11. INSTALL THE BLADES Assemble the blades with their supports using the screws and washers provided. Caution, tighten the screws carefully to avoid damaging the blades. Position each blade / blade support assembly on the motor (the screws and washers can already be pre-mounted on the motor) and tighten the screws. -
Page 21: Install The Light Kit (Optional)
1/ Connect the black wire of the wall control to the motor phase. 2/ Connect the red wire of the wall control to the main phase. Make sure that no wires protrudes and that the wall control knob is in position 0 (OFF) then reassemble your wall control (put back the knob and the plate). -
Page 22: Use Of The Wall Control
3/ Make the 3 electrical connections below and assemble the light kit with the ceiling fan by replacing the screws and washers. Then carefully install the supplied LED light dome by turning it clockwise until it locks in place. a/ Connect the connector of the red or brown wire of the light kit to the one of the red wire of the ceiling fan. b/ Connect the connector of the blue wire of the light kit to the one of the blue wire of the ceiling fan (first remove the connector of the blue fan wire which ensures double insulation ;... -
Page 23: Cleaning And Maintenance
Please inquire at the community administration for the authorized disposal location. 18. ADDITIONAL INFORMATION This manual is also available online on our website : www.fanelite.com You want to contact us by email : contact@fanelite.com You want to contact us by phone : (+590) 590 29 44 64 You can also contact us by using the contact form of our websites. - Page 24 @fanelitebrand www.fanelite.com...
Need help?
Do you have a question about the CANOUAN and is the answer not in the manual?
Questions and answers