Table of Contents
Advertisement
Quick Links
SAFETY INSTRUCTIONS
1. 120 Volts may cause serious injury from electric shock. Disconnect electrical power before starting installation or servicing.
Leave power disconnected until installation/service is completed.
2. Sharp edges may cause serious injury from cuts. Use care when cutting plenum openings and handling duct work.
3. Dropping may cause personal injury or equipment damage. Handle with care and follow installation instructions.
1. Read all instructions before beginning installation.
2. Improper installation may cause property damage or injury. Installation, service, and maintenance must be performed by a
qualified service technician.
3. Do not use in pool applications. Pool chemicals can damage the dehumidifier.
4. Do not use solvents or cleaners on or near the circuit board. Chemicals can damage circuit board components.
5. Wait 24 hours before running the unit if it was not shipped or stored in the upright position
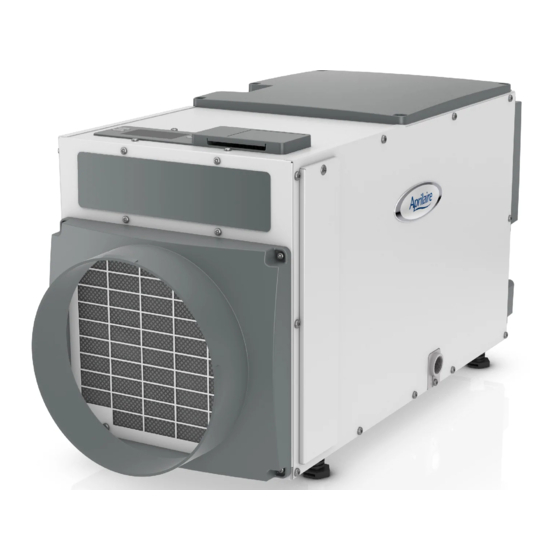
Model 1830CS & 1850CS Dehumidifier
Installation and Operation Manual
WARNING
CAUTION
READ AND SAVE THESE INSTRUCTIONS
1
Advertisement
Table of Contents

Related Manuals for Aprilaire 1830CS


Summary of Contents for Aprilaire 1830CS
- Page 1 Model 1830CS & 1850CS Dehumidifier Installation and Operation Manual SAFETY INSTRUCTIONS WARNING 1. 120 Volts may cause serious injury from electric shock. Disconnect electrical power before starting installation or servicing. Leave power disconnected until installation/service is completed. 2. Sharp edges may cause serious injury from cuts. Use care when cutting plenum openings and handling duct work.
-
Page 2: Table Of Contents
Service Parts . . . . . . . . . . . . . . . . . . . . . . . . . . . . . . . . . . . . . . . . . . . . . . . . . . . . . . . . . . . . . . . . . . . . . . . . . . . . . . . . . . . . . . . . . . . . . . . . . . . . . . . . . . 11 SPECIFICATIONS Model 1830CS Model 1850CS Weight 67 lbs . -
Page 3: Set Up Dehumidifier For Installation
SET UP DEHUMIDIFIER FOR INSTALLATION IMPORTANT: Cut the strap securing the compressor shipping support bracket and remove the strap and shipping bracket . See Figure 1 . IMPORTANT: Remove the ALERT LIGHT and FLOAT Switch cables from around the duct collar . PACKAGING CONTENT 1. -
Page 4: Duct Collars
SET UP DEHUMIDIFIER FOR INSTALLATION (CONTINUED) DUCT COLLARS Use the screws in the parts bag to attach the duct collars to the inlet and outlet of the dehumidifier . The outlet collar has a backflow FIGURE 3 – Install Duct Collars damper . -
Page 5: Location Considerations
LOCATION CONSIDERATIONS • Allow sufficient clearance for filter removal and FIGURE 5 – Filter Access Clearance to prevent airflow obstruction • Electrical service access will require the removal ELECTRICAL SERVICE 6" MINIMUM CLEARANCE of the side panel shown . Allow sufficient space ACCESS THIS SIDE FOR PROPER AIR FLOW for service on this side of the unit . -
Page 6: Drain Tubing And Condensate Pump Installation
INSTALLATION (CONTINUED) DRAIN TUBING AND CONDENSATE PUMP INSTALLATION The drain outlet on the dehumidifier can be plumbed directly to a condensate pump (see Figure 7) using FIGURE 7 – Drain and Condensate Pump Installation the provided fitting and 1/2” clear PVC tubing . Always maintain a constant downward slope from the dehumidifier to the condensate pump . -
Page 7: Model 76 - Crawl Space Control And Wiring
MODEL 76 – CRAWL SPACE CONTROL AND WIRING NOTE: Use 18-22 AWG wire for control wiring . FIGURE 10 – Model 76 Crawl Space (Remote) Wiring CRAWL SPACE CONTROL Used as crawl space control (or remote control), the Model 76 is mounted in the living space while the dehumidifier is located in the crawl + –... -
Page 8: Start-Up
SYSTEM SET-UP, CHECK & START-UP (CONTINUED) SYSTEM CHECK Press and hold the ON/OFF button After one minute of compressor and MODE buttons for 3 seconds . operation, all outputs will turn off The measured humidity, AIR and DONE will blink for 3 seconds SAMPLING and TEST will show and then return to the OFF screen . -
Page 9: Troubleshooting
HIGH DEW POINT / HIGH HUMIDITY ALERT If the dehumidifier measures the dew point of the air to be 4°F or more or 6%RH or more above the setting for 72 consecutive hours, the ALERT LIGHT will turn on and the display will show “HI” . The dehumidifier will continue to operate as normal when the ALERT LIGHT is on . If the dew point falls within 4°F of the setting or relative humidity falls within 6%RH of the setting, the ALERT LIGHT will turn off . - Page 10 0 .4”w .c . for Model • Verify that the outlet collar with backflow damper is installed on the outlet side of the dehumidifier . 1830CS or 0 .6”w .c . for • Check if backflow damper is blocked or stuck and remove obstruction .
-
Page 11: Service Parts
SERVICE PARTS 90-1906 Part Description Part No. Part Description Part No. Filter, 10” x 12” x 1” EZK 5443 Leveling Foot, Deh 5457 Internal Control Board, Deh 5444 Capacitor, 45MFD, 370VAC, 70pt/95pt Deh 5458 User Interface Assembly, Deh 5475 Capacitor, 8MFD, 450VAC, 70pt Deh, 5459 with Serial Number before 112015A09596 Wiring Access Door, AA Deh... - Page 12 AprilairePartners.com P.O. Box 1467 Madison, WI 53701-1467 800.334.6011 F: 608.257.4357 Printed in USA ©2019 Aprilaire – Division of Research Products Corporation 10011014 B2206466H 10.19...
Need help?
Do you have a question about the 1830CS and is the answer not in the manual?
Questions and answers