
Related Manuals for Brandt FP665XF1


Summary of Contents for Brandt FP665XF1
- Page 1 99638385_A_FR_EN.qxp 06/03/2007 08:21 Page 1 GUIDE D'UTILISATION GUIDE TO INSTALLATION Four Oven...
- Page 2 à vos besoins. Innovant, performant, nous l'avons conçu pour qu'il soit aussi toujours facile à utiliser. Vous trouverez également dans la gamme des produits BRANDT, un vaste choix de cuisinières, de fours à micro-ondes, de tables de cuisson, de hottes aspirantes, de lave-vaisselle, de lave-linge, de sèche-linge, de réfrigérateurs et congélateurs que...
-
Page 3: Table Of Contents
99638385_A_FR_EN.qxp 06/03/2007 08:21 Page 3 SOMMAIRE 1 / À L’ATTENTION DE L’UTILISATEUR • Consignes de sécurité ______________________________________ • Environnement ____________________________________________ 2 / INSTALLATION DE VOTRE APPAREIL • Choix de l’emplacement_____________________________________ • Encastrement _____________________________________________ • Raccordement électrique____________________________________ • Changement de câble d’alimentation __________________________ 3 / DESCRIPTION DE VOTRE APPAREIL •... -
Page 4: À L'attention De L'utilisateur
99638385_A_FR_EN.qxp 06/03/2007 08:21 Page 4 1 / A L’ATTENTION DE L’UTILISATEUR porte de votre four est bien fermée afin que le Important joint d'étanchéité remplisse correctement sa Conservez cette notice d'utilisation fonction. avec votre appareil. Si l'appareil devait être — Lors de son utilisation, l'appareil devient vendu ou cédé... -
Page 5: Environnement
99638385_A_FR_EN.qxp 06/03/2007 08:21 Page 5 1 / A L’ATTENTION DE L’UTILISATEUR • • RESPECT DE L’ENVIRONNEMENT — Les matériaux d'emballage de cet appareil sont recyclables. Participez à leur recyclage et contri- buez ainsi à la protection de l'environnement en les déposant dans les conteneurs municipaux prévus à... -
Page 6: Installation De Votre Appareil
99638385_A_FR_EN.qxp 06/03/2007 08:21 Page 6 2 / INSTALLATION DE VOTRE APPAREIL Fig. 01 meuble par 2 vis au travers des trous prévus à • • CHOIX DE L’EMPLACEMENT cet effet sur les montants latéraux (fig.1). Les schémas ci-dessus déterminent les cotes •... -
Page 7: Raccordement Électrique
99638385_A_FR_EN.qxp 06/03/2007 08:21 Page 7 2 / INSTALLATION DE VOTRE APPAREIL Compteur 20A Mono 220-240V~ 50Hz Ligne Mono 220-240 V ~ Disjoncteur différentiel ou fusible 16A Prise de courant 2 pôles + terre norme CEI 60083 Câble d'alimentation longueur 1,50 m environ •... -
Page 8: Changement De Câble D'alimentation
99638385_A_FR_EN.qxp 06/03/2007 08:21 Page 8 2 / INSTALLATION DE VOTRE APPAREIL Attention N N o o t t r r e e r r e e s s p p o o n n s s a a b b i i l l i i t t é é n n e e s s a a u u r r a a i i t t ê ê t t r r e e e e n n g g a a g g é é e e e e n n c c a a s s d d ' ' a a c c c c i i d d e e n n t t o o u u d d ' ' i i n n c c i i d d e e n n t t c c o o n n s s é é c c u u t t i i f f à... -
Page 9: Description De Votre Appareil
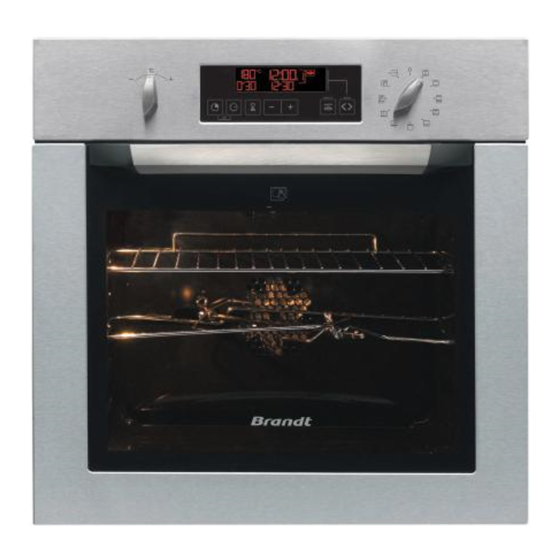
99638385_A_FR_EN.qxp 06/03/2007 08:21 Page 9 3 / DESCRIPTION DE VOTRE APPAREIL • • PRESENTATION DE VOTRE FOUR Programmateur Lampe Sélecteur de température Indicateur de gradins Sélecteur de fonctions Conseil Ce guide d’installation et d’utilisation est valable pour plusieurs modèles. De légères différences de détails et d’équipements peuvent apparaître entre votre appareil et les des- criptions présentées. -
Page 10: Description Des Accessoires
99638385_A_FR_EN.qxp 06/03/2007 08:21 Page 10 3 / DESCRIPTION DE VOTRE APPAREIL • • DESCRIPTION DES ACCESSOIRES • • Grille sécurité anti-basculement (fig.1) La grille peut être utilisée pour supporter tous les plats et moules contenant des aliments à cuire ou à gratiner. Elle sera utilisée pour les grillades (à... -
Page 11: Description De Votre Programmateur
99638385_A_FR_EN.qxp 06/03/2007 08:21 Page 11 3 / DESCRIPTION DE VOTRE APPAREIL • • DESCRIPTION DE VOTRE PROGRAMMATEUR Affichage de température Touches de réglage du temps Indicateur ECO (cuisson et pyrolyse) Touche du minuteur Affichage de l’heure et durées Touche de fin de cuisson Indicateur du numéro de gradin Touche de durée de cuisson Touche de fonction EASY COOK... -
Page 12: Utilisation De Votre Appareil
99638385_A_FR_EN.qxp 06/03/2007 08:21 Page 12 4 / UTILISATION DE VOTRE APPAREIL • • UTILISATION DU PROGRAMMATEUR • Comment régler l’heure A la mise sous tension L’afficheur clignote à 12:00. (fig.1) fig.1 Réglez l’heure en appuyant sur les touches + ou - (le maintien de la touche permet d’obtenir un défilement rapide) (fig.2). -
Page 13: º Cuisson Immédiate
99638385_A_FR_EN.qxp 06/03/2007 08:21 Page 13 4 / UTILISATION DE VOTRE APPAREIL •Cuisson immédiate — Le programmateur ne doit afficher que l’heure. Celle-ci ne doit pas clignoter (fig.1). fig.1 Tournez le sélecteur de fonctions sur la posi- tion de votre choix. Exemple : position (fig.2). -
Page 14: Cuisson Programmée
99638385_A_FR_EN.qxp 06/03/2007 08:21 Page 14 4 / UTILISATION DE VOTRE APPAREIL • • CUISSON PROGRAMMEE Cuisson avec départ immédiat et durée programmée - Choisissez le mode de cuisson souhaité et ajustez la température (fig. fig.1 - Appuyez sur la touche “ ”... - Page 15 99638385_A_FR_EN.qxp 06/03/2007 08:21 Page 15 4 / UTILISATION DE VOTRE APPAREIL • • CUISSON PROGRAMMEE (suite) Cuisson avec départ différé et heure de fin choisie P P r r o o c c é é d d e e z z c c o o m m m m e e u u n n e e c c u u i i s s s s o o n n p p r r o o g g r r a a m m m m é é e e . . - Après le réglage de la durée de cuisson, ap- puyez sur la touche “...
-
Page 16: Cuisson Économique
99638385_A_FR_EN.qxp 06/03/2007 08:21 Page 16 4 / UTILISATION DE VOTRE APPAREIL • • CUISSON ECONOMIQUE * — Le programmateur ne doit afficher que l’heure (fig. fig.1 — Tournez le sélecteur de fonctions sur la posi- tion “ ”. L’indicateur “ECO” s’allume dans l’afficheur (fig. -
Page 17: Utilisation De La Fonction Gril
99638385_A_FR_EN.qxp 06/03/2007 08:22 Page 17 4 / UTILISATION DE VOTRE APPAREIL UTILISATION DE LA FONCTION GRIL + • • — Cette fonction vous permet d’associer à la séquence de cuisson choisie une fonction “Dorage” du plat en fin de cuisson, celle-ci s’effectuant par la mise en service du gril pen- dant les 5 dernières minutes de la séqence. -
Page 18: Utilisation De La Fonction Minuterie
99638385_A_FR_EN.qxp 06/03/2007 08:22 Page 18 4 / UTILISATION DE VOTRE APPAREIL • • UTILISATION DE LA FONCTION MINUTERIE L L e e p p r r o o g g r r a a m m m m a a t t e e u u r r d d e e v v o o t t r r e e f f o o u u r r p p e e u u t t ê ê t t r r e e u u t t i i l l i i s s é... -
Page 19: Les Modes De Cuisson Du Four
99638385_A_FR_EN.qxp 06/03/2007 08:22 Page 19 5 / LES MODES DE CUISSON DU FOUR T T R R A A D D I I T T I I O O N N N N E E L L P P U U L L S S E E (température préconisée 2 2 0 0 0 0 °... - Page 20 99638385_A_FR_EN.qxp 06/03/2007 08:22 Page 20 5 / LES MODES DE CUISSON DU FOUR G G R R I I L L F F O O R R T T (température préconisée 2 2 7 7 5 5 ° ° C C mini 180°C maxi 275°C) •...
-
Page 21: Entretien Et Nettoyage De Votre Appareil
99638385_A_FR_EN.qxp 06/03/2007 08:22 Page 21 6 / ENTRETIEN ET NETTOYAGE DE VOTRE APPAREIL • • NETTOYAGE DE LA SURFACE EXTERIEURE Pour nettoyer la fenêtre du programmateur électronique, ainsi que la porte du four, utilisez un chiffon doux, imbibé de produit à vitre. Ne pas utiliser de produits d’entretien abrasifs ou de grattoirs métalliques durs pour nettoyer la porte en verre du four, ce qui pourrait érafler la surface et entraîner l’éclatement du verre. -
Page 22: Nettoyage Du Four Pyrolytique
99638385_A_FR_EN.qxp 06/03/2007 08:22 Page 22 6 / ENTRETIEN ET NETTOYAGE DE VOTRE APPAREIL - Si nécessaire, retirez l’ensemble des glaces intérieures de la porte. Cet ensemble est composé d’une ou deux glaces selon modèle avec à chaque coin une butée caoutchouc noire (fig.4). -
Page 23: Consignes De Sécurité
99638385_A_FR_EN.qxp 06/03/2007 08:22 Page 23 6 / ENTRETIEN ET NETTOYAGE DE VOTRE APPAREIL C C u u i i s s s s o o n n s s Biscuits, légumes, pâtisseries, Cuissons sans éclaboussures : p p e e u u s s a a l l i i s s s s a a n n t t e e quiches, soufflés... -
Page 24: Nettoyage Pyrolyse Immédiat
99638385_A_FR_EN.qxp 06/03/2007 08:22 Page 24 6 / ENTRETIEN ET NETTOYAGE DE VOTRE APPAREIL • • NETTOYAGE PYROLYSE IMMEDIAT Vérifiez que le programmateur affiche l’heure du jour et que celle-ci ne clignote pas. Il suffit de positionner votre sélecteur de cuisson sur la position “Pyrolyse”ou sur la position fig.1... -
Page 25: Nettoyage Pyrolyse Différé
99638385_A_FR_EN.qxp 06/03/2007 08:22 Page 25 6 / ENTRETIEN ET NETTOYAGE DE VOTRE APPAREIL • • NETTOYAGE PYROLYSE DIFFÉRÉ Suivre les instructions décrites dans le para- graphe “pyrolyse immédiate” puis Appuyez sur la touche “ ”, l’indicateur de fin de cuisson clignote pour indiquer que le réglage est alors possible. -
Page 26: Anomalies De Fonctionnement
99638385_A_FR_EN.qxp 06/03/2007 08:22 Page 26 7 / ANOMALIES DE FONCTIONNEMENT V V o o u u s s a a v v e e z z u u n n d d o o u u t t e e s s u u r r l l e e b b o o n n f f o o n n c c t t i i o o n n n n e e m m e e n n t t d d e e v v o o t t r r e e f f o o u u r r , , ceci ne signifie pas for- cément qu'il y a une panne. -
Page 27: Changement De L'ampoule
99638385_A_FR_EN.qxp 06/03/2007 08:22 Page 27 7 / ANOMALIES DE FONCTIONNEMENT Attention - Débranchez votre four avant toute intervention sur l'ampoule pour éviter tout risque de choc électrique et laissez refroidir si besoin l’appareil. Conseil Pour dévisser le hublot et l’ampoule, utilisez un gant de caoutchouc qui facilitera le démontage. -
Page 28: Avantages Et Principe "Auto Cook
99638385_A_FR_EN.qxp 06/03/2007 08:22 Page 28 8 / AVANTAGES ET PRINCIPE “AUTO COOK” • • AVANTAGE ET PRINCIPE Avec la fonction “ ” vous n’avez plus besoin de sélectionner la température et le temps de cuisson. Ces deux paramètres sont calculés automatiquement par votre four, afin d’obtenir une cuisson optimale. -
Page 29: Conseils
99638385_A_FR_EN.qxp 06/03/2007 08:22 Page 29 8 / AVANTAGES ET PRINCIPE “AUTO COOK” • • CONSEILS Dès que le symbole “ ” ne clignote plus, vous avez libre accès pour ouvrir la porte du four. Si toutefois vous ouvrez la porte alors que le symbole est animé, votre four émet un “bip”... -
Page 30: Les Modes De Cuisson Easy Cook
99638385_A_FR_EN.qxp 06/03/2007 08:22 Page 30 10 / LES MODES DE CUISSON EASY COOK P P O O I I S S S S O O N N S S Poissons entiers (dorade, colinot...) ou entiers individuels (truites, maque- • • reaux) avec aromates et vin blanc, rôti de poisson CONSEILS : - réservez cette fonction pour les poissons entiers, cuisinés au plat (les poissons grillés ou... -
Page 31: Conseils Et Astuces
99638385_A_FR_EN.qxp 06/03/2007 08:22 Page 31 11 / CONSEILS ET ASTUCES P P O O I I S S S S O O N N S S A l’achat, l’odeur doit être agréable et faible de marée. Le corps ferme et rigide, les écailles fortement adhérentes à la peau, l’œil vif et bombé et les branchies brillantes et humides. -
Page 32: Quelques Recettes
99638385_A_FR_EN.qxp 06/03/2007 08:22 Page 32 12 / QUELQUES RECETTES P P O O I I S S S S O O N N S S Dorade grise au cidre brut: 1 dorade de 1,5 kg. 500 g de champignons de Paris. 2 pommes acides. - Page 33 99638385_A_FR_EN.qxp 06/03/2007 08:22 Page 33 12 / QUELQUES RECETTES P P O O U U L L E E T T Farcissez-le avec un beau bouquet d’estragon frais ou enduisez-le d’un mélange fait de 6 gousses d’ail pilées avec une pincée de gros sel, quelques grains de poivre. T T A A R R T T E E S S / / Q Q U U I I C C H H E E S S Moule en aluminium anti-adhésif diamètre 30 cm.
- Page 34 99638385_A_FR_EN.qxp 06/03/2007 08:22 Page 34 NOTES...
- Page 35 99638385_A_FR_EN.qxp 06/03/2007 08:22 Page 35 NOTES...
-
Page 36: Service Apres-Vente
* * Service fourni par Brandt Customer Services, société par actions simplifiée au capital de 2.5000.000 euros, 5/7 avenue des Béthunes, 95310 Saint Ouen l’Aumône - RCS Pontoise 440 303 303 B B r r a a n n d d t t A A p p p p l l i i a a n n c c e e s s - société... - Page 37 (contact information at the end of this booklet). You can also log on to our web site at www.Brandt.com where you will find informa- tion on all our products, as well as other useful information.
- Page 38 99638385_A_FR_EN.qxp 06/03/2007 08:22 Page 38 TABLE OF CONTENTS 1 / INFORMATION FOR THE USER • Safety instructions _________________________________________ • Environment ______________________________________________ 2 / INSTALLING YOUR APPLIANCE • Choice of location __________________________________________ • Fitting ___________________________________________________ • Electrical connection _______________________________________ • Changing the power supply cable _____________________________ 3 / DESCRIPTION OF YOUR APPLIANCE •...
-
Page 39: Information For The User
99638385_A_FR_EN.qxp 06/03/2007 08:22 Page 39 1 / INFORMATION FOR THE USER Important — During cooking, ensure that the door of your oven is completely closed so that the seal can Keep this user guide with your appli- do its job properly. ance. -
Page 40: Environment
99638385_A_FR_EN.qxp 06/03/2007 08:22 Page 40 1 / INFORMATION FOR THE USER • • ENVIRONMENT — This appliance’s packing materials are recyclable. Recycle them and play a role in protecting the environment by depositing them in local authority containers provided for this purpose. —... -
Page 41: Installing Your Appliance
99638385_A_FR_EN.qxp 06/03/2007 08:22 Page 41 2 / INSTALLING YOUR APPLIANCE Fig. 01 holes designed for this purpose on the lateral • • CHOICE OF LOCATION mounts (fig.1). The above diagrams determine the dimen- • • FITTING sions of a cabinet that will be able to hold your oven. -
Page 42: Electrical Connection
99638385_A_FR_EN.qxp 06/03/2007 08:22 Page 42 2 / INSTALLING YOUR APPLIANCE Single-phase 20A Meter 220-240V~ 50Hz 220-240 V ~ Single-phase line 16A fuse or differential circuit breaker Electrical outlet 2 prong receptacle + earth CEI Standard 60083 Power supply cable length 1.50 m approx. - Page 43 99638385_A_FR_EN.qxp 06/03/2007 08:22 Page 43 2 / INSTALLING YOUR APPLIANCE Warning W W e e c c a a n n n n o o t t b b e e h h e e l l d d r r e e s s p p o o n n s s i i b b l l e e f f o o r r a a n n y y a a c c c c i i d d e e n n t t r r e e s s u u l l t t i i n n g g f f r r o o m m i i n n e e x x i i s s t t e e n n t t , , d d e e f f e e c c t t i i v v e e o o r r i i n n c c o o r r r r e e c c t t e e a a r r t t h h i i n n g g .
-
Page 44: Description Of Your Appliance
99638385_A_FR_EN.qxp 06/03/2007 08:22 Page 44 3 / DESCRIPTION OF YOUR APPLIANCE • • INTRODUCTION TO YOUR OVEN Programmer Light Temperature selector switch Shelf support indicator Function selector switch This Guide to Installation and Use is valid for several models. There may be minor dif- ferences in details or fittings between your appliance and the descriptions provided. -
Page 45: Description Of The Accessories
99638385_A_FR_EN.qxp 06/03/2007 08:22 Page 45 3 / DESCRIPTION OF YOUR APPLIANCE • • DESCRIPTION OF THE ACCESSORIES • • Anti-rocking safety grid (fig.1) REAR The grid can be used to hold all dishes and moulds containing foodstuffs to be cooked or browned. -
Page 46: Description Of Your Programmer
99638385_A_FR_EN.qxp 06/03/2007 08:22 Page 46 3 / DESCRIPTION OF YOUR APPLIANCE • • DESCRIPTION OF YOUR PROGRAMMER Temperature display Time setting buttons ECO indicator (cooking and pyrolytics) Timer button Time and cooking time display Cooking end time button Shelf support number indicator Cooking time button EASY COOK function button Cooking end time indicator... -
Page 47: Using Your Appliance
99638385_A_FR_EN.qxp 06/03/2007 08:23 Page 47 4 / USING YOUR APPLIANCE • • USING THE PROGRAMMER • How to set the time When plugged in The display flashes 12:00 (fig.1) fig.1 Set the time by pressing the + or - buttons (holding down the button allows you to scroll through the numbers rapidly) (fig.2). -
Page 48: º Immediate Cooking
99638385_A_FR_EN.qxp 06/03/2007 08:23 Page 48 4 / USING YOUR APPLIANCE •Immediate cooking — The programmer should display only the time. It should not be flashing (fig.1). fig.1 Turn the function selector to the position of your choice. Example: position (fig.2). Your oven recommends the optimal tempera- fig.2 ture for the chosen cooking mode. -
Page 49: Programmed Cooking
99638385_A_FR_EN.qxp 06/03/2007 08:23 Page 49 4 / USING YOUR APPLIANCE • • PROGRAMMED COOKING Cooking with immediate start and pro- grammed duration - Select the desired cooking mode and adjust the temperature (fig. fig.1 - Press the “ ” button until the cooking time indicator starts to flash. - Page 50 99638385_A_FR_EN.qxp 06/03/2007 08:23 Page 50 4 / USING YOUR APPLIANCE • • PROGRAMMED COOKING (cont.) Cooking with delayed start and chosen cooking end time P P r r o o c c e e e e d d a a s s w w i i t t h h p p r r o o g g r r a a m m m m e e d d c c o o o o k k i i n n g g . . - After setting the cooking time, press the “...
-
Page 51: Economical Cooking
99638385_A_FR_EN.qxp 06/03/2007 08:23 Page 51 4 / USING YOUR APPLIANCE • • ECONOMICAL COOKING* — The programmer should display only the time. (fig. fig.1 — Turn the function selector to the “ ” posi- tion. The “ECO” indicator appears in the dis- play (fig. -
Page 52: Using The Grill+ Function
99638385_A_FR_EN.qxp 06/03/2007 08:23 Page 52 4 / USING YOUR APPLIANCE USING THE GRILL + FUNCTION • • — This function allows you to combine the cho- sen cooking method with a function that “browns” your dish at the end of cooking; this can be accomplished by turning on the grill for the last five minutes of the programme. -
Page 53: Using The Timer Function
99638385_A_FR_EN.qxp 06/03/2007 08:23 Page 53 4 / USING YOUR APPLIANCE • • USING THE TIMER FUNCTION Y Y o o u u r r o o v v e e n n ’ ’ s s p p r r o o g g r r a a m m m m e e r r c c a a n n b b e e u u s s e e d d a a s s a a n n i i n n d d e e p p e e n n d d e e n n t t t t i i m m e e r r t t h h a a t t a a l l l l o o w w s s y y o o u u t t o o c c o o u u n n t t d d o o w w n n a a t t i i m m e e w w i i t t h h o o u u t t o o p p e e r r a a t t i i n n g g t t h h e e o o v v e e n n . -
Page 54: Oven Cooking Modes
99638385_A_FR_EN.qxp 06/03/2007 08:23 Page 54 5 / OVEN COOKING MODES C C O O N N V V E E N N T T I I O O N N A A L L F F A A N N (recommended temperature 2 2 0 0 0 0 °... - Page 55 99638385_A_FR_EN.qxp 06/03/2007 08:23 Page 55 5 / OVEN COOKING MODES H H I I G G H H T T E E M M P P E E R R A A T T U U R R E E G G R R I I L L L L (recommended temperature 2 2 7 7 5 5 °...
-
Page 56: Caring For And Cleaning Your Appliance
99638385_A_FR_EN.qxp 06/03/2007 08:23 Page 56 6 / CARING FOR AND CLEANING YOUR APPLIANCE • • CLEANING THE OUTER SURFACES To clean both the electronic programmer window and the oven door, use a window washing prod- uct applied to a soft cloth. Do not use abrasive cleaning products or hard metallic scrapers for cleaning the oven’s glass door, which could scuff the surface and cause the glass to shatter. -
Page 57: Cleaning The Pyrolytic Oven
99638385_A_FR_EN.qxp 06/03/2007 08:23 Page 57 6 / CARING FOR AND CLEANING YOUR APPLIANCE - If necessary, remove all the door’s interior windows. This unit is made up of one or two windows depending on the model, with a black rubber stopper at each corner (fig.4). - After cleaning, replace the four rubber cor- ners taking care to follow the markings on the fig.4... -
Page 58: Safety Recommendations
99638385_A_FR_EN.qxp 06/03/2007 08:23 Page 58 6 / CARING FOR AND CLEANING YOUR APPLIANCE R R e e l l a a t t i i v v e e l l y y c c l l e e a a n n Biscuits, vegetables, pastry, Splatter-free cooking: pyrolysis is c c o o o o k k i i n n g g o o p p e e r r a a t t i i o o n n s s... -
Page 59: Immediate Pyrolysis Cleaning
99638385_A_FR_EN.qxp 06/03/2007 08:23 Page 59 6 / CARING FOR AND CLEANING YOUR APPLIANCE • • IMMEDIATE PYROLYSIS CLEANING Check that the programmer is displaying the time of day and that it is not flashing. Simply set your cooking selector to “Pyrolysis”... -
Page 60: Delayed Pyrolysis Cleaning
99638385_A_FR_EN.qxp 06/03/2007 08:23 Page 60 6 / CARING FOR AND CLEANING YOUR APPLIANCE • • DELAYED PYROLYSIS CLEANING Follow the instructions described in the sec- tion “Programming for immediate pyrolysis”, then Press the “ ” button and the end of cooking time indicator flashes to indicate that you can now set your cleaning time. -
Page 61: Troubleshooting
99638385_A_FR_EN.qxp 06/03/2007 08:23 Page 61 7 / TROUBLESHOOTING I I f f y y o o u u h h a a v v e e a a d d o o u u b b t t a a b b o o u u t t t t h h e e c c o o r r r r e e c c t t f f u u n n c c t t i i o o n n i i n n g g o o f f y y o o u u r r o o v v e e n n , , this does not necessar- ily mean that there is a malfunction. -
Page 62: Changing The Bulb
99638385_A_FR_EN.qxp 06/03/2007 08:23 Page 62 7 / TROUBLESHOOTING Warning - Disconnect your oven before performing any task on the bulb to avoid the risk of electric shock and, if necessary, let the appliance cool down. To unscrew the port and the bulb, use a rubber glove, which will make disassembly easier. -
Page 63: Advantages And Principle Of "Auto Cook
99638385_A_FR_EN.qxp 06/03/2007 08:23 Page 63 8 / ADVANTAGES AND PRINCIPLE OF “AUTO COOK” • • ADVANTAGES AND PRINCIPLE With the “ ” function, you no longer need to select the temperature and cooking time. These two parameters are automatically calculated by your oven in order to give you optimal cooking. The “... -
Page 64: Tips
99638385_A_FR_EN.qxp 06/03/2007 08:23 Page 64 8 / ADVANTAGES AND PRINCIPLE OF “AUTO COOK” • • TIPS As soon as the symbol “ ” stops flashing, you can freely open the oven door. However, if you open the door while the symbol is flashing, your oven will “beep”... -
Page 65: Easy Cook Modes
99638385_A_FR_EN.qxp 06/03/2007 08:23 Page 65 10 / EASY COOK MODES F F I I S S H H Whole fish (bream, hake, etc) or fillets (trout, mackerel) with seasoning and • • white wine, baked fish TIPS: - use this function for whole fish, or prepared fish (grilled or wrapped requring the oven to be preheated).. -
Page 66: Tips And Hints
99638385_A_FR_EN.qxp 06/03/2007 08:24 Page 66 11 / TIPS AND HINTS F F I I S S H H When buying it, it should smell pleasant and not too “fishy”. The body should be firm and rigid and the scales should be firmly stuck to the skin; the eyes should be bright and rounded and gills should appear shiny and moist. -
Page 67: Some Recipes
99638385_A_FR_EN.qxp 06/03/2007 08:24 Page 67 12 / SOME RECIPES F F I I S S H H Black sea bream with dry cider: 1 black sea bream weighing 1.5 kg. 500 g button mushrooms. 2 sour apples. 2 shallots. 2 tablespoons heavy cream. 100 g butter. - Page 68 99638385_A_FR_EN.qxp 06/03/2007 08:24 Page 68 12 / SOME RECIPES C C H H I I C C K K E E N N Stuff it with a good bouquet of fresh tarragon or rub it with a mixture of 6 crushed cloves of garlic with a pinch of coarse salt, and some peppercorns.
-
Page 69: After-Sales Service
When you call, mention your appliance’s complete refer- ence (model, type, serial number). This infor- mation appears on the manufacturer’s name- plate (Fig.1). BRANDT APPLIANCES SAS 7 rue Henri Becquerel 92500 RUEIL MALMAISON MADE IN FRANCE 230V ~ 50 Hz fig.1... - Page 70 99638385_A_FR_EN.qxp 06/03/2007 08:24 Page 70 NOTES...
- Page 71 99638385_A_FR_EN.qxp 06/03/2007 08:24 Page 71 NOTES...
- Page 72 08:24 Page 72 * * Service provided by Brandt Customer Services, simplified shareholder company with capital of 25,000,000 Euros, 5/7 avenue des Béthunes, 95310 Saint Ouen l’Aumône - RCS Pontoise 440 303 303 B B r r a a n n d d t t A A p p p p l l i i a a n n c c e e s s - simplified shareholder company with capital of 10,000,000 Euros RCS Nanterre 440,302,347.
Need help?
Do you have a question about the FP665XF1 and is the answer not in the manual?
Questions and answers