
Related Manuals for Invacare Rea Focus


Summary of Contents for Invacare Rea Focus
- Page 1 Rea® Focus™ Rea®Focus™, Rea®Focus™150 en Manual wheelchair medium active User Manual This manual MUST be given to the user of the product. BEFORE using this product, read this manual and save for future reference.
- Page 2 All rights reserved. Republication, duplication or modification in whole or in part is prohibited without prior written permission from Invacare. Trademarks are identified by ™and ®. All trademarks are owned by or licensed to Invacare Corporation or its subsidiaries unless otherwise noted.
-
Page 3: Table Of Contents
5.4.2 Reclining backrest ......22 Contents 5.5 Table tray ........23 5.5.1 Mounting the attachment for table tray . - Page 4 Rea® Focus™ 10.4.10 Rea® Focus™ Low — 24*1” ....43 1431580-B...
-
Page 5: General
1.9 Service life 1.4 Limitation of liability We estimate that the Invacare® wheelchair has a service life span of five years. It is difficult to state the exact length of the service life of Invacare Rea AB accepts no liability for damage arising from: our products and the length stated is an estimated average life span •... -
Page 6: Safety
2.1 Specific risks Below you will find a number of points affecting your personal safety. Read them carefully! Contact your local Invacare office or Health Care provider in case you need assistance. Invacare is only responsible for product changes carried out by competent personnel. -
Page 7: Lifting The Wheelchair
Safety 2.5 Lifting the wheelchair • Always lift the wheelchair by grabbing the frame at the points shown in the picture. • Ensure that the backrest and push handles are securely in place. • Read the chapter “Safety instructions/Propelling techniques. Never lift the wheelchair by using the backrest bar. -
Page 8: Setup
Rea® Focus™ • Lift the rear wheel slightly upwards and push the push handles 3 Setup outwards B. When the seat plate is in the correct position, a “click” sound will be heard. 3.1 Delivery check WARNING! Any transport damage must be reported immediately to the transport Risk of trapping fingers company. -
Page 9: Fitting The Legrests
Setup Place the armrest A in the armrest attachment B. CAUTION! Make sure that the quick-release button C is pressed outwards. Risk of trapping fingers – Be careful not to trap your fingers between the frame WARNING! and the legrests. Risk of pinching fingers –... -
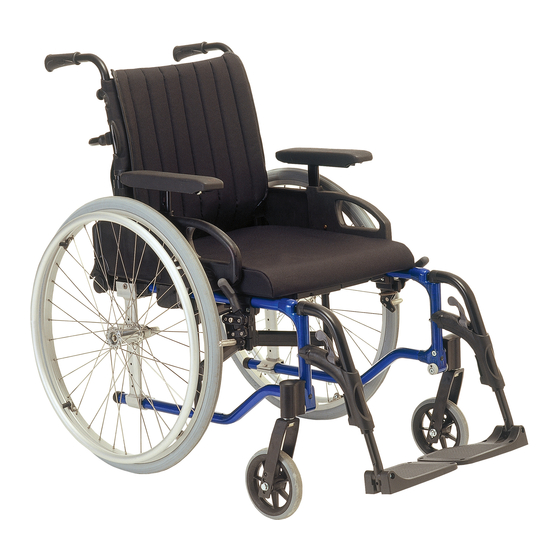
Page 10: Components
Rea® Focus™ 4 Components 4.1 Wheelchair overview The sticker placed on the backrest tubes is a help in order to set the same height on both sides. The sticker is cut into different sizes depending on the type of backrest. 4.2.1 Fixed and tension adjustable backrest Backrest upholstery Armrest... -
Page 11: Biangular Backrest
Components 4.2.2 Biangular backrest Reclining backrest without Reclining backrest with gas spring gas spring Release the two safety clamps A from the backrest tubes. Loosen the screws A. Adjust the backrest to the desired position. Re-tighten the screws A. When the backrest is adjusted in height, the lower Velcro®... -
Page 12: Adjusting The Shape - Tension Adjustable Backrest
Rea® Focus™ 4.4 Adjusting the backrest angle WARNING! Safety risk – Always make sure that the backrest is securely locked in its position. 4.4.1 Fixed backrest Fit the pins of the upper attachments B in the holes of the backrest tubes D. Loosen the screw A on the inside of the backrest attachment. -
Page 13: Biangular Backrest
Components Backrest without gas spring: 5 mm allen key 4.4.2 Biangular backrest The biangular backrest have two possible angle adjustments: • Angle adjustment on the upper joint • Angle adjustment on the lower joint Press the levers B and adjust the backrest to the desired angle. 4.5 Adjusting the push handles Loosen the screw A. -
Page 14: Flip-Up Armrests
Rea® Focus™ 4.6.1 Flip-up armrests Re-tighten the screw / handwheel. Repeat the procedure on the opposite side. 5 mm allen key Depth adjustment: Loosen the screw or the handwheel A, depending on which type of armrest you have chosen. Adjust the armrest height to the required position. Re-tighten the screw / handwheel. -
Page 15: Adjusting The Seat
Components 4.10 Adjusting the legrests 4.10.1 Angle adjustable legrest Angle adjustable legrests support the legs and reduces pressure. The legrests must always be fitted with calf pads, foot plates and heel straps. It is important to adjust the height and angle of the legrests to obtain a good seating position. -
Page 16: Fixed Legrest
Rea® Focus™ The distance between the lowest part of the footrest and the ground must be at least 40 mm. 4.10.2 Fixed legrest Height adjustment Adjust the angle and the depth by loosening the two screws A at the foot plate attachment. Tool: 5 mm allen key Adjust the foot plate to the correct position. -
Page 17: Height Adjustment
Components CAUTION! Damage to the product When adjusting the position of the rearwheel, the attachment clamps might be tightened unevenly and cause the rearwheels to scrape against the armrests. – Re-tighten the attachment screws alternately in order to get the clamps even. 4.14.1 Height adjustment Loosen the screws A and B. -
Page 18: Camber
Rea® Focus™ WARNING! Safety risk – Make sure that the castor housing is properly secured after each adjustment. When you have found the desired seat height and depth, it’s important to check that the angle between the castor attachment and surface is as close to 90° as possible, as it Loosen the screws C. -
Page 19: Castor Height
Components Push the castor housing C back into position after adjustment. Push the adjustment screw C back into position after the Re-tighten the screws A and B. adjustment. The screws should be tightened with a torque of 20 +/- Re-tighten the screws A and B. 2 Nm. - Page 20 Rea® Focus™ Slide the brake C forward or backwards to the desired position. Re-tighten the screw. The distance between the brake shaft B and the tire should be approximately 15 mm. If further adjustments of the brakes are necessary, the brake attachment can also be adjusted forwards or backwards: WARNING! Risk of reduced brake effect...
-
Page 21: Accessories
Accessories 5 Accessories 5.1 Inlay cushion seat The angle can be adjusted by loosening the screws B and bolts A on the trunk support arm. Hold with the allen key and tighten with the fixed spanner. Remember to re-tighten the screws and bolts when the required position is achieved. -
Page 22: Headrest / Neckrest
Rea® Focus™ Height adjustment Screwdriver CAUTION! Risk of pinching – Be careful not to pinch your fingers between the trunk support and the wheel when propelling the chair.. Depth adjustment: The height and the removal are operated by the handwheel. The bar is equipped with an adjustable stop block. -
Page 23: Mounting The Attachment For Table Tray
Accessories Depth / angle adjustment protrudes from the table while pushing the wheelchair, there is a risk of discomfort or minor bruises. The table tray can be adjusted both in depth and width, the following sections will show the different possibilities. 5.5.1 Mounting the attachment for table tray Loosen the handle D. -
Page 24: Locking The Table Tray
Rea® Focus™ Place the cushion for the table tray A on the table and place the CAUTION! attachment straps B around the table. Risk of discomfort / insecurity The table is not in a fixed position. – Make sure to engage the table lock again after adjusting 5.7 Anti-tip device the depth of the table. -
Page 25: Adjusting The Anti-Tip Device Swing-Away
Accessories 5.7.2 Adjusting the anti-tip device swing-away The distance between the anti-tip device and the ground as well as the distance between the anti-tip device and the drive Height adjustment / Folding: wheel should be 50 mm. 5.7.3 Anti-tip device regular Mounting and depth adjustment: To adjust the height, press on the two knobs B placed on each side of the housing. -
Page 26: Posture Belt
Rea® Focus™ 5.8 Posture belt The wheelchair can be equipped with a posture belt. It prevents the user from sliding downward in the wheelchair or from falling out of the wheelchair. The posture belt is not a positioning device. WARNING! Risk of serious injury / strangulation A loose belt can allow the user to slip down and create a Shorten or extend the loop D as required. -
Page 27: Usage
Usage 6.2.2 Stretching and leaning 6 Usage 6.1 General warnings Usage CAUTION! Risk of sliding – The seat must be positioned flat or tilted backwards if the user is left alone unattended. CAUTION! Risk of sliding – If you have a very low seat height and / or use your feet to maneuver the wheelchair, the legrests can be removed. -
Page 28: Propelling Down A Slope
Rea® Focus™ 6.2.4 Propelling down a slope The wheelchair can manage a slope of 15°. Adjust the anti-tip devices upwards. Ensure that the user’s feet rest securely on the footrests and cannot slide off. Then tilt the Risk of falling wheelchair backwards and push it forwards against the kerb. -
Page 29: Escalators And Stairs
Usage 6.2.7 Escalators and stairs Check that the push handles/push bar are securely fixed in place before you start. Do not use escalators when you are in the wheelchair. Find Fold the anti-tip devices upwards. out whether there is a lift nearby. Balance the wheelchair on the rear wheels until the balance point is found. -
Page 30: Transport
– The Rea® Focus™ with 16” wheels can under no circumstances be used as a seat in a vehicle during Invacare has continuously worked to improve the safety in all our transport. products for the users in different everyday situations. This has, among other things, meant that Invacare since the mid 1990’s has... -
Page 31: Posture Belt
Transport The tie-down points on the wheelchair where the restraint system straps should be placed are marked with this symbol. For vehicles where the wheelchair can not be restrained, there are no existing test methods. If there are existing marked areas for wheelchairs in the vehicle, we recommend to use these and follow the guidelines, if any, for placing the wheelchair. -
Page 32: Restraint Methods
Rea® Focus™ 7.4 Restraint methods 7.5.1 Folding the backrest bar Press the small knob A. Fold the backrest bar B. 7.5.2 Removing the armrests Flip-up armrests: 7.4.1 Frontal restraints with straps Connect the frontal straps around the castor attachment A. Release brakes and tension front straps by pulling the wheelchair backwards. -
Page 33: Remove The Legrest Angle Adjustable
Transport Push the handle A forwards or sidewards. WARNING! Turn the footrest B outwards. Risk of trapping fingers Lift off the footrest. – Be careful not to trap your fingers when folding the seat. 7.5.6 Brake lever 7.5.4 Remove the legrest angle adjustable The brake lever handle will have a certain amount of free play. -
Page 34: Maintenance
Rea® Focus™ 8.4 Washing and disinfection 8 Maintenance Remove all loose and removable covers and wash them in a washing machine according to the washing instructions for each 8.1 Daily performance check cover. Remove all padded parts such as seat cushions, armrests, Check that the following parts are correctly mounted on the headrest/neckrest with fixed padded parts, calf pads and so on wheelchair:... -
Page 35: Flat Tire
– Do not use a defect wheelchair. If you discover damages, contact your Dealer, Technical Service Centre or Invacare service department immediately for technical service. Technical service, is to be carried out by an authorized wheelchair technician or by an Invacare service department. -
Page 36: After Use
9 After Use according to above. Packing 9.1 Recycling • All Invacare Rea AB packing material is developed to fit the The wheelchair can be divided into the following main components: products in an optimal way to reduce unnecessary material waste. •... -
Page 37: Technical Data
Technical data 10 Technical data 10.1 Dimensions and weights FOCUS FOCUS 150 Seat width 380–505 mm 530–555 mm Low chassis: 375–450 mm Seat depth High chassis: 425–500 mm 425–500 mm Transit: 425–500 mm Low chassis: 365–490 mm Seat height High chassis: 415–540 mm 440–540 mm Transit: 430–465 mm Backrest height... -
Page 38: Maximum Weight Of Removable Parts
Rea® Focus™ 10.1.1 Maximum weight of removable parts Maximum weight of removable parts Part: Maximum weight: Legrest angle adjustable with calf pad and footrest 3,1 kg Armrest 2,0 kg Rear wheel 24” solid with handrim and spoke guard 2,5 kg Headrest / Neckrest / Cheek support 1,4 kg Trunk support... -
Page 39: Rea® Focus™ High - 22*1 3/8
Technical data 3° 3° 3° 3° N/A = Not applicable, * = Not possible in combination with 90° legrests 10.4.2 Rea® Focus™ High — 22*1 3/8” 41,5 3° 3° 3° 3° 46,5 3° 46,5 3° 46,5 3° 46,5 3° 3° 3°... -
Page 40: Rea® Focus™ High - 24*1 3/8
Rea® Focus™ 46,5 3° 3° 3° 3° 3° 3° 51,5 3° 51,5 3° 51,5 3° 3° 51,5* 3° N/A = Not applicable, * = Not possible in combination with 90° legrests 10.4.4 Rea® Focus™ High — 24*1 3/8” 41,5 3° 3°... -
Page 41: Rea® Focus™ High - 24*1
Technical data 10.4.5 Rea® Focus™ High — 24*1” 41,5 3° 3° 3° 3° 46,5 3° 46,5 3° 46,5 3° 46,5 3° 3° 3° 3° 3° 3° 51,5 3° 51,5 3° 51,5 3° 51,5* 3° 3° N/A = Not applicable, * = Not possible in combination with 90° legrests 10.4.6 Rea®... -
Page 42: Rea® Focus™ Low - 22*1 3/8
Rea® Focus™ 10.4.7 Rea® Focus™ Low — 22*1 3/8” 36,5 3° 3° 3° 3° 41,5 3° 41,5 3° 41,5 3° 41,5 3° 3° 3° 3° 3° 3° 46,5 3° 46,5 3° 46,5 3° 46,5* 3° 3° N/A = Not applicable, * = Not possible in combination with 90° legrests 10.4.8 Rea®... -
Page 43: Rea® Focus™ Low - 24*1 3/8
Technical data 46,5 3° 46,5 3° 46,5 3° 46,5* 3° 3° N/A = Not applicable, * = Not possible in combination with 90° legrests 10.4.9 Rea® Focus™ Low — 24*1 3/8” 3° 3° 3° 41,5 3° 41,5 3° 41,5 3° 41,5 3°... - Page 44 Rea® Focus™ 3° 3° 3° 3° 3° 46,5 3° 46,5 3° 46,5 3° 3° 46,5* 3° N/A = Not applicable, * = Not possible in combination with 90° legrests 1431580-B...
- Page 45 Notes...
- Page 46 Notes...
- Page 47 Notes...
- Page 48 Invacare Sales Companies Ireland: United Kingdom: Invacare Ireland Ltd, Invacare Limited Unit 5 Seatown Business Campus Pencoed Technology Park, Pencoed Seatown Road, Swords, County Bridgend CF35 5AQ Dublin Tel: (44) (0) 1656 776 222 Tel : (353) 1 810 7084...
Need help?
Do you have a question about the Rea Focus and is the answer not in the manual?
Questions and answers