Table of Contents
Advertisement
Quick Links
OWNER'S MANUAL
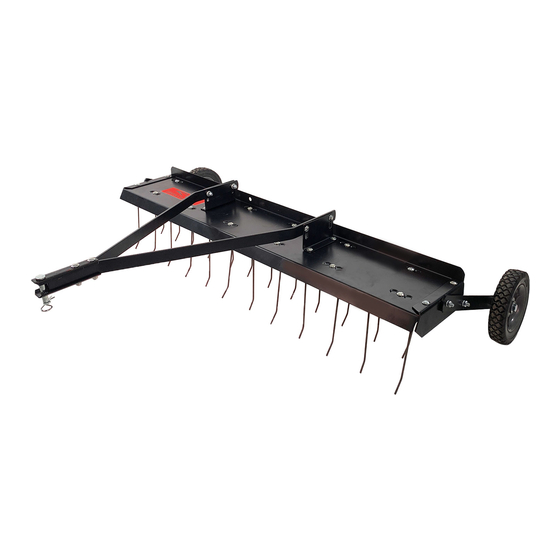
D E T H A T C H E R
MODEL:
D T - 4 8 B H
• Assembly
• Installation
• Operation
• Repair Parts
Visit us on the web!
www.brinly.com
Call Customer Service, Toll-Free: 877-728-8224
Important: This manual contains information for the safety
of persons and property. Read it carefully before
assembly and operation of the equipment!
1
L-1763-H
Advertisement
Table of Contents

Summary of Contents for Brinly DT-48BH
- Page 1 • Installation • Operation • Repair Parts Call Customer Service, Toll-Free: 877-728-8224 Important: This manual contains information for the safety Visit us on the web! of persons and property. Read it carefully before www.brinly.com assembly and operation of the equipment! L-1763-H...
-
Page 2: Table Of Contents
INTRODUCTION AND SAFETY ================================================================================================== CONGRATULATIONS on the purchase of your new Brinly-Hardy Dethatcher! Your product has been designed, engineered and manufactured to give you the best possible dependability and performance. Should you experience any problem you cannot easily remedy, please do not hesitate to contact our knowledgeable customer service department toll-free at 1-877-728-8224. - Page 3 SAFETY ================================================================================================== GENERAL NOTES (Operation) COMPATIBILITY Caution should be taken when towing and/or using any attachment. This attachment combined with the weight distribu- For use with lawn tractors, garden tion, turning radius, and speed of towing vehicle can result in tractors, ztr’s, and riding mowers.
- Page 4 Please call our Customer Service ing condition and keep safety devices in place. Department, Toll Free: 877-728-8224 or customerservice@brinly.com • The towing vehicle and attachment should be stopped and inspected for damage after striking a foreign object. Any damage should be repaired before restarting and operating the equipment.
-
Page 5: Parts
PARTS ================================================================================================== Ref # Part # Description Ref # Part # Description B-5925 Logo Decal R-1455-10 Pull Bar B-3861 Drawbar Pin R-1456-1 Tine Tray with Decal D-146P Hairpin Cotter, 1/8" R-1504 Safety Wire R-616 Tine 1M1648P Hex Head Bolt, 1/2" x 3" R-618 Special Washer 10M1032P... - Page 6 HARDWARE IDENTIFIER ================================================================================================== DO NOT RETURN PRODUCT IF YOU ARE MISSING PARTS. Illustrations on this page Please Call: 1 (877) 728-8224 are to scale for faster identification of hardware during assembly. Special Washer; Washer; Washer; Nut; Nut; Washer Lock, 5/16” Flat, 5/16”...
-
Page 7: Assembly
ASSEMBLY ================================================================================================== Step 1 1. Lay the tray (14) upside down. Note: The tray dimples will be facing UP. 2. Attach the twelve wire tines (4) to underside of Tray (14) as shown using: (18) Qty. 12 - Carriage Bolts, 5/16” x 1” Qty. - Page 8 ASSEMBLY ================================================================================================== Step 3 Align the tray mount brackets (6) with each pull bar (13) as illustrated. Secure with: (18) Qty. 4 - Carriage Bolts, 5/16” x 1” (22) Qty. 4 - Flat Washers, 5/16” (21) Qty. 4 - Lock Washers, 5/16” (19) Qty.
- Page 9 ASSEMBLY ================================================================================================== Step 5 Align the clevis plates (12) with the pull bars (13) as illustrated. Secure with: (17) Qty. 2 - Carriage Bolts, 5/16” x 2” (21) Qty. 2 - Lock Washers, 5/16” (19) Qty. 2 - Hex Nuts, 5/16” Next, slide the drawbar pin (2) through the clevis plates (12).
- Page 10 ASSEMBLY ================================================================================================== Step 7 On both ends of the tray (14): Align the wheel mount brackets (6) with the tray (14) and secure as illustrated with: (18) Qty. 4 - Carriage Bolts, 5/16” x 1” (21) Qty. 4 - Lock Washers, 5/16” (19) Qty.
- Page 11 ASSEMBLY ================================================================================================== Level Adjustment Step 9 Height Adjustment MOUNTING AND ADjUSTMENT - Select a smooth flat surface such as a driveway, sidewalk, garage floor etc. - Attach the Dethatcher to the towing vehicle using Drawbar Pin (2) and Hairpin Cotter (3). - Place tines on 1/2”...
-
Page 12: Use And Care
USE AND CARE ================================================================================================== MODEL: D T - 4 8 B H U S E & C A R E S E C T I O N TINE ACTION FREE POSITION - Grass should be less than 3” tall for proper tine action. - When in use, all tines on the dethatcher should deflect back and “flip”... -
Page 13: Installing & Removing
USE AND CARE ================================================================================================== INSTALLING DETHATCHER REMOVING DETHATCHER 1. Secure towing vehicle parking brake. CAUTION: Avoid injury! Make sure feet 2. Remove cotter pin and drawbar pin. and hands are clear of Tine Tips. CAUTION: Avoid injury! 1. Lock towing vehicle in park. Keep feet away from under drawbar. -
Page 14: Specifications
Towing Speed ..... 5 mph In North America and Canada call Toll-Free: 877-728-8224 Chat online: www.brinly.com Email: customerservice@brinly.com SERVICE NOTES 1. - Page 15 NOTES ================================================================================================== English Manual L-1763-H...
-
Page 16: Warranty
Hardy Co. During the period of the warranty, the exclusive remedy is repair or replacement of the product as set forth above. Brinly-Hardy Company • 3230 Industrial Parkway • Jeffersonville, IN 47130 • (877) 728-8224 • brinly.com English Manual L-1763-H...


Need help?
Do you have a question about the DT-48BH and is the answer not in the manual?
Questions and answers