
Subscribe to Our Youtube Channel
Related Manuals for GOEBEL GO-RN1


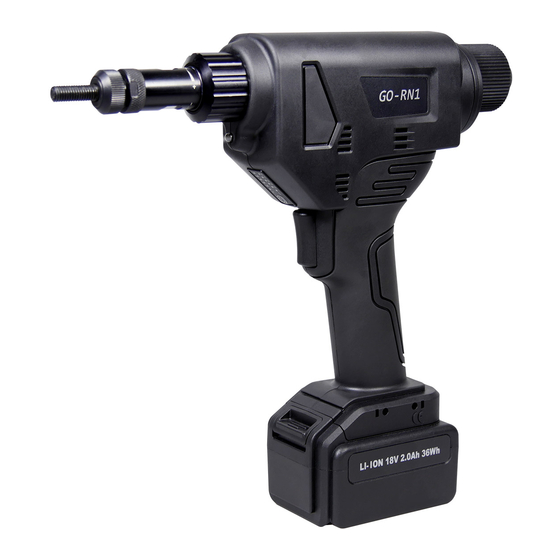
Summary of Contents for GOEBEL GO-RN1
- Page 1 innovative fastener solutions GO - RN1 GO - RN2 GO - SN1 Cordless Blind Rivet Nut Battery Tool User Manual...
-
Page 2: Table Of Contents
2 | Deutsch 1 | English Instruction manual: GO-RN1 / GO-RN2 / GO-SN1 Table of contents Page Safety precautions 2 - 4 Daily maintenance & environmental protection 1. Tools overview 1.1 Capacity 1.1 Technical parameters 1.2 Configuration/ Accessories (see fig. A) 5 - 6 1.3 Part list (see Fig. -
Page 3: Safety Precautions
Deutsch | 2 English | 2 Safety precautions To reduce the risk of electric shock, personal injury, fire and property damage, be sure to follow the safety precautions below. Description of the symbols: Danger Indicates imminent hazards which, if not avoided will result in serious injury or death Warning Indicates potential hazards which, if not avoided could result in serious injury or death Caution... - Page 4 2 | Deutsch 3 | English Safety precautions Use of the battery • Do not charge damaged, contaminated or wet batteries. • Batteries must not be thrown into water or fire at any time, and used batteries must not be disposed of at will. •...
-
Page 5: Daily Maintenance & Environmental Protection
Deutsch | 2 English | 4 Maintenance • Regular maintenance prolongs the life of tools with a lithium battery and should be carried out by an authorised dealer or manufacturer. In case of more frequent use, it is recommended to carry out maintenance in advance. •... -
Page 6: Capacity
10.62 11.5 11.87 2.16 21.5 21.5 21.5 3.68 1.46 3.62 3.62 3.62 2.68 GO-RN1 GO-RN2 GO-SN1 Model GO-RN1 GO-RN2 GO-SN1 Motor 18V Brushless motor Noise level < 78dB Riveting mode Conventional riveting mode / Fully automatic riveting mode Traction force... -
Page 7: Configuration/ Accessories (See Fig. A)
Deutsch | 2 English | 6 1.2 Configuration* / Accessories (see fig. A) Parts description Code Spec Qty. Parts description Code Spec Qty. Battery Li-Ion 18V 2.0 Ah 2277012410 Wrench 2277012310 Battery Charger 2277012510 ABS casing 2277013310 Allen key 2270000213 GO - RN1 Configuration Parts description Code... -
Page 8: Part List (See Fig. B)
2 | Deutsch 7 | English 1.3 Part list (Fig. B) Abb. B Abb. B www.goebelfasteners.com... -
Page 9: Go-Rn Series Tool Parts List
*Please note that the shaded parts in the list are wear parts, serial numbers 8, 9, 13 are structural parts, serial numbers a, b and c are their own exclusive parts for tools, and the rest are general parts. List of common parts: GO-RN1, GO-RN2, GO-SN1 Standard Code Parts description Qty. -
Page 10: Preparation Of The Tool
2 | Deutsch 9 | English 2. Preparation of the tool Before operating the riveting tool, please read the following important instructions carefully. Danger - 2.1 Exchange of the mandrels Make sure that you remove the battery from the riveting tool before replacing the mandrel and nosepiece, otherwise there is a risk of injury! Select the appropriate mandrel with corresponding nosepiece that match the size of the blind rivet nut. -
Page 11: Checking The Battery
English | 10 Deutsch | 2 2.2 Adjustment of the mandrel Adjust the length of the mandrel correctly according to the length of the blind rivet nut (see fig.) The order of adjustment is as follows: ① ② ③ ⑤ ④... -
Page 12: Checking The Tool
2 | Deutsch 11 | English 2.4 Checking the tool ➀ LED lighting ➁ Trigger ➂ Battery Install the battery ➂ in the direction of the arrow. Press the trigger ➁, the white LED illumination lights up ➀ is always on, indicating that the power is working normally. -
Page 13: Adjusting The Stroke
The stroke setting (indicator lights) can be set/adjusted between 1-10. Before adjusting the stroke, please read the following instructions to distinguish between the different types of units (GO-RN1, GO-RN2 and GO-SN1). Stroke adjustment on the GO-RN1 (adopt the principle for the GO-RN2 and GO-SN1) First press the trigger button of the tool, then press the button ➂... - Page 14 2 | Deutsch 13 | English www.goebelfasteners.com...
-
Page 15: Setting The Riveting Mode
English | 14 Deutsch | 2 3.3 Setting the riveting mode (Important note before setting the riveting mode) Before switching the riveting mode, please refer to the specifications and material properties of the blind rivet nut, as well as other information about the capacity and riveting condition to select the appropriate riveting mode. -
Page 16: Tool Operation
(before official riveting) (Fig. 1) We recommend that you use GOEBEL brand blind rivet nuts for optimum processing. Screw the blind rivet nut manually by ½ turn according to the above illustration, vertically and straight onto the mandrel! ➁... -
Page 17: Checking The Set Blind Rivet Nut
English | 16 Deutsch | 2 4.2 Checking the set blind rivet nut If after the setting process the result of the blind rivet nut setting appearance does not correspond to the picture in the middle, it shows that the stroke has not been set to the most suitable setting. -
Page 18: Setting Instructions For The Riveting Process
2 | Deutsch 17 | English 4.4 Setting instructions for the riveting process Set the blind rivet nut in a vertical position. The blind rivet nut is screwed onto the mandrel in the direction of the arrow ①, make sure that this is done vertically! ➁ Insert the blind rivet nut into the workpiece in the direction of the arrow, again vertically! ➂... -
Page 19: Charger & Batteries
English | 18 Deutsch | 2 5. Charger & Battery 5.1 Technical parameters Charger Battery Output: 18V - 2.0Ah Output: 18V - 2.0Ah - 36Wh Input: 100 - 240V /50 - 60HZ/ 1 A Net weight: 13oz Net weight: 9.5oz 5.2 Charger usage The charger is connected to the power supply, the green indicator light ➀... -
Page 20: Faq (Questions / Answers)
6. FAQ English | 19 Questions Answers ▶ ▶ Battery Is it okay not to use them for a long time Charge the battery every 6 months, otherwise it may deteriorate in performance after 6 months. ▶ ▶ Does charging after each use affect Suggestion: When the remaining battery time is only 25% (a light on the display) or when the battery life battery is exhausted, it should be recharged to increase the battery life. -
Page 21: Protection Conditions & Ce Certification
The highest liability for damages is limited to the value of the product itself and does not cover the relevant parts. If you have any questions, please contact your local dealer or GOEBEL directly for assistance immediately. - Page 22 NOTIZEN / NOTES / NOTES...
- Page 23 NOTIZEN / NOTES / NOTES...
Need help?
Do you have a question about the GO-RN1 and is the answer not in the manual?
Questions and answers