Table of Contents
Advertisement
Quick Links
Installation and Operating Instructions
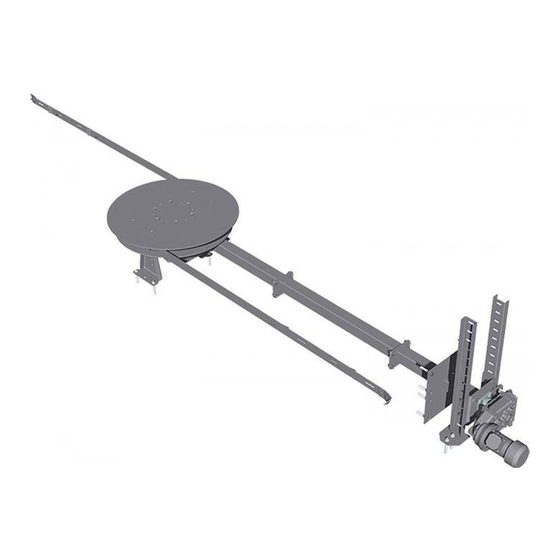
FBR-G / GAR-G
with separate rotary agitator drive and discharge screw
Translation of the original German operating and installation instructions for technicians and operators
Read and follow the instructions and safety information!
Technical changes, typographical errors and omissions reserved!
M2070119_en | Edition 04/06/2019
Fröling Ges.m.b.H. | A-4710 Grieskirchen, Industriestraße 12 | www.froeling.com
Advertisement
Table of Contents

Related Manuals for Fröling FBR-G


Summary of Contents for Fröling FBR-G
- Page 1 Installation and Operating Instructions FBR-G / GAR-G with separate rotary agitator drive and discharge screw Translation of the original German operating and installation instructions for technicians and operators Read and follow the instructions and safety information! Technical changes, typographical errors and omissions reserved! M2070119_en | Edition 04/06/2019 Fröling Ges.m.b.H.
-
Page 2: Table Of Contents
Table of contents Table of contents General Functional description Safety Hazard levels of warnings Permitted uses 2.2.1 Permitted fuels Wood chips Wood pellets Qualification of staff 2.3.1 Qualification of assembly staff 2.3.2 Personal protective equipment for assembly staff 2.3.3 Qualification of operating staff 2.3.4 Protective equipment for operating staff Design information... - Page 3 During operation Decommissioning 5.5.1 Disassembly 5.5.2 Disposal Servicing Maintenance schedule Maintenance contract Troubleshooting Procedure for fault messages Notes Appendix Addresses 9.1.1 Address of manufacturer Customer service 9.1.2 Address of the installer Installation and Operating Instructions FBR-G / GAR-G | M2070119_en...
-
Page 4: General
General 1 General Thank you for choosing a quality product from Froling. The product features a state-of- the-art design and conforms to all currently applicable standards and testing guidelines. Please read and observe the documentation provided and always keep it close to the system for reference. -
Page 5: Functional Description
The feed output can be variably adjusted regardless of the discharge screw thanks to the separate drive of the rotary agitator. Installation and Operating Instructions FBR-G / GAR-G | M2070119_en... -
Page 6: Safety
Safety Hazard levels of warnings 2 Safety 2.1 Hazard levels of warnings This documentation uses warnings with the following hazard levels to indicate direct hazards and important safety instructions: DANGER The dangerous situation is imminent and if measures are not observed it will lead to serious injury or death. -
Page 7: Permitted Uses
Safety Permitted uses 2.2 Permitted uses Froling’s “FBR-G / GAR-G with separate rotary agitator drive and discharge screw” is solely designed for discharging fuels from dedicated stores. Only use fuels specified in the “Permitted fuels” section. The unit should only be operated when it is in full working order. It must be operated in accordance with the instructions, observing safety precautions, and you should ensure you are aware of the potential hazards. -
Page 8: Wood Pellets
Safety Permitted uses Wood pellets Wood pellets made from natural wood with a diameter of 6 mm Note on standards Fuel acc. to EN ISO 17225 - Part 2: Wood pellets class A1 / D06 plus / DIN plus certification scheme and/or: General note: Before refilling the store, check for pellet dust and clean if necessary. -
Page 9: Qualification Of Operating Staff
ÖNORM H 5170 Construction and fire protection requirements (Austria) ÖNORM H 5190 Heating systems - Acoustic insulation EN ISO 13857 Safety of machines; Safety distances for maintaining a safe distance from hazardous areas Installation and Operating Instructions FBR-G / GAR-G | M2070119_en... -
Page 10: Requirements At The Installation Site
Safety Design information 2.4.2 Requirements at the installation site ▪ Protect the store against all weather conditions. ▪ Protective structures must be designed in accordance with the applicable standards and regulations Information about the fuel store NOTICE! The fuel store plate provided must be affixed in a conspicuous place in the access area of the store When FILLING the fuel store, observe the system DOCUMENTATION. -
Page 11: Safety Devices
TMF: Temperature monitoring device in the fuel store (as per TRVB H118, Austria only) which activates the customer’s alarm(s) when the temperature in the fuel store exceeds 70°C. Installation and Operating Instructions FBR-G / GAR-G | M2070119_en... -
Page 12: Residual Risks
Safety Residual risks 2.6 Residual risks The discharge system has been designed and built to comply with the relevant safety directives. Nevertheless by the nature of its operation and function, there are residual risks which cannot be eliminated completely. DANGER When working on the unit with a live power supply: Serious injury possible due to automatic startup! When working on the system or in the store, it is essential that the five safety... - Page 13 ❒ Fit an approx. 300 mm high covering made of sheet metal or hardwood to the silo wall. ➥ Froling offers a ready-made wall protection pack for this purpose. The staff at Froling will be happy to advise you. Installation and Operating Instructions FBR-G / GAR-G | M2070119_en...
-
Page 14: Technical Information
Technical information Dimensions 3 Technical information 3.1 Dimensions Item Description Diameter of spring blade ⇨ See "Store sizes" [page 15] (FBR) / articulated arm (TGR) D1 Diameter of rotary agitator 900 mm 1300 900 mm 1300 900 mm 1300 plate D2 Diameter, screw 110 mm 150 mm... -
Page 15: Store Sizes
Length of rotary agitator duct (L1) 3165 3415 3665 Length of open trough (L3) 2545 2795 3045 Length of open trough (L3) with long 4545 5045 5545 screws All dimensions in mm Installation and Operating Instructions FBR-G / GAR-G | M2070119_en... -
Page 16: Technical Specifications
Technical information Technical specifications ❒ The nominal diameter of the discharge system must be selected according to the side length (A) of the space that runs parallel to the rotary agitator duct. 3.3 Technical specifications Rotary agitator Description Geared motor Power 0.37 kW 0.55 kW... -
Page 17: Assembly
If the rotary agitator is not going to be assembled immediately: ❒ Store components at a protected location, which is dry and free from dust ➥ Damp can lead to damage to individual parts, particularly in the motor! Installation and Operating Instructions FBR-G / GAR-G | M2070119_en... -
Page 18: Installation Site
Assembly Installation site 4.2 Installation site When planning the fuel store, you should observe the following design information: Store detail Design information 1 Walls and The walls and ceilings of the store and the boiler room must be fire-proof ceilings (REI 90) in compliance with local regulations 2 Hole in Do not fix or cement the transfer trough and rotary agitator duct to the... -
Page 19: Information About Setup
⇨ See "Fitting the rotary agitator" [page 35] NOTICE! When fitting the discharge screw on the left side, the raising plate (B) in the area of the intermediate plate (C) must be shortened accordingly! Installation and Operating Instructions FBR-G / GAR-G | M2070119_en... - Page 20 Assembly Installation site Distance between articulated arms / spring blades FBR: Ø 900 mm FBR / GAR GAR: Ø 1300 mm FBR / GAR Distance between top edge of trough of discharge screw and bottom edge of spring blades: ▪ min. 30 mm / max. 50 mm (2) NOTICE! Intermediate plate and top edge of trough of discharge screw should be on the same level (3) NOTICE! The rotary agitator duct and top edge of trough of discharge screw must be...
- Page 21 Assembly Installation site 1x standard discharge screw and 1x long discharge screw Installation and Operating Instructions FBR-G / GAR-G | M2070119_en...
-
Page 22: Wall Opening
Assembly Installation site 4.2.2 Wall opening Before erecting the rotary agitator, the customer must make a hole in the wall for both the trough of the discharge screw and the rotary agitator duct. Discharge screw trough Section - Side view: Section - Top view α... -
Page 23: Installing The Discharge System
Top part of gravity shaft (for Ø 110) Spring pin (for Ø 110) Flange bearing Extension trough raising plate Torque support with pin Extension trough pellet cover plate Torque support with bearing Installation and Operating Instructions FBR-G / GAR-G | M2070119_en... -
Page 24: Materials Supplied With Agitator Head
Assembly Installing the discharge system Extension trough wood chips cover Spacer ring plate Open extension trough Geared motor 4.3.2 Materials supplied with agitator head FBR: Spacer ring (for FBR with mitre gear RI150 (green)) Spring blades Rotary agitator plate GAR: Articulated arm rotary agitator Spring blades 4.3.3 Materials supplied with basic kit... -
Page 25: Materials Supplied With Separate Drive
Torque support with Calotte holder Adjustable foot bearing Trough holder with Fibre-glass seal Adjustable foot for support geared motor Geared motor Friction bearing calotte wall lining Spacer ring Extension module Heavy duty anchor Installation and Operating Instructions FBR-G / GAR-G | M2070119_en... -
Page 26: Installing The Discharge Screw
Assembly Installing the discharge system 4.3.5 Installing the discharge screw Overview of trough arrangement The following diagrams show the correct arrangement of the open troughs depending on the rotary agitator diameter and the screw diameter. Screw Ø 110 Base trough L=1045 with wood chips plate Transfer channel Direction of feed... - Page 27 Transfer channel Ø 5,5 m Extension trough L=1500 Base trough L=1545 with wood chips plate with wood chips plate Transfer channel Ø 6,0 m Installation and Operating Instructions FBR-G / GAR-G | M2070119_en...
-
Page 28: Overview Of Trough Arrangement With Extended Length
Assembly Installing the discharge system Overview of trough arrangement with extended length The following diagrams show the correct arrangement of the open troughs depending on the rotary agitator diameter and the screw diameter. Screw Ø 110 Extension trough L=500 with pellets plate Base trough L=1045 with wood chips plate Transfer channel... - Page 29 Ø 5,5 m Extension trough L=1000 Extension trough L=1500 with pellets plate Base trough L=1545 with pellets plate Extension trough L=1500 with wood chips plate with pellets plate Transfer channel Ø 6,0 m Installation and Operating Instructions FBR-G / GAR-G | M2070119_en...
-
Page 30: Installing The Discharge Screw
Assembly Installing the discharge system Installing the discharge screw ❒ Assemble open troughs (A) according to overview, ⇨ See "Overview of trough arrangement" [page 26] ⇨ See "Overview of trough arrangement with extended length" [page 28] ❒ Fit transfer channel (B) with seal to open trough ➥... - Page 31 ▪ Fit the raising plate (E) on the opposite side NOTICE! Observe the overview for the trough arrangement, ⇨ See "Overview of trough arrangement" [page 26] ⇨ See "Overview of trough arrangement with extended length" [page 28] Installation and Operating Instructions FBR-G / GAR-G | M2070119_en...
-
Page 32: Fitting The Upper Part Of Gravity Shaft And Drive Unit
Assembly Installing the discharge system 4.3.6 Fitting the upper part of gravity shaft and drive unit Assembly with screw Ø110 ❒ Secure top part of gravity shaft (A) with seal (B) to the closed trough on the boiler room side ❒... -
Page 33: Assembly With Screw Ø150
❒ Secure top part of gravity shaft (A) with seal (B) to the closed trough on the boiler room side ❒ Secure flange plate (C) with seal (D) to top part of gravity shaft Installation and Operating Instructions FBR-G / GAR-G | M2070119_en... - Page 34 Assembly Installing the discharge system ❒ Push the flange bearing (A) onto the screw end and secure to top part of gravity shaft ❒ Push the space ring (B) onto the screw end ❒ Insert key (C) into nut on screw end ❒...
-
Page 35: Fitting Attachments
➥ Screw the flange for the intermediate support (D) to the underside of the flanges ➥ Check the alignment of the flange plates! ❒ Slide drive shaft (E) into rotary agitator duct Installation and Operating Instructions FBR-G / GAR-G | M2070119_en... - Page 36 Assembly Installing the discharge system ❒ Push rotary agitator duct through hole in wall ➥ The last duct part must be positioned close to the hole in the wall! ❒ Remove the key and shaft retainer (A) from the shaft stub ❒...
- Page 37 ❒ Fit both half shells (A) of the bearing on the drive shaft ❒ Fit calotte holder (C) with seal (B) ➥ Make sure that the half shells (A) are secured by the calotte holder (B) (see detail) Installation and Operating Instructions FBR-G / GAR-G | M2070119_en...
- Page 38 Assembly Installing the discharge system Prepare the geared motor: ❒ Remove the transport lock ❒ Fit the vent screw (supplied) to the highest point ❒ Drill holes in the wall lining on the wall and pre-drill ❒ Hammer in dowel and fix wall lining with frame screws ❒...
- Page 39 ❒ Insert the heavy duty anchors into the bore hole and tighten with a spanner (SW 17 mm) ❒ Shorten the adjustable feet using an angle grinder so that the rotary agitator arms are not obstructed Installation and Operating Instructions FBR-G / GAR-G | M2070119_en...
-
Page 40: Installing The Spring Blade Agitator (Fbr)
Assembly Installing the discharge system 4.3.9 Installing the spring blade agitator (FBR) RI 125 RI 150 Mitre gear RI 125: ❒ Fit the stir plate to the flange of the mitre gear Mitre gear RI 150: ❒ Fit the stir plate and spacer rings to the flange of the mitre gear Fröling Ges.m.b.H. -
Page 41: Fitting The Spring Blades
❒ Tighten the left and right screw connections alternately by 2 - 3 turns each, until the spring pile is right next to the ring of the stirring head ❒ Repeat the steps for each spring pile ❒ Fit the cover plates on the stirring head Installation and Operating Instructions FBR-G / GAR-G | M2070119_en... -
Page 42: Assembling The Articulated Arm Rotary Agitator (Gar)
Assembly Installing the discharge system 4.3.10 Assembling the articulated arm rotary agitator (GAR) ❒ Loosen the four hexagonal screws and remove the rotary disc ➥ Eye bolts are no longer required ❒ Remove the cable ties (transport lock) on both articulated arms ❒... - Page 43 NOTICE! In order to achieve the correct setting (situation C), it may be necessary to screw in the articulated arms several times and readjust the adjusting nut! ❒ Secure adjusting nut (Y) with lock nut (X) Installation and Operating Instructions FBR-G / GAR-G | M2070119_en...
- Page 44 Assembly Installing the discharge system ❒ Re-install cover of basic module and rotary disc on basic module The spring piles may already be assembled, depending on the delivery configuration. In this case, the following step is omitted: direction of rotation ❒...
-
Page 45: Fitting Adjustable Feet In Boiler Room (Optional)
❒ Close the wall penetration on the store side and the boiler room side with a non- flammable covering NOTICE Do not connect the transfer channel to the brickwork (with concrete), as this will transfer sound through all the brickwork. Installation and Operating Instructions FBR-G / GAR-G | M2070119_en... -
Page 46: Connecting The System
Assembly Connecting the system 4.4 Connecting the system 4.4.1 Electrical connection DANGER When working on electrical components: Risk of electrocution! When work is carried out on electrical components: ❒ Always have work carried out by a qualified electrician ❒ Observe the applicable standards and regulations ➥... -
Page 47: Operating The System
❒ Check the connection of the sprinkler device ❒ Check there is a shear plate in the area of the wall penetration When the check is finished: ❒ Fill the store with fuel Installation and Operating Instructions FBR-G / GAR-G | M2070119_en... -
Page 48: Filling The Store With Fuel
Operating the system Filling the store with fuel 5.3 Filling the store with fuel Note the following when loading the machine with fuel: ❒ Only use permitted fuels! ⇨ See "Permitted fuels" [page 7] ❒ Remove foreign bodies from the store before filling NOTICE! Systems in which the fuel is delivered by tanker and is blown into the store space must be fitted with a rotary valve. -
Page 49: Loading Of Fuel For A Partially Emptied Store With Rotary Agitator
❒ Only add the rest of the fuel once the rotary agitator arms are back on the head of the rotary agitator ❒ It is important you follow the procedure given below! Installation and Operating Instructions FBR-G / GAR-G | M2070119_en... -
Page 50: Blowing In Fuel For A Partially Emptied Store With Rotary Agitator
Operating the system Filling the store with fuel ❒ Switch off the power supply to the entire system ➥ Depending on the model via boiler, expansion switch cabinet, etc. ❒ Pile up residual fuel (in the corners and on the walls) in the fuel store on and around the head of the rotary agitator by hand and distribute on discharge screw ➥... -
Page 51: Blowing In Fuel For An Empty Store With Rotary Agitator
➥ The head of the rotary agitator should be completely covered ❒ Follow the instructions on working in the fuel store! NOTICE! Refer to the notice (supplied with the boiler) at the entrance to the store Installation and Operating Instructions FBR-G / GAR-G | M2070119_en... -
Page 52: Drainage Of Fuel Store
Operating the system Filling the store with fuel If the head of the rotary agitator is not adequately covered by the remaining fuel: ❒ Close all openings to the store to seal out dust ❒ Load a small amount of fuel (approx. 2-3 m³) ➥... -
Page 53: During Operation
5.5.2 Disposal ❒ Disposal should be carried out according to the valid national regulations and guidelines. ❒ You can separate and clean recyclable materials and send them to a recycling centre. Installation and Operating Instructions FBR-G / GAR-G | M2070119_en... -
Page 54: Servicing
Servicing Maintenance schedule 6 Servicing 6.1 Maintenance schedule Discharge screw GAR / FBR W = weekly, M = monthly, Q = quarterly, F = prior to each fill of the store Element Interval Operation Motor / gears ❒ Carry out a general visual inspection of drive motors ➥... -
Page 55: Maintenance Contract
For this reason, FROLING offers a maintenance contract, which optimises operating safety. Please see the details in the accompanying guarantee certificate. Your Froling customer service office will also be happy to advise you. Installation and Operating Instructions FBR-G / GAR-G | M2070119_en... -
Page 56: Troubleshooting
Troubleshooting Procedure for fault messages 7 Troubleshooting The term “fault” is a collective term for warnings, errors and alarms. The boiler reacts differently to the three types of message: WARNING In case of warnings the status LED flashes orange and the boiler initially continues controlled operation. -
Page 57: Notes
Notes 8 Notes Installation and Operating Instructions FBR-G / GAR-G | M2070119_en... - Page 58 Notes Fröling Ges.m.b.H. | A-4710 Grieskirchen, Industriestraße 12 | www.froeling.com...
- Page 59 Notes Installation and Operating Instructions FBR-G / GAR-G | M2070119_en...
-
Page 60: Appendix Addresses
Appendix Addresses 9 Appendix 9.1 Addresses 9.1.1 Address of manufacturer FRÖLING Heizkessel- und Behälterbau GesmbH Industriestraße 12 A-4710 Grieskirchen AUSTRIA TEL 0043 (0)7248 606 0 FAX 0043 (0)7248 606 600 EMAIL info@froeling.com INTERNET www.froeling.com Customer service Austria 0043 (0)7248 606 7000 Germany 0049 (0)89 927 926 400 Worldwide...
Need help?
Do you have a question about the FBR-G and is the answer not in the manual?
Questions and answers