Table of Contents
Advertisement
Available languages
Available languages
Quick Links
Advertisement
Table of Contents

Related Manuals for Xoro HRT 7622NP


Summary of Contents for Xoro HRT 7622NP
- Page 1 Manuale d’uso - IT User Manual - ENG HRT 7622 HRT 7622NP...
-
Page 2: Istruzioni Di Sicurezza
Istruzioni di sicurezza Il flash con un simbolo freccia all’interno di un triangolo equilatero avverte l’utente della presenza di non isolata “tensione pericolosa” all’interno del prodotto che può essere di intensità sufficiente a costituire un rischio di folgorazione per le persone. Il punto esclamativo all’interno di un triangolo equilatero avverte l’utente della presenza di importanti istruzioni operative e di manutenzione (assistenza) nella literature allegato al prodotto. - Page 3 Dichiarazione CE Con la presente MAS Elektronik AG dichiara che le seguenti attrezzature: • HRT 7622NP (DVB-T2 Ricevitore HD) • HRT 7622 (DVB-T2 Ricevitore HD con USB PVR) è in conformità alla Direttiva 2014/53 / UE. Il testo integrale della dichiarazione di conformità UE è...
- Page 4 Contenuto della confezione - Panoramica Contenuto del pacco I seguenti componenti vengono forniti: Ricevitore XORO, Telecomando, Manuale d’uso Nota: • Il dispositivo deve essere utilizzato solo con gli accessori originali • Se uno qualsiasi di questi elementi sono mancanti, si prega di contattare il rivenditore al più pre- sto possibile.
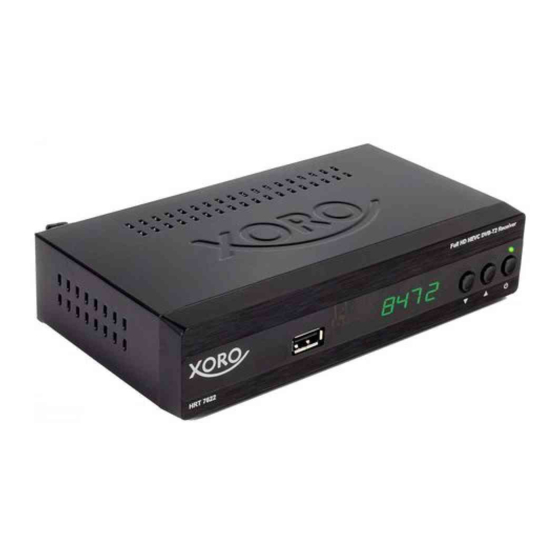
- Page 5 Panoramica - Telecomando Posizione Etichetta Descrizione RF-IN Collegare l’antenna a questa porta. La tensione di alimentazione (+ 5V) per un’antenna attiva può essere attivato durante la prima installazione o nel menu di ricerca canali. SCART Questa porta consente di collegare televisori con un ingresso SCART. S/PDIF Questa porta consente di connettersi a un dispositivo audio con ingres- COAX...
- Page 6 Telecomando Pulsante Descrizione ■ PVR, Timeshift, Supporti di riproduzione-File e PVR Record: fine riproduzione o registrazione. ● La registrazione PVR si avvia se si preme questo tasto mentre si guarda la TV in diretta e un dispositivo di archiviazione è collegato alla porta USB. PVR/ROS- Se si preme questo tasto mentre si guarda la TV in diretta e un dispositivo di archivia- zione è...
-
Page 7: Prima Installazione
Prima installazione • Collegare il ricevitore al televisore ed all’antenna. • Collegare il ricevitore ad una presa di corrente • Accendere il televisore e selezionare la sorgente del segnale corretta (HDMI o SCART) con la telecomando del televisore. Si prega di consultare il manuale d’uso del televisore. •... - Page 8 Attività giornaliera Cambio canali È possibile passare da un canale all’altro utilizzando i tasti CH ▲ / CH ▼ Tramite i tasti numerici 0-9 si può andare a uno specifico canale direttamente. Elenco canali Si apre la lista dei canali premendo il tasto OK. ▲/▼...
- Page 9 Funzionamento quotidiano - PVR e Timeshift Se si preme OK per pianificare un timer, data e ora sono automaticamente importati dalla EPG ad un timer. Si prega di controllare e modificare, se necessario. Confermare il timer premendo il tasto OK. All‘elenco Timer si può...
- Page 10 Impostazioni (Programma) Aprire il menu principale del ricevitore premendo il tasto MENU. Modifica programma Il menu è accessibile solo inserendo una password. La pas- sword di default è 000000. Se hai dimenticato la password, utilizzare la password master 888888. Le impostazioni verranno salvate automaticamente quando si esce dal menu.
- Page 11 Impostazioni (Programmi / Immagini) Rinominare il canale Utilizzare i tasti ▲ / ▼ per evidenziare il canale che si desidera rinominare e premere il tasto RE- CALL. Apparirà una tastiera sullo schermo. Utilizzare i tasti ◄/►/▲/▼ per evidenziare le lettere giu- ste e confermare la scelta premendo il tasto OK.
- Page 12 Impostazioni (Immagine / Ricerca canali / ora) Info Timeout Questa impostazione determina il tempo di visualizzazione delle informazioni (nome del canale, nume- ro, ecc) dopo il passaggio ad un altro canale. Trasparenza OSD Questa impostazione modifica l’aspetto del menu OSD con l’aggiunta della trasparenza. Ricerca automatica Quando questa funzione viene attivata immediatamente inizia una nuova scansione dei canali (vedere capitolo Prima...
-
Page 13: Led Dimmer
Impostazioni (opzione / System) Lingua OSD Impostare la lingua per tutti i menu su schermo. Lingua dei sottotitoli Impostare la lingua preferita per i sottotitoli. Lingua audio Impostare la lingua preferita per le tracce audio. Digital Audio Con questa opzione è possibile specificare il formato del segnale audio dall’uscita HDMI e S/PDIF: Suono stereo digitale Se un programma TV ha una traccia audio multicanale verrà... - Page 14 È possibile accedere alle informazioni per quanto riguarda il software e l’hardware tramite questa opzione. Aggiornamento software Se necessario, un nuovo firmware, nonché un manuale di installazione saranno disponibili presso www.xoro.de Non installare il software da altre fonti o siti web. Impostazione di rete Questo menù permette di impostare manualmente gli indirizzi IP.
- Page 15 Impostazioni (USB) Proporzioni Questa impostazione definisce se le immagini devono essere adattate allo schermo intero o se debba essere mantenuto il rapporto di aspetto. Configurazione dei film In questo menu è possibile modificare l’aspetto (dimensione / colore) dei sottotitoli. Questa impostazione ha effetto solo su alcuni sottotitoli in modalità media player. I sottotitoli dei canali televisivi non sono interessati.
-
Page 16: Safety Instructions
Safety instructions The flash with an arrowhead symbol within an equilateral triangle is intended to alert the user of the presence of un-insulated “dangerous voltage” within the product’s enclosure that may be of sufficient magnitude to constitute a risk of electric shock to persons. - Page 17 EC Declaration Hereby MAS Elektronik AG declares that the following Equipment: • HRT 7622NP (HD DVB-T2 Receiver) • HRT 7622 (HD DVB-T2 Receiver with USB PVR) is in compliance with Directive 2014/53/EU. The full text of the EU declaration of conformity is availa- ble at the following internet address: www.xoro.de/downloads...
-
Page 18: Package Content
Package content - Overview Package content The following components are supplied : • XORO Receiver • Remote Control • User Manual Note: • The device should only be used with original accessories • If any of these items are missing, please contact your dealer as soon as possible. Keep the origi- nal packaging in the event that the unit must be returned to the dealer. - Page 19 Overview - Remote Control Position Label Description RF-IN Connect your antenna to this port. Supply Voltage (+5V) for an active Antenna can be enabled during first time installation and in Channel Search Menu. SCART This port allows to connect TVs with a SCART-Input. S/PDIF COAX This Port allows to connect to an Audio Device with digital Audio Input.
-
Page 20: Remote Control
Remote Control Button Description ● PVR record starts if this Button is pressed while watching live TV and a USB Mass Storage Device is connected. PVR/RED List of PVR Recording is shown if this Button is pressed while watching live TV and a USB Mass Storage Device with recordings is connected. -
Page 21: First Time Installation
First Time Installation • Connect the Receiver to your TV and your Antenna. • Connect the Receiver to a Mains Socket • Power On your TV and select the correct signal source (HDMI or SCART) with the Remote Con- troller of your TV. Please consult the User Manual of your TV. •... -
Page 22: Daily Operation
Daily operation Switching Channels You can switch between channels using the CH▲/CH▼ keys. Via the numerical keys 0-9 you can go to a specific channel directly. Channel List Open the channel list by pressing the OK button. ▲/▼ Select channel Switch to a selected channel PAGE Scroll through a list page by page... -
Page 23: Direct Record
Daily operation - PVR and Timeshift If you press OK to schedule a Timer, Date and Time are au- tomatically imported from the EPG to a Timer. Please check and modify if needed. Confirm the Timer be pressing OK. The Timer List can also be accessed by the BLUE Button on the Remote Controller. -
Page 24: Program Edit
Settings (Program) Open the main menu of the receiver by pressing the MENU key. Program Edit The menu can only be accessed by entering a password. The default password is 000000. If you have forgotten your password, use the Master-Pass- word 888888 Your settings will be saved automatically when leaving the menu. -
Page 25: Aspect Ratio
Settings (Program/Picture) Favourite groups The receiver has 4 favourite groups. You can assign any channel to any group. A channel can be assigned to several groups. • Use the ▲/▼ keys to select a channel you want to add to a favourite group. Open the favourite groups menu by pressing the FAV key. -
Page 26: Auto Standby
Settings (Picture/Channel Search/Time) TV Format Determines the colour system for the SCART output (PAL or NTSC) and the frame rate for the HDMI output (50Hz or 60Hz). Info Timeout This setting determines how long the information display (channel name, number etc.) remains visible after switching to another channel. -
Page 27: Set Password
Settings (Option/System) OSD Language Set the language for all on screen menus. Subtitle language Set the preferred language for subtitles. Audio Language Set the preferred language for audio tracks. Digital Audio With this option you can specify the format of the audio signal output by the HDMI and S/PDIF output: digital stereo sound If a TV program has a multi channel audio track this audio format will be distributed over the HDMI output... - Page 28 Settings (System/USB) Software update If required new firmware as well as an installation manual will be available at www.xoro.de Do not install software from other sources or websites. Network Setting This Menu allows to manually set IP Addresses. This settings shall be changed by advanced users only. Must users don’t need to change this settings because the Receiver will automatically set IP Addresses is most cases.
-
Page 29: Movie Configure
Settings (USB) Movie Configure In this menu you can change the appearance (Size/Colour) of subtitles. This settings only affects certain subtitles in media player mode. Subtitles from TV Channels are not affected. PVR Configure This menu is available for the HRT 7622 only. Record Device This Menu shows several information about the connected USB Mass Storage device. - Page 30 XORO by MAS Elektronik AG Weidegrund 3 21614 Buxtehude Germany www.xoro.de ENG: OY1261...
Need help?
Do you have a question about the HRT 7622NP and is the answer not in the manual?
Questions and answers