Carel Power + PSD1 Series Technical Leaflet
Hide thumbs
Also See for Power + PSD1 Series:
- Installation manuallines (64 pages) ,
- Technical leaflet (40 pages)
Table of Contents
Advertisement
Available languages
Available languages
Advertisement
Table of Contents

Related Manuals for Carel Power + PSD1 Series


Summary of Contents for Carel Power + PSD1 Series
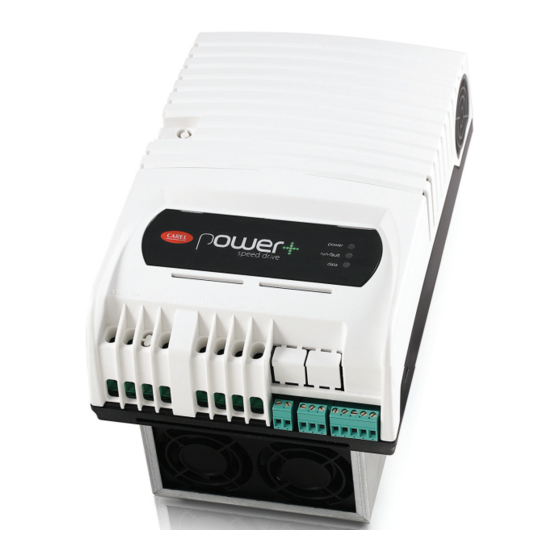
- Page 1 Power + Speed drive PSD1 Series - 230V 12/16A PSD1 Series - 400V 18/24A Foglio istruzioni Technical leafl et NO POWER & SIGNAL CABLES TOGETHER READ CAREFULLY IN THE TEXT! H i g h E f f i c i e n c y S o l u t i o n s...
-
Page 3: Table Of Contents
Indice 1. AVVERTENZE 1.1 Avvertenze generali ..................5 1.2 Regole fondamentali di sicurezza ............... 5 2. INTRODUZIONE 2.1 Funzioni e caratteristiche principali ............. 6 2.2 Modelli ......................6 2.3 Accessori ......................6 3. INSTALLAZIONE 3.1 Identifi cazione ....................7 3.2 Struttura ......................7 3.3 Dimensioni ...................... - Page 4 Il presente foglio istruzioni ha lo scopo di descrivere le operazioni di messa in servizio e installazione del drive, nonché di illustrare le caratteristiche principali del prodotto. Per ulteriori informazioni consultare il manuale d’uso cod. +0300048IT, scaricabile, anche anteriormente all’acquisto, dal sito ww.carel.com, alla sezione “Documentazione”. SIMBOLI Tensione pericolosa Cautela, superfi...
-
Page 5: Avvertenze
+0300048IT, disponibile, anche anteriormente all’acquisto, sul sito www.carel.com, alla sezione “Documentazione”. Regole fondamentali di sicurezza •... -
Page 6: Introduzione
È predisposto per il montaggio a pannello o con dissipatore fuori quadro. La confi gurazione e la programmazione, nonchè i comandi di marcia/arresto (run/stop) ed il riferimento di velocità, sono gestiti da un controllo CAREL pCO o da un qualunque dispositivo di controllo tramite collegamento seriale RS485 con protocollo Modbus® in confi... -
Page 7: Installazione
INSTALLAZIONE Attenzione: evitare l’installazione del drive in ambienti con le seguenti caratteristiche: • umidità relativa maggiore del 95% o condensante; • forti vibrazioni o urti; • esposizione a getti d’acqua; • esposizione ad atmosfere aggressive ed inquinanti (es: gas solforici e ammoniacali, nebbie saline, fumi) per evitare corrosione e/o ossidazione;... -
Page 8: Dimensioni
Dimensioni Le dimensioni totali del drive variano in base alle modalità di raff reddamento (taglia 1per i modelli con dissipatore raff reddato ad aria forzata e taglia 2 per i modelli Coldplate) e secondo il tipo di montaggio (a pannello o con dissipatore fuori quadro, vedere il paragrafo “Piano di foratura e montaggio”), in quanto la posizione delle staff... -
Page 9: Piano Di Foratura E Montaggio
Dimensioni (mm) Montaggio Peso (kg) Dissipatore fuori quadro A pannello Codice / taglia PSD1012200 / 1 289,2 192,3 269,3 PSD1016200 / 1 289,2 192,3 269,3 PSD10122A0 / 2 289,2 192,3 PSD10162A0 / 2 289,2 192,3 PSD1018400 / 1 PSD1018400 / 1 82 82 289,2 289,2... -
Page 10: Raffreddamento
Montaggio a pannello Fig. 3.e Attenzione: nel caso di smontaggio non fare presa sulle staff e sfi labili, ma su parti “solide“ come il dissipatore e il coperchio plastico. Staccare prima le staff e superiori, poi quelle inferiori per evitare possibile caduta al suolo. Raff... -
Page 11: Conformità Alle Norme Emc
Conformità alle norme EMC Per quanto riguarda le linee guida generali EMC seguire scrupolosamente le indicazioni riportate al paragrafo “Collegamenti elettrici“ e nel manuale d’uso cod. +0300048IT, scaricabile, anche anteriormente all’acquisto, dal sito ww.carel.com. “Power+” +0500048IE - rel 2.2 - 06.11.2014... -
Page 12: Collegamenti Elettrici
Collegamenti elettrici Per l’installazione procedere come indicato di seguito, facendo riferimento allo schema di collegamento generale (par. 3.9). Attenzione: nel collegamento dei driver è necessario rispettare le seguenti avvertenze: • separare quanto più possibile (almeno 40 cm) i cavi delle sonde e degli ingressi digitali dal cavo motore per evitare possibili disturbi elettromagnetici. - Page 13 Morsetti C1 e C2 Attenzione: l’utilizzo dei morsetti C1 e C2 è prevista solo per i modelli PSD10184** e PSD10244** (alimentazione trifase). Si presentano due casi: Se è richiesta la conformità alla EN61000-3-12: • collegare ai morsetti C1 e C2 la reattanza DC opzionale;...
- Page 14 Corrente di dispersione Come per tutti i dispositivi con inverter, può esistere una corrente di dispersione verso terra maggiore di 3,5mA. Il drive è progettato per produrre la minima corrente di dispersione. L’intensità di corrente è infl uenzata dalla lunghezza e dal tipo di cavo motore, dalla frequenza eff...
- Page 15 Collegare le fasi del motore in modo da ottenere il senso di rotazione desiderato: per invertirlo scambiare tra loro due fi li U, V, W come descritto nella fi gura seguente L1/L L2/N L1/L L2/N L3 U V W L1/L L2/N U V W Fig.
- Page 16 Ingresso digitale di sicurezza Collegare l’ingresso digitale di sicurezza “Safe Torque Off ” ad un dispositivo di sicurezza (per esempio un pressostato di massima pressione) con contatto pulito normalmente chiuso, in serie a una tensione esterna 24 Vac/24 Vdc, senza necessità...
-
Page 17: Schema Di Collegamento Generale
Schema di collegamento generale (mod. PSD10122**, PSD10162**) Non usati Not used Connessione al 24 Vdc ausiliari in caso di non utilizzo della funzionalità Connection to auxiliary 24 Vdc supply when function Safety Torque Off is not used 3 4 5 6 7 8 9 10 L1/L L2/N L3 1 2 3 4 5 6 7 8 9 10... -
Page 18: (Mod. Psd10184**, Psd10244**)
3.10 Schema di collegamento generale (mod. PSD10184**, PSD10244**) Connessione al 24 Vdc ausiliari in caso di non utilizzo della funzionalità Connection to auxiliary 24 Vdc supply when function Safety Torque Off is not used 3 4 5 6 7 8 9 10 L1/L L2/N L3 1 2 3 4 5 6 7 8 9 10... -
Page 19: 3.11 Modelli Power+ Coldplate
La piastra è provvista di fori fi lettati M5 per il fi ssaggio di un dispositivo supplementare con funzione di raff reddamento (coldplate), tipicamente utilizzante refrigerante liquido. Il coldplate è a carico dell’utilizzatore e non è fornito da Carel. Montaggio Dimensioni Dispositivo di raff... -
Page 20: Filtro Emi (Psd10**2**)
3.12 Filtro EMI (PSD10**2**) Il fi ltro EMI è una opzione fornibile a parte da utilizzare con i drive Power+ PSD10122** e PSD 10162** per ridurre le emissioni condotte ai livelli previsti da EN61800-3 categoria C1. Il fi ltro va collegato tra alimentazione e morsetti L1/L, L2/N e Terra del drive. Dimensioni (mm) Peso cod. -
Page 21: Controlli
I condensatori interni devono essere riformati se il Power+ rimane a magazzino o comunque non è alimentato per più di due anni. Per informazioni sul processo di riformatura, contattare il riferimento Carel locale. “Power+” +0500048IE - rel 2.2 - 06.11.2014... -
Page 22: Caratteristiche Tecniche
Risoluzione di frequenza 0,1 Hz Unità di Ogni drive deve essere connesso in rete tramite Modbus® a un controllo CAREL di tipo pCO o di altro controllo costruttore, che comanda i drive secondo una logica Master/Slave. Sonda di temp. PTC o contatto pulito, corrente massima 10 mA, lunghezza 1 ingresso protezione motore max 25 m. -
Page 23: Valori Nominali
Valori nominali Nella tabella seguente sono riportati i valori nominali delle correnti di ingresso e di uscita , nonché le specifi che per il dimensionamento dei cavi (sezione, lunghezza massima) e dei fusibili. I valori sono riferiti a una temperatura di funzionamento di 60 °C e a u na frequenza di commutazione di 8 kHz, salvo diversa indicazione. -
Page 24: Prescrizioni Ul Per L'installazione
PRESCRIZIONI UL PER L’INSTALLAZIONE I modelli di PSD1 conformi agli standard UL e CSA hanno il simbolo UL/CSA sull’etichetta sull’etichetta. • Protezione dai transitori di tensione (Surge) Il drive è equipaggiato internamente con dispositivi di protezione dai Surge di tipo 2 secondo lo standard degli Stati Uniti UL508C Per installazioni in Canada è... - Page 25 Index 1. WARNINGS 1.1 General warnings .................... 5 1.2 Fundamental safety rules ................5 2. INTRODUCTION 2.1 Functions and main features ................ 6 2.2 Models ......................6 2.3 Accessories ...................... 6 3. INSTALLATION Identifi cation ....................7 3.2 Structure ......................7 3.3 Dimensions .....................
- Page 26 This instruction sheet is provided for the purpose of describing the operations for commissioning and installing the drive, as well as illustrating the main features of the product. For further information, see the user manual code +0300048EN, downloadable, including prior to purchase, from www.carel.com, under “Literature”. SYMBOLS...
- Page 27 +0300048EN, available, including prior to purchase, at www.carel.com, under “Literature”. Fundamental safety rules •...
- Page 28 Confi guration and programming, as well as the run/stop controls and speed reference, are managed by a CAREL pCO controller or any controller device via RS485 serial connection using the Modbus® protocol in master mode.
- Page 29 INSTALLATION Important Important : avoid installing the drive in environments with the following characteristics: • relative humidity higher than 95% or with condensation; • strong vibrations or knocks; • exposure to water sprays; • exposure to aggressive and polluting atmospheres (e.g.: sulphur and ammonia fumes, saline mist, smoke) to avoid corrosion and/or oxidation;...
- Page 30 Dimensions The overall dimensions of the drive vary based on cooling system (size 1 for models with forced air cooled fi nned heatsink and size 2 for Coldplate models) and the type of assembly (panel or with heat sink outside of the panel, see the paragraph on “Drilling and assembly”), as the position of the fastening brackets aff...
- Page 31 Dimensions (mm) weight Assembly Heat sink outside panel Panel (kg) Model / size PSD1012200 / 1 289,2 192,3 269,3 PSD1016200 / 1 289,2 192,3 269,3 PSD10122A0 / 2 289,2 192,3 PSD10162A0 / 2 289,2 192,3 PSD1018400 / 1 289,2 192,3 269,3 PSD1024400 / 1 289,2...
- Page 32 Panel installation Fig. 3.e Important: in case of dismantling, do not grab the brackets, but rather the “solid“ parts such as the heat sink anche the plastic cover. Remove the top bracket fi rst, then the bottom one to prevent the drive from falling down. Cooling All the Power+ drives, Coldplate models excluded are fi...
- Page 33 Conformity to EMC standards As regards the general EMC guidelines, strictly follow the instructions shown in the paragraph on “Electrical connections“ and in the user manual code +0300048EN, downloadable, even prior to purchase, from www.carel.com. “Power+” +0500048IE - rel 2.2 - 06.11.2014...
- Page 34 Electrical connections For installation proceed as shown below, with reference to the general connection diagram (par. 3.9). Important Important the following warnings must be observed when connecting the drive: • separate as much as possible the probe and digital input cables (at least 40 cm) from the power cables to avoid possible electromagnetic disturbance.
- Page 35 Terminals C1 e C2 Important: The use of terminals C1 and C2 is possible only for PSD10184** and PSD10244** models (3phase power supply). There are two possible cases: if compliance with EN61000-3-12 is required: • Connect the optional DC choke to terminals C1 and C2 •...
- Page 36 Earth leakage current As for all inverter devices, earth leakage current may occur greater than 3,5mA. The drive is designed to produce the minimum possible leakage current. The current depends on the length and the type of motor cable, the eff ective switching frequency, the type of earth connection used and the type of RFI fi...
- Page 37 Connect the motor phases so as to ensure the required direction of rotation: to reverse direction, swap over two of V, W wires indicated in the following fi gures L1/L L2/N L1/L L2/N L3 U V W L1/L L2/N U V W Fig.
- Page 38 Safety digital input Connect the “Safe Torque Off ” digital input to a safety device (for example, a maximum pressure switch) with normally closed voltage-free contact, in series with an external 24 Vac/24 Vdc voltage source, without needing to observe the polarity for direct current (ref.
- Page 39 General connection diagram (Codes PSD10122**, PSD10162**) Non usati Not used Connessione al 24 Vdc ausiliari in caso di non utilizzo della funzionalità Connection to auxiliary 24 Vdc supply when function Safety Torque Off is not used 3 4 5 6 7 8 9 10 L1/L L2/N L3 1 2 3 4 5 6 7 8 9 10...
- Page 40 3.10 General connection diagram (Codes PSD10184**, PSD10244**) Connessione al 24 Vdc ausiliari in caso di non utilizzo della funzionalità Connection to auxiliary 24 Vdc supply when function Safety Torque Off is not used 3 4 5 6 7 8 9 10 L1/L L2/N L3 1 2 3 4 5 6 7 8 9 10...
- Page 41 fi nned heatsink and fan are replaced by a fl at aluminium plate. The plate has threaded holes M5 for fi xing an additional device with cooling function (coldplate), typically using liquid refrigerant. The coldplate is the user’s responsibility and is not supplied by Carel. Assembly...
- Page 42 3.12 EMI fi lter (PSD10**2**) The EMI fi lter is an optional that can be supplied separately to be used with Power + drives PSD10122** e PSD 10162** to reduce the emissions to the levels envisioned by EN61800-3 category C1. The fi...
- Page 43 Important The internal capacitors must be reformed if the drive has been stored for more than two years. For information on capacitor reforming, please contact your local Carel representative. “Power+” +0500048IE - rel 2.2 - 06.11.2014...
- Page 44 System: Safe Torque OFF input, communication failure Frequency resolution 0,1 Hz Each drive must be connected in the network via Modbus® to a CAREL pCO controller or third party Control unit control unit that manages the drive based on Master/Slave logic.
- Page 45 Rated values The table below shows the rated input and output values, as well as the specifi cations for sizing the cables (cross- section, maximum length) and the fuses. The values refer to an operating temperature of 60 °C and a switching frequency of 8 kHz, unless otherwise specifi...
- Page 46 UL NOTES FOR INSTALLATION INSTRUCTIONS The PSD1 models, that conform to the UL Standard and CSA Standard have the UL/CSA mark on the nameplate. • Transient Voltage Surge Protection The drives are equipped with internal type 2 Surge Protection Device according to the United States Standard UL508C.
- Page 48 Agenzia / Agency: CAREL INDUSTRIES Hqs Via dell’Industria, 11 - 35020 Brugine - Padova (Italy) Tel. (+39) 049.9716611 - Fax (+39) 049.9716600 e-mail: CAREL@CAREL.com - www.CAREL.com...
Need help?
Do you have a question about the Power + PSD1 Series and is the answer not in the manual?
Questions and answers