
Related Manuals for Blackmagicdesign Video Assist


Summary of Contents for Blackmagicdesign Video Assist
- Page 1 Installation and Operation Manual Blackmagic Video Assist November 2017 日本語 English, , Français, Deutsch, Español, , Italiano and Português. 한국어, 中文...
- Page 2 Blackmagic Video Assist has a 6G-SDI input so it will monitor Ultra HD. Blackmagic Video Assist 4K records Ultra HD on two SD cards for continuous recording and is also a powerful audio recorder, so you can mix analog audio into the SDI or HDMI recording.
-
Page 3: Table Of Contents
Working with 3rd Party Software Working with Files from SD Cards Using Final Cut Pro X Checking Disk Speed Using Avid Media Composer Blackmagic Video Assist Setup Using Adobe Premiere Pro CC Video Settings Using Autodesk Smoke 2013 About Settings... -
Page 4: Getting Started
Getting Started Plugging in Power Getting started with your video assist is as simple as plugging in power, connecting your video source, plugging in your audio and inserting an SD card. This section shows you how to get started including: ■... -
Page 5: Plugging In Video
HDMI or SDI output. You can listen to the audio on your clips during recording and playback by plugging a headset into the headset jack. On Blackmagic Video Assist 4K you can also listen to your audio during playback via the built in speaker below the LCD. -
Page 6: Inserting Sd Cards
Generally the faster the cards, the better. If you are recording Ultra HD on Blackmagic Video Assist 4K, then we recommend high speed UHS-II type SD cards. These cards need to be capable of write speeds above 110MB/s for recording up to Ultra HD 2160p30. -
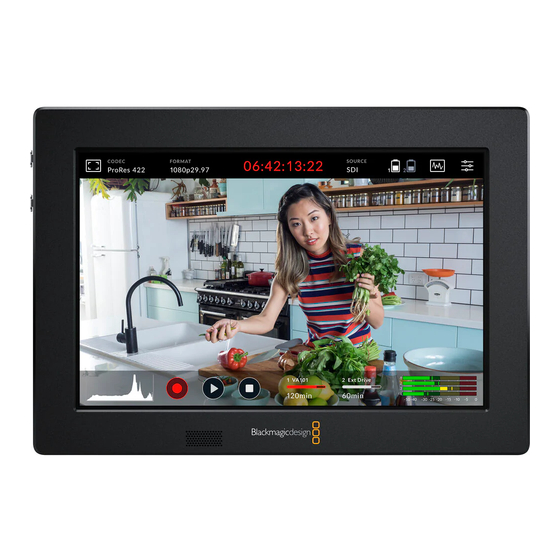
Page 7: Recording
While recording, the timecode counter in the status strip will continuously update, showing you the duration of your clip. When the on screen display is hidden on your video assist, a small record indicator will be displayed at the bottom of the LCD so you can easily confirm you’re recording. -
Page 8: Recording Clean Hdmi From Dslr Cameras
Some DSLR cameras record 8-bit video internally, and some can provide a clean video image via their HDMI output. By plugging the DSLR camera’s HDMI output into your video assist, you can bypass the camera’s internal compression and record using high quality 10-bit ProRes or Avid DNx codecs. -
Page 9: Settings
Settings Changing Settings using the Touchscreen Your video assist features a built in touchscreen. The touchscreen is used to monitor your video and audio, plus change settings. You can change most settings by tapping on the icons in the status strip at the top of the LCD. - Page 10 Overlays Tap the overlays icon to open the zebra, focus peaking, guides and grid settings. These settings let you display overlays on the LCD to help with exposure, focus, composition and framing when connected to a camera. Overlay features are not visible via the SDI or HDMI output. Zebra The zebra feature helps you achieve optimum exposure by displaying diagonal lines over areas of the video that exceed your set zebra level.
- Page 11 You can choose from the following frame guides: HDTV Displays action and title safe regions of your image within a 1.78:1 aspect ratio compatible with 16:9 HD television and computer screens. Displays the 4:3 aspect ratio compatible with SD television screens, or to help frame shots when using 2x anamorphic adapters.
- Page 12 The codecs available depend on the model you are using. For example, both models can record HD video to Apple ProRes and Avid DNxHD codecs with a range of bit rates. Blackmagic Video Assist 4K also lets you choose ProRes and DNxHR codecs for Ultra HD recording.
- Page 13 To disable trigger recording, select ‘never’. T/C Run When timecode run is selected, your video assist will start recording as soon as it detects running timecode from your SDI or HDMI source. Recording will stop when the timecode has ceased. This feature is useful when connecting cameras that don’t support SDI start/stop trigger recording.
- Page 14 Displays the connected SDI or HDMI input source. The unit will use the first source connected. If you have another source connected, your video assist will swap over to the other if the signal from the original source is lost for a brief period of time. This can be useful for redundancy if you need to run a back up signal.
- Page 15 When your card is full, the indicator will turn solid red and the recording will stop. Your video assist will then save the last recorded file. If you have a formatted card in slot 2 of Blackmagic Video Assist 4K, the unit will automatically switch over to slot 2 and continue recording to your second card.
-
Page 16: Volume And Analog Audio Levels
Volume and Analog Audio Levels Speaker Volume To adjust the volume for the built in speaker on Blackmagic Video Assist 4K, swipe the LCD up or down to reveal the on screen meters, then tap the audio meters to open the volume and analog audio level settings. -
Page 17: Storage, Monitor, Display, Audio And Setup Settings
SD card, format your card, adjust monitor and display settings, plus change the date and time. On Blackmagic Video Assist 4K, you can also adjust audio settings. To hide the settings and return to your video image, swipe left or right, or tap the ‘back’... - Page 18 To enable the automatic screen rotation, select ‘auto’. Blue Only Blackmagic Video Assist 4K features a ‘blue only’ mode that displays only the blue channel, represented as a black and white image. If there is noise in a digital video signal, it is most visible within the blue channel, so you can easily check for noise by using this feature.
- Page 19 Display 3D LUT Your video assist can display the input video with 3D LUTs applied to the image. A 3D LUT is only used on the display and not actually recorded into the video itself, so you don’t need to worry that your recorded image will have the look permanently applied.
- Page 20 LCD, but not your recorded video. Audio Settings Blackmagic Video Assist 4K is also a powerful audio recorder. Each XLR input has independent settings such as: XLR Line, XLR Mic or Video When connecting professional audio equipment other than microphones to the analog XLR inputs, make sure you set the recording level to ‘XLR line’.
- Page 21 Setup Settings Setup lets you set the language, set the date and time for your video assist’s internal clock, plus displays the device name, and the internal software version currently installed on the unit.
-
Page 22: Monitoring Using On Screen Meters
Tap ‘save’ to confirm the change. Monitoring using on screen meters Your video assist features useful on screen meters such as a histogram and audio levels meter so you can check your exposure and luminance range on cameras, plus monitor the level of your source audio. -
Page 23: Video Scopes
Assist 4K, select ‘XLR line’ or ‘XLR mic’ in the audio settings. Video Scopes Blackmagic Video Assist 4K has a set of four real time video scopes that you can use to monitor the internal data levels of your video signal. You can choose to display a waveform, parade, vectorscope or histogram. - Page 24 Tapping the adjustment sliders icon opens the brightness and opacity sliders on the left of screen. The two sliders let you refine the brightness and opacity of the scope against the underlying video image. Brightness – Adjust the brightness to make fine details in the scope graph more or less defined.
- Page 25 Waveform The waveform display provides a digitally encoded waveform similar to traditional luminance waveform monitors, which is used to monitor the luma or brightness levels of your video signal. The bottom of the graph indicates the black level, or shadows, of the image, while the top of the graph indicates the white level, or highlights.
- Page 26 The vectorscope measures the overall range of color hue and saturation within an image. Blackmagic Video Assist 4K has a traditional vectorscope, emulating a trace drawn graph, with 100 percent color bar saturation targets positioned at the graticule markers surrounding the graph.
- Page 27 When monitoring a video signal that contains skin tone, you will want to keep your warm color saturation along a line at approximately 10 o’clock on the vectorscope. This is known as the “fleshtone line” and is based on the color of blood beneath the skin’s surface.
-
Page 28: About Sd Cards
HD recording. These cards are rated for fast data speeds and support larger storage sizes. For Ultra HD recording on Blackmagic Video Assist 4K, you will need to use the fastest UHS-II cards available. We have included a table below that shows the latest compatible SD cards for recording Ultra HD, HD and SD video. -
Page 29: Formatting Sd Cards Using Your Video Assist
Swipe the touchscreen left or right, or tap the card status display to open the storage settings. Tap the ‘format card’ icon. On Blackmagic Video Assist 4K, tap the icon that corresponds with your selected card. For example, ‘format card 1’ or ‘format card 2’. -
Page 30: Formatting Sd Cards Using A Computer
Formatting SD Cards using a Computer SD cards can also be formatted using a Mac OS or Windows computer. Preparing SD Cards on a Mac OS computer Use the ‘disk utility’ application included with Mac OS to format or initialize your SD card in the HFS+ or exFAT formats. -
Page 31: Working With Files From Sd Cards
Windows computer that features an SD card slot or by using an SD card reader. Remove the SD card from your video assist and insert it into the SD card slot of your computer, or SD card reader. The SD card can be accessed the same way as you would an external hard drive, USB drive or any other media storage device attached to your computer. -
Page 32: Checking Disk Speed
Blackmagic Video Assist Setup Blackmagic Video Assist Setup contains two configuration tabs labeled ‘video’ and ‘about’. These tabs let you import 3D LUTs into your video assist, change the name of the unit, and set the language of your video assist’s user interface. -
Page 33: Video Settings
Video Settings 3D LUTs can be imported into your video assist so you can display the video with color corrected looks applied. 3D LUTs can be generated as .cube files in DaVinci Resolve and you can find more information in the DaVinci Resolve manual. -
Page 34: Updating The Internal Software
Updating the Internal Software Ocasionally, updates for your video assist’s internal software will be available on the Blackmagic Design website. We recommend downloading the software and updating your video assist so you can benefit from new features and improvements. To update the internal software using Mac OS: Download and unzip Blackmagic Video Assist Setup. -
Page 35: Using Davinci Resolve
Blackmagic Design support office. Checking the Software Version Currently Installed To check which version of Blackmagic Video Assist software is installed on your computer, open the About Blackmagic Video Assist Setup window. ‚ On Mac OS, open Blackmagic Video Assist Setup from the Applications folder. -
Page 36: Importing Your Clips
Warranty 12 Month Limited Warranty Blackmagic Design warrants that this product will be free from defects in materials and workmanship for a period of 12 months from the date of purchase. If a product proves to be defective during this warranty period, Blackmagic Design, at its option, either will repair the defective product without charge for parts and labor, or will provide a replacement in exchange for the defective product.
Need help?
Do you have a question about the Video Assist and is the answer not in the manual?
Questions and answers