Advertisement
Quick Links
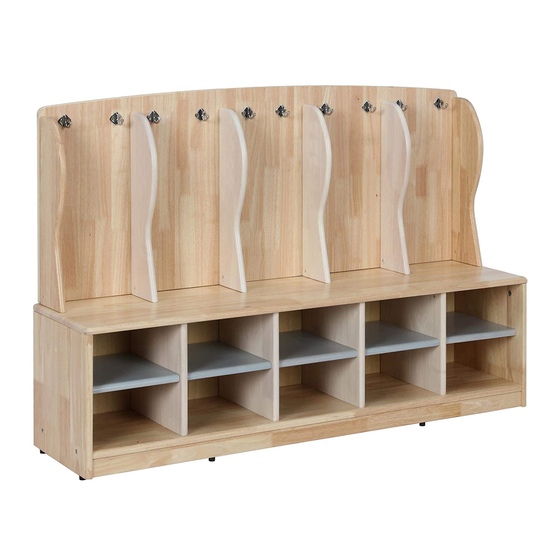
Coat Locker
Vestiaire
Casillero para ropa
Questions, concerns, missing parts?
CONTACT OUR CUSTOMER SERVICE
DEPARTMENT BEFORE RETURNING
PRODUCT TO THE RETAILER.
Tel #: 1-800-295-1980
E-Mail: das@dorel.com
Des questions, des préoccupations, des
pièces manquantes?
SERVICE À LA CLIENTÈLE A VANT DE
RETOURNER LE PRODUIT AU DÉTAILLANT.
NEED HELP!
CALL US FOR ASSISTANCE
1-800-295-1980
DO NOT RETURN PRODUCT TO STORE
E-MAIL:DAS@DOREL.COM
CONTACTEZ NOTRE
Tél #: 1-800-295-1980
Courriel: das@dorel.com
NEED HELP!
CALL US FOR ASSISTANCE
1-800-295-1980
DO NOT RETURN PRODUCT TO STORE
E-MAIL:DAS@DOREL.COM
Modèle No: / Modelo No:
Code CUP: / Código UPC:
Numéro de lot / Número de lote:
___________________
Date of purchase:
Date d'achat / Fecha de compra:
_______ / _______ / _______
Preguntas, inquietudes, partes que faltan?
CONTACTE NUESTRO DEPARTAMENTO DE
SERVICIO AL CLIENTE ANTES DE
DEVOLVER EL PRODUCTO A LA TIENDA.
Tel #: 1-800-295-1980
E-Mail: das@dorel.com
Model No
DL8798-4
UPC Code
0-65857-20120-8
Lot number:
NEED HELP!
CALL US FOR AS
1-800-295-1980
DO NOT RETURN
E-MAIL:DAS@DO
Advertisement

Related Manuals for Bertini DL8798-4


Summary of Contents for Bertini DL8798-4
- Page 1 Model No Modèle No: / Modelo No: DL8798-4 UPC Code Code CUP: / Código UPC: 0-65857-20120-8 Coat Locker Lot number: Numéro de lot / Número de lote: Vestiaire ___________________ Casillero para ropa Date of purchase: Date d'achat / Fecha de compra:...
-
Page 2: Notes / Notas
CUSTOMER SERVICE / SERVICE À LA CLIENTÈLE / SERVICIO AL CLIENTE Vous pouvez également nous contacter en écrivant à También puede contactarnos escribiendo a la dirección que You can also contact us by writing to the address listed l'adresse ci-dessous. Veuillez inclure le numéro de modèle du figura a continuación. - Page 3 CARE AND CLEANING/ ENTRETIEN ET NETTOYAGE/ CUIDADOS Y LIMPIEZA Dust regularly with a soft, lint-free cloth to prevent soil build- Époussetez régulièrement avec un chiffon doux, non Regularmente, limpie con un paño suave y seco para evitar up. A damp cloth may be used occasionally to clean surface. pelucheux pour empêcher la poussière de s'accumuler.
- Page 5 PARTS LIST LISTE DES PIÈCES / LISTA DE PIEZAS LEFT SIDE PANEL/ RIGHT SIDE PANEL/ DRAWER BOTTOM/ BOTTOM PANEL/ BACK PANEL/ PANNEAU LATÉRAL PANNEAU LATÉRAL TOP RAIL/ PANNEAU INFÉRIEUR PANNEAU PANNEAU ARRIÈRE/ GAUCHE/ DROIT/ RAIL SUPÉRIEUR/ DE TIROIR/ INFÉRIEUR/ PANEL POSTERIOR PANEL LATERAL PANEL LATERAL RIEL SUPERIOR...
- Page 6 HARDWARE LIST LISTE DE QUINCAILLERIE / LISTA DE TORNILLOS Y ACCESORIOS Ø7 X 38 mm Ø15 X 12 mm Ø6 X 35mm Ø6 X 60mm Ø15 X 25 mm Ø4 X 50mm FOOT/ BOLT/ CAM LOCK/ WOOD DOWEL/ WOOD DOWEL/ SCREW/ PIED/ BOULON/...
- Page 7 Step 1: Étape 1: Etapa 1: Insert wood dowels (3) into all parts, Insérer des goujons en bois (3) dans toutes les Inserte las clavijas de madera (3) en todas las included bottom panel (D), shelfs (K) (I) pièces, y compris le panneau inférieur (D), les partes, incluido el panel inferior (D), los estantes (K) (J), middle panels (G) &...
- Page 8 Step 2: Étape 2: Etapa 2: Insert wood dowels (3) into the upper Insérez des goujons en bois (3) dans le trou supérieur Inserte las clavijas de madera (3) en el orificio hole of drawer bottoms (F) as indicated des panneaux inférieurs de tiroir (F) comme indiqué ci- superior de los paneles inferiores del cajón (F) below.
- Page 9 Step 3: Étape 3: Etapa 3: Fixez l’étagère trois (K) dans l’étagère un Attached shelf three (K) to shelfs one (I) Fije el estante tres (K) a los estantes uno (I) (I) et l’étagère deux (J) à l’aide des and shelfs two (J) by using bolts (1). y los estantes dos (J) utilizando los pernos boulons (1).
- Page 10 Step 4: Étape 4: Etapa 4: Attach top rails (E) to bottom panel (D) Fixez les rails supérieurs (E) au panneau Fije los rieles superiores (E) al panel inferior (D) inférieur (D) à l’aide des vis (6) et d’un by using screws (6) and a Phillips con los tornillos (6) y un destornillador Phillips screwdriver (not included).
- Page 11 Step 5: Étape 5: Etapa 5: Attach middles panels two (H) to Fixez les panneaux centraux deux (H) au Fije los paneles centrales dos (H) al panel panneau inférieur (D) à l’aide des boulons bottom panel (D) by using bolts (1). inferior (D) utilizando los pernos (1).
- Page 12 Step 6: Étape 6: Etapa 6: Attach left side panel (B) to bottom panel (D) Fixez le panneau latéral gauche (B) et le panneau inférieur Fije el panel lateral izquierdo (B) y el panel inferior (D) by using bolts (1). (D) à...
- Page 13 Step 7: Étape 7: Etapa 7: Attach right side panel (C) and bottom Fixez le panneau latéral droit (C) et le panneau inférieur Fije el panel lateral derecho (C) y el panel inferior (D) (D) à l’aide des boulons (1). panel (D) by using bolts (1).
- Page 14 Step 8: Étape 8: Etapa 8: Attach shelf three (K) and back panel Fixez l'étagère trois (K) et le panneau Fije el estante tres (K) y el panel posterior (A) arrière (A) à l’aide des boulons (1). (A) by using bolts (1). utilizando los pernos (1).
- Page 15 Step 9: Étape 9: Etapa 9: Insert shelf four (L) into the locker Insérez l'étagère quatre (L) dans le casier Inserte el estante cuatro (L) en el casillero directly as shown below. directement comme indiqué ci-dessous. directamente como se muestra a continuación. Insert cam locks (2) into panels (A), (B), Insérez les verrous à...
- Page 16 Step 10: Étape 10: Etapa 10: Attach back panel locker (7) to the shelf Fixez le verrou de panneau arrière (7) à Fije el bloqueador del panel posterior (7) al four (L) with screws (9) using a Phillips l'étagère quatre (L) avec des vis (9) et à estante cuatro (L) con los tornillos (9) usando l’aide d’un tournevis cruciforme (non screwdriver (not included) as shown...
- Page 17 That's it! You've finished assembling your Coat Locker. Ça y est, vous avez fini d'assembler votre Vestiaire. ¡Eso es todo! Ha terminado de armar su casillero. Contact our customer service Pour toute question, veuillez Si usted tiene alguna pregunta, department with any questions. communiquer avec notre représentant comuníquese con nuestro de service à...
- Page 18 Furniture Wall Safety Strap Hardware list PLASTIC CONNECTOR STRAP LONG SCREW SHORT SCREW SCREW 4 PCS 2 PCS 4 PCS 4 PCS ANCHOR 4 PCS WARNING: WHEN UPRIGHT, IT IS POSSIBLE THAT THE FURNITURE MAY TIP OVER. PLEASE INSTALL THE SAFETY WALL STRAP BEHIND THE FURNITURE TO ENSURE SAFETY.
- Page 19 Sangle de sécurité pour ancrer le meuble au mur Liste de quincaillerie CHEVILLE D'ANCRAGE SANGLE CONNECTEUR LONGUE VIS COURTE VIS EN PLASTIQUE 4 PCS 2 PCS 4 PCS 4 PCS 4 PCS AVERTISSEMENT: LORSQUE DEBOUT , IL EST POSSIBLE QUE LE MEUBLE PUISSE BASCULER. VEUILLEZ INSTALLER LA SANGLE C B D DE SÉCURITÉ...
- Page 20 Correa de seguridad para fijar el mueble a la pared Lista de tornillos y accesorios TORNILLO ANCLA DE TORNILLO CONECTOR CORREA TORNILLO LARGO CORTO PLÁSTICO 4 PCS 2 PCS 4 PCS 4 PCS 4 PCS ADVERTENCIA: ES POSIBLE QUE EL MUEBLE PUEDA VOLCARSE AL ESTAR DE PIE. INSTALE LA CORREA DE SEGURIDAD PARA LA PARED DETRÁS DEL MUEBLE PARA ASEGURARSE DE QUE NO SE VUELQUE.
Need help?
Do you have a question about the DL8798-4 and is the answer not in the manual?
Questions and answers