Table of Contents
Advertisement
Quick Links
Advertisement
Table of Contents

Related Manuals for Foxtech NAGA PRO

Summary of Contents for Foxtech NAGA PRO
- Page 1 NAGA PRO User Manual NAGA PRO User Manual (Herelink Version)
-
Page 2: Table Of Contents
NAGA PRO User Manual Content 一. Assembly....................1 1. Unfold the Arm..................1 2. Turn on Herelink Remote Controller............3 3. Install Battery..................4 4. Install Propeller..................9 二. Herelink Remote Controller Introduction.......... 13 1. Hardware Update................13 2. Herelink Device Activation..............13 3. - Page 3 NAGA PRO User Manual 1. Download Mission Planner..............36 2. Connect Mission Planner to The Cube..........37 3. Loading Firmware to The Cube............37 4. Basic Hardware Calibration and Parameter Setting......38 4.1 Frame Type Configuration............38 4.2 Accelerometer and Compass Calibration........39 4.2.1 Accelerometer Calibration............
- Page 4 NAGA PRO User Manual 七. How to Use Oblique Camera..............62 1. Camera Function Buttons..............62 2. Camera and Aircraft Connection............62 3. Photo Taking Test................63 八. FAQ.....................65 九. Troubleshooting Guide............... 70 十. How to Use QGC................71...
-
Page 5: 一.Assembly
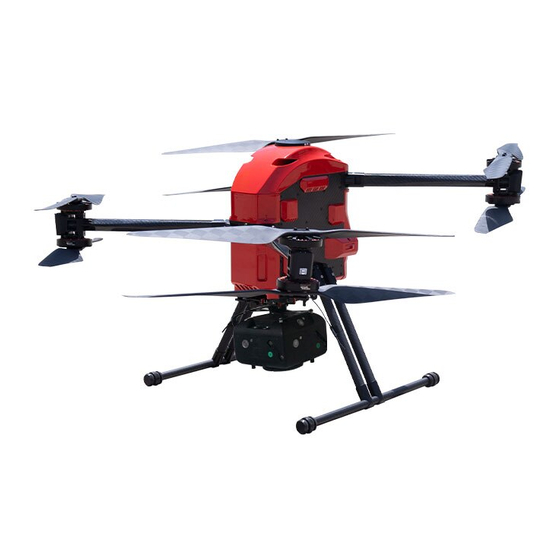
NAGA PRO User Manual 一.Assembly NAGA PRO(Herelink version) accessories are shown in the following figure, including 1x NAGA Pro UAV, 4 pair x Propeller, 1x landing gear, 1x Herelink remote controller, 1x charger, 2x battery. 1. Unfold the Arm First unfold the lower arm of the fuselage around the rotation axis, and then unfold the upper arm, snap the arm buckle into the green locking piece, and turn the green locking piece clockwise to lock the arm. - Page 6 NAGA PRO User Manual...
-
Page 7: Turn On Herelink Remote Controller
NAGA PRO User Manual 2. Turn on Herelink Remote Controller Long press the power button to turn on Herelink, and then click the QGC icon to enter the ground station software. -
Page 8: Install Battery
NAGA PRO User Manual Enter the ground station software and wait for the aircraft to automatically connect. 3. Install Battery... - Page 9 NAGA PRO User Manual...
- Page 10 NAGA PRO User Manual...
- Page 11 NAGA PRO User Manual...
- Page 12 NAGA PRO User Manual...
-
Page 13: Install Propeller
NAGA PRO User Manual 4. Install Propeller The motors are divided into upper and lower parts. The upper motors are defined as No. 1, No. 2, No. 3, and No. 4. The lower motors are defined as No.5, No. 6, No. 7, No. 8. - Page 14 NAGA PRO User Manual...
- Page 15 NAGA PRO User Manual...
- Page 16 NAGA PRO User Manual...
-
Page 17: 二.Herelink Remote Controller Introduction
NAGA PRO User Manual 二.Herelink Remote Controller Introduction 1. Hardware Update Download the application to update the firmware : ·Windows https://herelinkfw.cubepilot.org/ asher_win.zip ·MAC https://herelinkfw.cubepilot.org/ asher_mac.zip ·Linux https://herelinkfw.cubepilot.org/ asher_linux.zip 2. Herelink Device Activation After upgrading the Herelink firmware, you need to activate the device, and the screen will display "Update Device". - Page 18 NAGA PRO User Manual You will then be prompted to enter your 16-bit software activation key. After inputting, click "Finish", and then click "Register", your device will download the latest firmware program and automatically update and install it.
-
Page 19: Update Firmware Through Wifi
NAGA PRO User Manual 3. Update Firmware through WiFi If your Herelink firmware has been installed Solex TX , you can update the ground station through the built-in update function (Note: Herelink air unit still needs to be updated using the PC update program.). - Page 20 NAGA PRO User Manual Swipe to the bottom and click the "About phone" option. Select "System Update". Select "Check for Updates" in the lower right corner.
- Page 21 NAGA PRO User Manual The system will check for updates and install them automatically. If the Herelink remote update error occurs, please check the following three steps: -Is it connected to a stable WiFi...
-
Page 22: Pair With The Air Unit
NAGA PRO User Manual -Whether the region and time of the device are correct -Is the key entered correct. 4. Pair with the Air Unit In the application interface, swipe down the notification bar from the top and click Herelink Settings to open the settings. - Page 23 NAGA PRO User Manual the LED2 indicator flashes.
-
Page 24: Joystick/Rollwheel Calibration And Setting
NAGA PRO User Manual 5. Joystick/Rollwheel Calibration and Setting In the application interface, swipe down on the notification bar from the top and click Herelink Settings to open the settings. - Page 25 NAGA PRO User Manual Click "JOYSTICK" to enter the joystick interface. Here you can find joystick and hardware rollwheel options and calibration settings. On this screen, you can -See the RC calibration status -Calibration rollwheel -Calibration joystick -Set RC joystick mode...
- Page 26 NAGA PRO User Manual channel, and the right WBus is Sbus1 or Sbus2 -Reverse RC channel setting -Set the throttle center value as zero. To calibrate the rollwheel, please select "HW WHEEL CAL". Click start "HW wheel Calibration" and prompt to calibrate.
- Page 27 NAGA PRO User Manual After the calibration is completed, you can set the Sbus channel of the rollwheel and the Sbus1 or Sbus2 to be used at the position marked with the red frame. The output of Sbus1 is the same as the output of the joystick, and the rollwheel can be set to channels 5-16, and on Sbus2, the rollwheel can be set to channels 1 -16 ...
- Page 28 NAGA PRO User Manual To calibrate the joystick, click start calibration, and perform hardware joystick calibration according to the joystick arrow and the prompt on the right.
- Page 29 NAGA PRO User Manual After the joystick calibration is completed. It will prompt that the test is passed, click the pass button below to complete the hardware joystick calibration. If there is a problem or the calibration fails during the calibration process, please re-calibrate.
- Page 30 NAGA PRO User Manual Modify the joystick reverse by clicking "REV" next to the channel that needs to be changed.
- Page 31 NAGA PRO User Manual After setting, click "SAVE" to save the setting. To calibrate the remote control SBUS output, please click "SBUS OUT CAL". Follow the remote controller moving steps on the right to move the joystick to each...
-
Page 32: Power Mode Setting
NAGA PRO User Manual After setting, click "SAVE" to save the setting. Power Mode Setting Set the power transmission mode that matches your country/region from here... -
Page 33: Video Sharing
NAGA PRO User Manual 7. Video Sharing 7.1. Enable video streaming on Herelink Swipe down on the notification bar and click "herelink Settings". Find "Video Sharing" and enable video sharing. -
Page 34: Share Video Via Wifi Hotspot Connection
NAGA PRO User Manual Please note that the video stream is not available until the GCS application is enabled, so please make sure there is at least one GCS application runs in the background and selects the correct video stream. -
Page 35: Share Videos Via Usb Connection
NAGA PRO User Manual Then configure the name and password for the hotspot under "Set up WLAN hotspot". The address of the video stream is: rtsp://192.168.43.1:8554/fpv_stream 7.3. Share videos via USB Connection Pull down the menu bar, press and hold the hotspot logo to jump to the setting interface. -
Page 36: Share Video Via Wifi Connection
NAGA PRO User Manual Find USB tethering in "Tethering and Portable Hotspot" and turn it on. The video stream rtsp://192.168.42.129:8554/fpv_stream will be transmitted to the connected device via the USB connection. 7.4. Share Video via WIFI Connection Herelink can use the Herelink IP on the network to get the video stream by connecting to 5G Wifi. -
Page 37: Display Video Stream
NAGA PRO User Manual Swipe down to find the IP address. The connection address of the video stream is: rtsp://<here link wifi ip address>:8554/fpv_stream 7.5. Display Video Stream In this example, we use VLC media player. -Open the VLC player and click Media>>Open network streaming. -
Page 38: Connect With Mission Planner Ground Station
NAGA PRO User Manual 8. Connect with Mission Planner Ground Station Turn on the Herelink hotspot and connect the computer Wifi to the WiFi hotspot of Herelink. Open the GCS Set the port to "UDP" (upper right corner). -
Page 39: Watch A Live Herelink Video In Mission Planner
NAGA PRO User Manual 9. Watch a Live Herelink Video in Mission Planner Note: The video requires Mission Planner 1.3.70 Beta or higher Start Solex or QGC to ensure that your video stream is working properly (this is necessary to start the video transmission process) ... -
Page 40: 三.Mission Planner Operation Guide
NAGA PRO User Manual 三.Mission Planner Operation Guide 1. Download Mission Planner Before installing firmware for The Cube, please download stable version of Mission Planner from ArduPilot website. Mission Planner currently supports Windows, just download the corresponding version according to your need. -
Page 41: Connect Mission Planner To The Cube
NAGA PRO User Manual Using Windows 10 as example, download the .msi installation file and run it as administrator. During the installation process, device drivers will be installed together. Click "yes" if any dialog box pop up. Software download URL::http://firmware.ardupilot.org/Tools/MissionPlanner/ 2. -
Page 42: Basic Hardware Calibration And Parameter Setting
NAGA PRO User Manual Before installing the firmware, select the corresponding device and baud rate (the same configuration as when connecting the device). Don’t hit Connect just yet. On the Mission Planner’s "Initial Setup > Install Firmware"" screen select the appropriate icon that matches your frame (i.e. -
Page 43: Accelerometer And Compass Calibration
NAGA PRO User Manual 4.2 Accelerometer and Compass Calibration Go to "Initial Setup > Mandatory Hardware > Accel Calibration". Click Calibrate Accel to start the calibration. Pointing the nose of aircraft to LEVEL, LEFT, RIGHT, NOSEDOWN, NOSEUP, and BACK according to the message below. "Calibration successful" will be shown after calibration completed successfully. - Page 44 NAGA PRO User Manual Place the aircraft nose to front and left-hand-side to the ground then press any button to continue. Place the aircraft nose to front and right-hand-side to the ground then press any button to continue.
- Page 45 NAGA PRO User Manual Place the aircraft nose to the ground then press any button to continue.
- Page 46 NAGA PRO User Manual Place the aircraft nose to upward then press any button to continue. Place the aircraft upside-down then press any button to continue.
-
Page 47: Level Calibration
NAGA PRO User Manual "Calibration successful" will be shown after calibration completed successfully. 4.2.2 Level Calibration Place the aircraft horizontally and click "Calibrate Level". The text in button will become "Completed" after calibration successful. -
Page 48: Compass Calibration
NAGA PRO User Manual 4.2.3 Compass Calibration Go to "Initial Setup > Mandatory Hardware >HWID", check the ID number of the CAN port compass, and then select the compass. Select to enable the Use compass ID number according to the ID number of the CAN port compass, and adjust the use priority of the CAN port compass to the best. - Page 49 NAGA PRO User Manual If calibration is successful, the window below will show "success". "success" will also be shown on compass. Upon successful completion, a “Please reboot the autopilot” window will appear. Click OK, unplug and replug the USB.
-
Page 50: Remote Controller Calibration
NAGA PRO User Manual If, after multiple attempts, you are unable to calibrate the compass, Press the “Cancel” button and change the “Fitness” drop-down to a more relaxed setting and try again. Normally, select Default. 4.2.4 Remote Controller Calibration Connect the RC receiver to The Cube via RCIN and turn on your RC transmitter. Then click... -
Page 51: Esc Calibration
Safety Checking: Before calibrating the ESC, please make sure that there is no propeller mounted on the aircraft. Connect NAGA Pro to MP ground control station via data link. Select the "Configuration > Full Parameter List > Search for the "esc" keyword, change the ESC-CALIBRATION parameter value to 3, then power off the aircraft. -
Page 52: Select Flight Modes
NAGA PRO User Manual 4.2.6 Select Flight Modes Set the 5 channel or the other channel on the remote controller (which can be set by all parameters FLTMODE-CH) to the appropriate position. Missioon Planner will display the current position in green, select a mode for each switch and click the save mode button. The remote controller can set up to 6 flight modes, and you can set up 6 single-channel mixing according to your own remote controller instructions. - Page 53 NAGA PRO User Manual Four commonly used flight modes: ALT HOLD After the first test flight, you can try the altitude hold mode. This mode does not require GPS support. The autopilot will maintain the current altitude based on the data from the air pressure sensor.
-
Page 54: 四.Mission Planner Rtk Setting
NAGA PRO User Manual In this mode, the aircraft will automatically perform tasks set by the Mission Planner on the ground station, such as taking off and flying to multiple waypoints in sequence, rotating, and taking pictures. RTL GPS positioning is required for the return home mode. The GPS positioning point before ARM is the current "home"... - Page 55 NAGA PRO User Manual Select the correct base station port in the upper left corner and click connect. In the SurveyIn Acc column, enter the absolute geographic accuracy you expect your HERE+ base station to achieve.In the Time field, enter the shortest search time you expect. Click Restart, the ground station will transmit the data you input to the HERE+ base station, and the base station will start a new round of satellite search and positioning.
- Page 56 NAGA PRO User Manual In Progress: satellite searching is still in progress; Duration: the number of seconds that the current search task has been operated; Observation: the number of observations obtained; Current Acc: the absolute geographic accuracy that the current base station can achieve;...
- Page 57 NAGA PRO User Manual In the figure, the indicator light showing the status of the base station is shown in green, and the two satellite systems, GPS and Glonass, are shown in green (if you want to change the satellite system, please refer to the instructions in the following chapters). The box on the right is displayed as Position is valid.
-
Page 58: How To Use Base Station
NAGA PRO User Manual 2. How to Use Base Station Open the Mission Planner ground station software on your computer, enter the initial setup→Optional Hardware→RTK/GPS Inject page, select the correct base station port in the upper left corner, and then click connect. You will see the following page:... -
Page 59: 五.First Take-Off
NAGA PRO User Manual Enter the latitude and longitude of the known fixed station and the measured height of the RTK antenna relative to the ground at the position in the figure below, and then click the use button. Note: The RTK antenna placement position should coincide with the fixed point position as much as possible. -
Page 60: Meaning Of Led Indicator Light
NAGA PRO User Manual If the blue light or green light flashes, the buzzer will emit a low-pitched sound after unlocking, and the motor will start idling and can take off. 2. Meaning of LED Indicator Light: Flashing red and blue:Initializing sensors and auto-check the autopilot. Please lay down the flight controller. - Page 61 NAGA PRO User Manual in detail whether the hardware installation is correct (especially whether the arm is locked in place, the battery compartment cover is tightly locked, whether the landing gear is locked, whether the external load is installed firmly, the direction of the propeller, etc.). After confirming that there is no problem, perform the following steps : ...
- Page 62 NAGA PRO User Manual Unlock through the ground control station. Under the premise that the autopilot has a link to the ground, there is an action tab at the bottom of the HUD window of the ground control station. Click the unlock button inside to unlock.
-
Page 63: Disarm The Drone
NAGA PRO User Manual Take off: raise the throttle to take off, and control the direction according to the attitude. (if the novice is not familiar with the control, you can practice the flight simulator first, so as to avoid the explosion of the aircraft and the loss of personnel and property) If there is no operation within 15 seconds after unlocking, it will be automatically locked. - Page 64 NAGA PRO User Manual The main explanation here is the mission planning function of the MP ground control station, but the waypoint planning concepts of other ground control stations are actually very similar. Create a multi-waypoint area in the MP mission planning interface ...
- Page 65 NAGA PRO User Manual The mission planner will display the configuration interface. This interface defines the camera parameters automatically calculates shooting distance DO_SET_CAM_TRIGG_DIST command parameters, you can also set the parameters according to the actual situation. If you accept these parameters, please click accept. The mission planner will generate a series of waypoints covering the designated area, including the take-off point and the landing point.
-
Page 66: 七.How To Use Oblique Camera
NAGA PRO User Manual command, and finally call DO_SET_CAM_TRIGG_DIST again to set the parameter back to 0 and stop taking pictures; Note that the parameters of two call are different. 七.How to Use Oblique Camera 1. Camera Function Buttons 2. Camera and Aircraft Connection... -
Page 67: Photo Taking Test
NAGA PRO User Manual 3. Photo Taking Test... - Page 68 NAGA PRO User Manual...
-
Page 69: 八.Faq
NAGA PRO User Manual 八.FAQ 1. Bad AHRS The cause of the problem: the acceleration and level are not calibrated, or the calibration is wrong. Added GPS, but the GPS is not fixed, or the GPS arrow is not consistent with the flight... - Page 70 NAGA PRO User Manual Solution: Correctly calibrate the acceleration, power off the flight controller after calibration, reconnect, and calibrate the level,this step is very important. Assemble the GPS correctly, make sure the GPS is fixed, and the arrow of the GPS and the arrow of the flight controller should be the same.
- Page 71 NAGA PRO User Manual configuration debugging\standard parameters, don't check the board voltage, and others can be checked or unchecked. Remove the check,then remember to click the "Write Parameters" button above, then power off the flight controller and reconnect it). 5. Compasses inconsistent solution The cause of the problem: Compasses inconsistent means that the compass is out of sync.
- Page 72 NAGA PRO User Manual 10. Compass offsets too high The cause of the problem: The offset value of the main compass (i.e. sqrt(x^2+y^2+z^2)) is greater than 500, and this will be prompted. Generally, there are magnetic objects (motors, screws,battery) near the flight controller or GPS, or the environment has strong magnetic interference.
- Page 73 NAGA PRO User Manual Cause of the problem: This may be a hardware problem, or it may be that flight controller is started immediately after flashing the firmware. Solution: Re-power on the flight controller and reconnect it. 17. Gyros not healthy The cause of the problem: the data of the gyroscope fluctuates badly, the value is out of range, and there is no data.
-
Page 74: 九.Troubleshooting Guide
NAGA PRO User Manual the ground control station sees it is upward), and the other channels are the same as the ground control station. If not, it means the channel direction is wrong, reverse setting and then re-calibrate. - When the indoor flight is unlocked, the correct flight mode is not selected: there is no... -
Page 75: 十.How To Use Qgc
NAGA PRO User Manual points: Check if the frame setting X or + is correct Check if the ESC serial number is correct Check if the motor rotation is correct Whether the propeller direction is correct and whether the wind is blowing downwards ...
Need help?
Do you have a question about the NAGA PRO and is the answer not in the manual?
Questions and answers