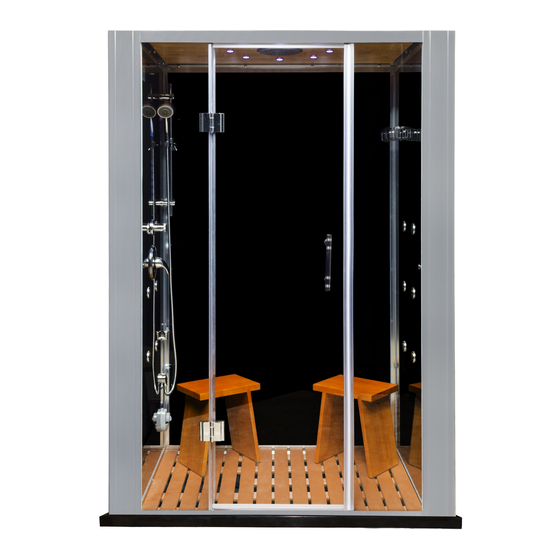
Summary of Contents for Homewardbath STEAM PLANET Galaxy Series
- Page 1 Galaxy Series Installation & Operations Manual WS-112 Note: You must read all installation & operation instructions prior to assembly and use of this unit. P a g e Rev1/2015...
-
Page 2: Table Of Contents
Table of Contents Tools Needed for Installation ……………………………………………. Product Features ……………………………………………. Unit Information ……………………………………………. Electrical Information ……………………………………………. Plumbing Requirements ……………………………………………. General Information ……………………………………………. Base Information ……………………………………………. Assembly & Installation ……………………………………………. Handle Assembly ……………………………………………. Temperature adjustments ……………………………………………. Diverter Maintenance & Care ……………………………………………. -
Page 3: Tools Needed For Installation
TOOLS REQUIRED FOR INSTALLATION: Level Screw driver #2 Phillips Silicone Wrench Electric Drill Square Ruler Rubber mallet PRODUCT FEATURES DESCRIPTION WS112(32) WS112(36) WS112(40) 4.2kW Quick heating -Self-Draining Steam Generator Steam Aromatherapy Cup Body Massage Jets ... -
Page 4: Electrical Information
ELECTRICAL INFORMATION 1 dedicated 12-2 wire with 20 amp GFCI breaker (220V) Connect the overhead light, speaker, fan, CD, telephone according to the tags on the wires. Do not connect the wire “O3” to anything. Connect main power supply. PLUMBING INFORMATION The unit is equipped with 3 ft. -
Page 5: Base Information
BASE OPTIONS The standard WS-112 shower enclosure does not include a base. It can be installed over a custom or existing base of your choice. Steam Planet offers one base option: A man made “cultured stone” base (Black or White) that sets into place or may require some type of cement/thin set mortar foundation. -
Page 6: Assembly & Installation
INSTALLATION INSTRUCTIONS FOR WS112 ALL SIZES 1. The distance between Wall A and Wall B should be at least 4. To assemble front frame you will need at least 6” #2 Philips 1510mm (59.5 inches). bit. It is advised to use an impact driver. Do not over tighten. 2. - Page 7 Note: Panel with hinge holes goes on the left side. Install the front fixed glass panels. Remove plastic clip in horizontal frame, slide glass in place, and reattach clip to hold glass into place. Do the same for the right side. INSTALLING THE CEILING 1.
-
Page 8: Handle Assembly
INSTALL THE GASKETS 1. Once all is connected, place the wooden shower grid floors and benches inside the unit. 2. Please, do not use the unit for at least 24hours or until the silicone is completely dried. ________________________________________________________________________________________________ HANDLE ASSEMBLY TRIM FLANGE ATTACHMENT HANDLE ATTACHMENT Position Flange (A) on the Valve (B) with drain hole (C) at the... -
Page 9: Temperature Adjustments
MAINTENANCE & CARE TEMPERATURE ADJUSTMENTS Disassembly: 1. Replacement parts may be available at Lowes or Home Depot. 2. When replacement parts are not available, please write or call Price Pfister Consumer Service. 3. Always turn off water and release pressure before working on your faucet. -
Page 10: Cleaning & Maintenance
Turn on the water and test. Of the unit still leaks, replace the Water flows from the tub spout while using the shower. cartridge (E). The seal inside of the diverter mechanism may have become dislodged. The spout (H) may need replacement. ... -
Page 11: Control Parts Information
CONTROL PARTS INFORMATION FOR STEAM SHOWER FOR ALL UNITS Steam Temperature Sensor LCD Display Control Panel Water Diverter Water Flow Adjustment (On/Off) Water Temperature Adjustment Body Jets Steam Outlet Handheld Shower Set Steam Generator Cleaning Liquid Inlet LCD DISPLAY: Fahrenheit Degree (if applicable) Celsius Degree Temperature Temperature Indicator... -
Page 12: Control Panel Diagram
CONTROL PANEL FOR STEAM SHOWER: CONTROL PROCEDURES Power on/off Push any button to light the display, and press the power on/off switch to start the system. Push the power on/off switch again to turn off the system and display. Steam Temperature Setting Touch the Steam Temperature Setting button and the display will appear on the screen. - Page 13 Chromatherapy This button controls the color of the Chromatherapy LED lights (picture 5). When the Chromatherapy function starts, the lamp symbol on the LCD display flashes. Circulation Fan This button turns fan on/off. When fan is turned on, the fan symbol on the LCD display Flashes. Steam on/off This button turns the steam on/off.
-
Page 14: Wireless Fm Transmitter Information
WIRELESS FM TRANSMITTER On/Off: Push and hold this button for power on/off. Push and release this button shortly to change between transmitting and clock. Audio signal input: to be connected to audio signal output interface of Mp3 player. Transmitting frequency +/- adjusting: push this button to increase/decrease for transmitting frequency for FM. The adjusting range is 88-108.8MHz. -
Page 15: Troubleshooting
TROUBLESHOOTING FOR STEAM CABIN ISSUE CAUSE SOLUTION Check connection between control panel Not connected properly and power box Touch panel does not work Change to 220V supply Wrong voltage 1. Desired steam room temperature is Increase the desired temperature to be lower than current temperature higher than current temperature 2. - Page 16 16 | P a g e Rev1/2015...


Need help?
Do you have a question about the STEAM PLANET Galaxy Series and is the answer not in the manual?
Questions and answers