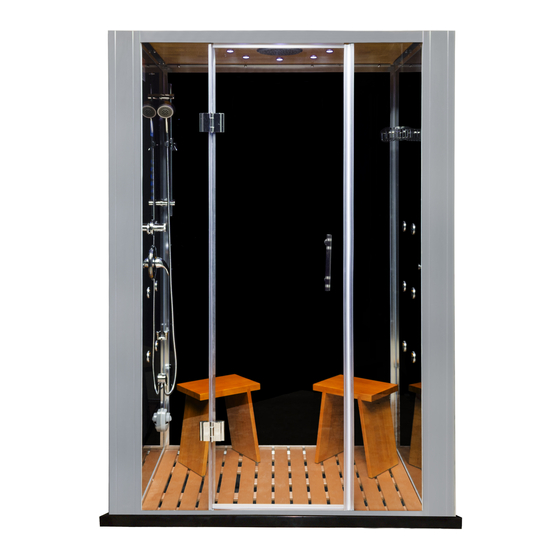
Summary of Contents for Homewardbath Steam Planet Galaxy Series
- Page 1 Galaxy Series Installation & Operations Manual WS-112 Note: You must read all installation & operation instructions prior to assembly and use of this unit. Rev 09/2021...
-
Page 2: Table Of Contents
Table of Contents TOOLS REQUIRED FOR INSTALLATION: ........................... 1 PRODUCT FEATURES ................................. 1 UNIT INFORMATION ................................1 ELECTRICAL INFORMATION .............................. 2 PLUMBING INFORMATION ..............................2 PLUMBING REQUIREMENTS .............................. 2 GENERAL INFORMATION ..............................2 SHOWER PAN OPTIONS ..............................2 BASE INSTALLATION INFORMATION: ..........................3 INSTALLATION INSTRUCTIONS FOR WS112 ALL SIZES.................... -
Page 3: Tools Required For Installation
TOOLS REQUIRED FOR INSTALLATION: Level Screw driver #2 Phillips Silicone Wrench Electric Drill Square Ruler Rubber mallet PRODUCT FEATURES DESCRIPTION WS112(32) WS112(36) WS112(40) 4.2kW Quick heating -Self-Draining Steam Generator ✓ ✓ ✓ Steam Aromatherapy Cup ✓ ✓ ✓ Body Massage Jets ✓... -
Page 4: Electrical Information
ELECTRICAL INFORMATION • 1 dedicated 12-2 wire with 20 amp GFCI breaker (220V) • Connect the overhead light, speaker, fan, CD, telephone according to the tags on the wires. • Do not connect the wire “O3” to anything. • Connect main power supply. PLUMBING INFORMATION The unit is equipped with 3 ft. -
Page 5: Base Installation Information
Homeward Bath’s offers two base options: 1. A man made “cultured stone” base that requires some type of cement/thin set mortar foundation. Height is 1 ¾in. 2. A flush-to-floor acrylic base with fiber glass backing that requires some type of cement/thin set mortar foundation. Height is 2 ½... -
Page 6: Installation Instructions For Ws112 All Sizes
INSTALLATION INSTRUCTIONS FOR WS112 ALL SIZES 1. The distance between Wall A and Wall B should be at 5. Each 5” frame sidepiece has 2 grey rubber gaskets on least 1510mm (59.5 inches). top and bottom. Bottom piece has to be all the way down, 2. -
Page 7: Installing The Ceiling
12. Install the door handle & adjustable handheld shower bar (if not done in previous steps.) Note: Panel with hinge holes goes on the left side. Install the front fixed glass panels. Remove plastic clip in horizontal frame, slide glass in place, and reattach clip to hold glass into place. -
Page 8: Install The Gaskets
INSTALL THE GASKETS 1. Once all is connected, place the wooden shower grid floors and benches inside the unit. 2. Please, do not use the unit for at least 24hours or until the silicone is completely dried. HANDLE ASSEMBLY TRIM FLANGE ATTACHMENT 1. -
Page 9: Temperature Adjustments
TEMPERATURE ADJUSTMENTS PFISTER MAINTENANCE & CARE Disassembly: 1. Replacement parts may be available at Lowes or Home Depot. 2. When replacement parts are not available, please write or call Price Pfister Consumer Service. 3. Always turn off water and release pressure before working on your faucet. -
Page 10: Cleaning Cartridge
• ▪ Remove cartridge assembly (D) and inspect cartridge Water doesn’t get hot enough. (E) and inlets for debris or sediment and flush with o Remove hand (A), sleeve (B) and flange (C) and then water. refer to valve body instruction sheets for adjusting Reassemble the whole unit and test. -
Page 11: General Use And Maintenance For All Units
GENERAL USE AND MAINTENANCE FOR ALL UNITS • Drops of water will continue to drain out from the jets and water outlets after use, this is normal and it will eventually stop. • Abrasive cleaners must not be used. • Always shut off the power supply when the system is not in use. -
Page 12: Control Procedures
CONTROL PANEL FOR STEAM SHOWER: CONTROL PROCEDURES Power on/off 1. Press any button to light up the display and (Picture 1) shows on screen. 2. Then press the power on/off button to start the system and (Picture 2) shows on the display. 3. - Page 13 Steam temperature setting 1. Press this button and picture 3 shows on the display. 2. The temperature setting ranges from 20° to 59°C (68° to 138°F). 3. Press and hold this button to adjust the temperature. 4. Let go of the button when the number reaches the desired temperature and the number is set as a steam setting temperature.
- Page 14 Steam on/off 1. This button turns the steam on/off. 2. Pressing this button makes the steam symbol on the LCD display flash. 3. The temperature sensor controls the steam output based on the preset steam temperature. 4. The steam generator has a 4°C variance between accrual set temperature and real temperature.
-
Page 15: Troubleshooting For Steam Cabin
TROUBLESHOOTING FOR STEAM CABIN ISSUE CAUSE SOLUTION Check connection between control panel and power 1. Not connected properly Touch panel does not work 2. Wrong voltage Change to 220V supply 1. Desired steam room Increase the desired temperature to be higher than temperature is lower than current temperature current temperature... -
Page 16: Electrical Schematic
ELECTRICAL SCHEMATIC 14 | P a g e... -
Page 17: Replacement Parts
REPLACEMENT PARTS Parts can be purchased by visiting: hwbpro.com You can also request parts that are under warranty by filling out the parts request form at: homewardbath.com/support WARRANTY INFORMATION & REGISTRATION Please visit our website to complete the online form: homewardbath.com/warranty-registration Registration must be completed within 45 days of receipt to be valid.


Need help?
Do you have a question about the Steam Planet Galaxy Series and is the answer not in the manual?
Questions and answers