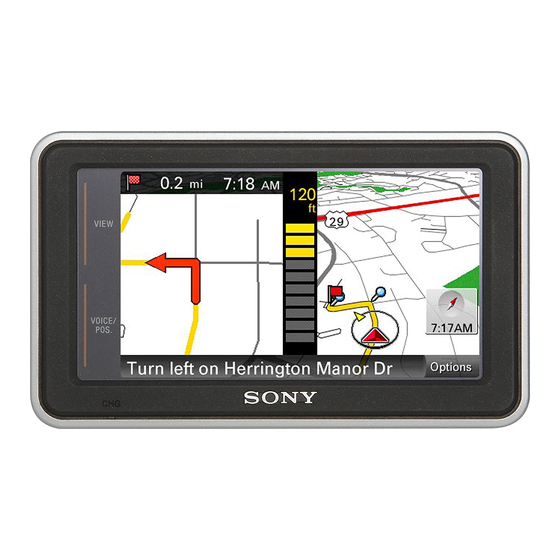
Sony NV-U73T Instruction Manual
Personal navigation system
Hide thumbs
Also See for NV-U73T:
- Quick start manual (194 pages) ,
- Operating manual (21 pages) ,
- Specifications (2 pages)

Related Manuals for Sony NV-U73T


Summary of Contents for Sony NV-U73T
- Page 1 3-292-494-12 (1) Instruction Manual Personal Navigation System Instruction Manual NV-U83T NV-U73T © 2008 Sony Corporation...
-
Page 2: Using The Manuals
Using the manuals The following manuals are included with the unit. Before installing or operating the unit, read these manuals thoroughly and retain them for future reference. • Read This First Contains instructions on how to install the unit in your car, the location of controls, and the featured navigation operations. -
Page 4: Table Of Contents
Table of Contents Basic Operations Menu operations......6 Gesture Command operations ....6 Keyboard operations . - Page 5 Using the Supplied Software System requirements ....28 Installing the software ....28 Connecting the unit to your computer .
-
Page 6: Basic Operations
Basic Operations Common procedures to operate the system are explained. General operations can be performed on the touch screen. Gently touch the displayed icons with your finger. Note Do not press the display with excessive force. Do not use any sharp object, such as a pen, etc., to tap on the display. -
Page 7: Keyboard Operations
Keyboard operations The keyboard display appears when you need to enter text. When entering addresses, you need only enter characters in upper case, as the system automatically converts them to appropriate characters. You can change the case or enter special characters/symbols when necessary. The following types of keyboards are selectable: •... -
Page 8: Navigation
Navigation Checking the GPS status About the GPS status indication The GPS status can be checked by the color of the current position icon. If the current position is not displayed, touch VOICE/POS. to show the icon. Current position icon Indication Status Signals are insufficient for... -
Page 9: Home Search
Full address search Follow the procedure below if you know the house number, street name, and the city name of the destination. In the menu display, touch “Enter Address.” If the state selection display appears, select the new (current) state or “Change to Different State.”... -
Page 10: Poi Search
POI search POI (Points Of Interest) search allows you to set facilities such as restaurants, hotels, gas stations, etc., as the destination. The system searches for POIs near the current position. To search for the POIs in another city You can specify the city before selecting the POI search method. -
Page 11: Intersection Search
Intersection search The intersection can be set as a destination, if available for the selected street. In the menu display, touch “Find a Place.” The search method selection display appears. Select “Find Intersection.” The street name input display appears. Enter the street name. The list of street candidates appears. -
Page 12: Favorites Search
Favorites search You can select a destination that is saved in the Favorites. For details on how to manage Favorites, see page 19. In the menu display, touch “My Places.” The search method selection display appears. Select “Favorite 1,” “Favorite 2,” “Favorite 3,”... -
Page 13: Map Scrolling Mode
Approaching an intersection (closer) Approaching an intersection (even closer) A Current direction/current speed B Current position/GPS status indication (page 8) C North indicator/current time D Current street name E ETA (Estimated Time of Arrival)/distance to destination F Distance to next turn G Next instruction H Next turn instruction I Magnified view of an intersection... -
Page 14: Using The Map Tool
Using the map tool The map tool bar appears when you touch “Options” on the map display. MENU VOICE/ POS. 1 To show the main menu. 2 To check the TMC status/show the traffic messages on the current route (page 17). 3 To show the call in progress display (page 22).* 4 During route guidance:... -
Page 15: Editing Route Points
After setting the route point, select “Done.” The route planning display reappears with the selected point added in the list. The last setting is listed as the final destination. Repeat step 4 to 6 to continue adding route points. Up to 10 route points can be set. Select “Calculate Route.”... -
Page 16: Adding An Interim Destination To The Current Route
Adding an interim destination to the current route During route guidance, you can add an interim destination. In the menu display, touch select the desired search method to set the interim destination. For details on search methods, see “Route searching” on page 8. You can select the desired search method, except for home search and Favorites search. -
Page 17: Tmc Information
TMC information The built-in TMC (Traffic Message Channel) receiver* allows you to receive traffic information. You can check the traffic messages. * For NV-U83T, the receiver is located in the cradle. For NV-U73T, the receiver is located in the unit. Checking traffic information About the TMC status indication The TMC status can be checked by the traffic... -
Page 18: Selecting The Traffic Information Type
Selecting the traffic information type You can select the traffic information type to display. Open the list of traffic messages. For details, see “Viewing traffic messages” on page 17. Select “Change Message.” The type selection display appears. Select the desired type. Select To show “On Route”... -
Page 19: Favorites
From the map option menu In the map display, touch the map to switch to the map scrolling mode, then select the desired point. Select “Options,” then “More...” Follow the procedure from step 3 above to add the selected point to the address book. Further management of address book is available from the setting menu (page 24). -
Page 20: Activating The Bluetooth Signal
Activating the Bluetooth signal In the menu display, touch “Phone.” Select “Bluetooth Signal,” then “ON.” The signal is activated. The Bluetooth indicator in the bottom right of the unit lights up in blue. Pairing with a cellphone Pairing is required only the first time you connect to a cellphone. -
Page 21: Making Calls
Making calls You can make hands-free calls in various ways. The following calling methods are available. • “Dialing a phone number” (page 21) • “Using the list of recent calls” (page 21) • “Using the phone book” (page 21) • “Using preset numbers” (page 22) •... -
Page 22: Using Preset Numbers
Using preset numbers You can make a call quickly using preset phone numbers. For details on how to preset phone numbers, see page 27. In the menu display, touch “Phone.” The calling method selection display appears. Select “D1,” “D2,” “D3,” or “Home.” The call is made. -
Page 23: Showing The Map
Showing the map Touch VOICE/POS. The map and the route guidance (if in progress) appear with displayed on the right side. To return to the call in progress display, touch To show the menu display, touch MENU. Transferring the current call to a cellphone You can transfer the current call to a cellphone if, for example, you want to leave your car without... -
Page 24: Settings
Settings The setting menu includes the following categories. • “Route Planning” (page 14) • “Address Book” (page 24) • “General” (page 24) • “Map” (page 26) • “Route Profile” (page 26) • “Guide” (page 26) • “Traffic Information” (page 27) •... - Page 25 Daylight Saving Time To set daylight saving time automatically by GPS or manually. – “Automatic”: Updates automatically by GPS. – “Manual (+1h)”/“Manual (+30min)”: Sets manually. – “OFF”: Standard time. GUI Day / Night Mode To select the color theme of menu displays. –...
-
Page 26: Map Settings
Map settings The following map display settings are configurable. In the menu display, touch desired item c the desired option. 2D / 3D Map View To select the default map view. – “2D”: Overhead view. – “3D” (level 1): Overhead view from a slight angle. -
Page 27: Traffic Information Settings
Automatic Zoom To change the map scale automatically depending on the driving speed. The faster the speed, the larger the map scale: “ON,” “OFF.” Intersection Zoom To show the magnified view of an intersection: “ON,” “OFF.” Select Voice To select the guidance voice type. For details on how to import guidance voice data from your computer, see “Guidance voice data management”... -
Page 28: Using The Supplied Software
Using the Supplied Software You can install the software to your computer from the supplied disc. Using the software, you can manage various data to use on the unit. System requirements Computer • IBM PC/AT compatible machines • CPU: Pentium III Processor 800 MHz or faster •... -
Page 29: Starting The Software
3 To select the language for software on-screen displays. 4 To upgrade the firmware (page 31). 5 To manage guidance voice data (page 29). 6 To access to the Sony navigation support site. 7 To exit the software. Guidance voice data management You can transfer guidance voice data from your computer to the unit, using the software. -
Page 30: Map Data Management
Map data management You can transfer and replace the map data on the unit, using the software (e.g., to restore map data if necessary). Before starting, connect the unit to your computer and start the software. To transfer the map data on the supplied/optional disc, insert the disc. In the main menu of the software, select “Map Manager.”... -
Page 31: Transferring Address Book Data From Your Computer To The Unit
The address book data is transferred to your computer. Firmware upgrade You can download firmware upgrades from the Sony navigation support site to your computer, and upgrade the firmware of the unit using the software. Before starting, connect the unit to your computer and start the software.
Need help?
Do you have a question about the NV-U73T and is the answer not in the manual?
Questions and answers