Table of Contents
Advertisement
Available languages
Available languages
Quick Links
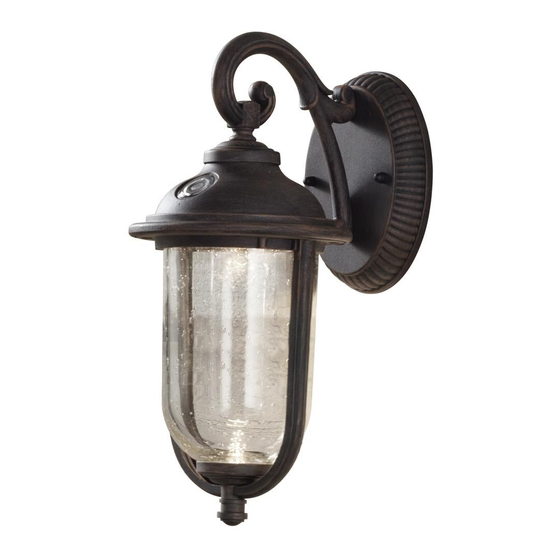
Item #1001 376 142
Model #RFSW6300L30RSPC
USE AND CARE GUIDE
PERDIDO OUTDOOR LANTERN
Questions, problems, missing parts? Before returning to the store,
call Hampton Bay Customer Service
8 a.m. - 7 p.m., EST, Monday - Friday,
9 a.m. - 6 p.m., EST, Saturday
1-855-HD-HAMPTON
HAMPTONBAY.COM
THANK YOU
We appreciate the trust and confidence you have placed in Hampton Bay through the purchase of this outdoor lantern. We strive to continually
create quality products designed to enhance your home. Visit us online to see our full line of products available for your home improvement
needs. Thank you for choosing Hampton Bay!
Advertisement
Chapters
Table of Contents

Related Manuals for HAMPTON BAY PERDIDO RFSW6300L30RSPC


Summary of Contents for HAMPTON BAY PERDIDO RFSW6300L30RSPC
- Page 1 THANK YOU We appreciate the trust and confidence you have placed in Hampton Bay through the purchase of this outdoor lantern. We strive to continually create quality products designed to enhance your home. Visit us online to see our full line of products available for your home improvement...
-
Page 2: Table Of Contents
Table of Contents Safety Information . . . . . . . . . . . . . . . . . . . . . . . . . . . . . . . . . . 2 Installation . -
Page 3: Pre-Installation
Pre-Installation PLANNING INSTALLATION □ Turn off the electrical power at your fuse or circuit breaker box before installing or servicing any part of this fixture. □ Carefully remove the fixture from the carton, and check that all parts are included. Be careful not to misplace any of the screws or parts needed for installing the fixture. -
Page 4: Package Contents
Pre-Installation (continued) PACKAGE CONTENTS Part Description Quantity Gem bar Backplate Light fixture... -
Page 5: Installation
Installation Installing the gem bar Connecting the wires □ Remove the acorn nuts (DD) to separate the gem bar from CAUTION: Make sure the main power is off at the fuse or circuit the fixture. breaker box. Check the power wires for damage or scrapes. If the power supply wires are within 3 in. - Page 6 Installation (continued) Mounting the light fixture □ Align the mounting holes in the backplate (B) with the two studs (CC). □ Insert the two studs (CC) through the backplate (B), and secure the fixture with the two acorn nuts (DD). □...
-
Page 7: Maintenance
Maintenance REPLACING THE LED DRIVER Do NOT disassemble product. This operation IMPORTANT: is only for replacement of a faulty LED Driver. This is NOT a step to be taken with installation of this fixture. IMPORTANT: It is recommended that the replacement of an LED driver be completed by a qualified electrician. -
Page 8: Care And Cleaning
Care and Cleaning To clean the fixture, disconnect power to the fixture by turning off the circuit breaker or by removing the fuse at the fuse box. Wait a few minutes for the fixture to cool down. □ Use a dry or slightly dampened clean cloth (use clean water, never a solvent) to wipe the glass and surface of the fixture. □... -
Page 9: Service Parts
Service Parts MODEL TYPE Part Description Quantity Glass Driver and Photocell LED Array HAMPTONBAY.COM Please contact 1-855-HD-HAMPTON for further assistance. - Page 10 Questions, problems, missing parts? Before returning to the store, call Hampton Bay Customer Service 8 a.m. - 7 p.m., EST, Monday - Friday, 9 a.m. - 6 p.m., EST, Saturday 1-855-HD-HAMPTON HAMPTONBAY.COM Retain this manual for future use. 8060846 R3...
- Page 11 FAROL PERDIDO PARA EXTERIORES ¿Preguntas, problemas, piezas faltantes? Antes de regresar a la tienda, llame al servicio al cliente de Hampton Bay de lunes a viernes de 8 a.m. a 7 p.m. (hora del este) y los sábados de 9 a.m. a 6 p.m. (hora del este) 1-855-HD-HAMPTON HAMPTONBAY.COM...
-
Page 12: Información Sobre Seguridad
Contenido Información sobre seguridad . . . . . . . . . . . . . . . . . . . . . . . . . 12 Instalación . -
Page 13: Antes De La Instalación
Antes de la instalación PLANIFICACIÓN DE LA INSTALACIÓN □ Desconecte la electricidad en la caja de fusibles o el interruptor de circuito antes de instalar o dar servicio a cualquier pieza de esta lámpara. □ Retire con cuidado la lámpara de la caja y revise que tenga todas las piezas. Asegúrese de no perder ningún tornillo o cualquier otra pieza necesaria para la instalación. -
Page 14: Contenido Del Paquete
Antes de la instalación (continuación) CONTENIDO DEL PAQUETE Pieza Descripción Cantidad Barra de soporte Placa posterior Lámpara... -
Page 15: Instalación
Instalación Instalación de la barra de soporte Conexión de los alambres □ Retire todas las tuercas ciegas (DD) para separar la barra PRECAUCIÓN: Asegúrese de desconectar la electricidad en la de soporte de la lámpara. caja de fusibles o el interruptor del circuito. Revise los alambres para detectar posibles daños o rayaduras. - Page 16 Instalación (continuación) Montaje de la lámpara □ Alinee los orificios de montaje en la placa posterior (B) con los dos pasadores (CC). □ Inserte los dos pasadores (CC) a través de la placa posterior (B) y fije la lámpara con las dos tuercas ciegas (DD).
-
Page 17: Mantenimiento
Mantenimiento REEMPLAZO DEL CONTROLADOR DE LED NO desarme el producto. Esta operación IMPORTANTE: es solo para el reemplazo de un controlador de LED defectuoso. Este paso NO es necesario durante la instalación de esta lámpara. IMPORTANTE: Se recomienda que el reemplazo del Fotocelda controlador de LED sea realizado por un electricista calificado. -
Page 18: Cuidado Y Limpieza
Cuidado y limpieza Para limpiar la lámpara, desconecte la electricidad a la lámpara apagando el interruptor de circuito o retirando el fusible en la caja de fusibles. Espere unos minutos hasta que la lámpara se enfríe. □ Use un paño limpio seco o ligeramente húmedo (use agua limpia, no use solventes jamás) para limpiar el vidrio y la superficie de la lámpara. -
Page 19: Piezas De Recambio
Piezas de recambio TIPO DE MODELO Pieza Descripción Cantidad Vidrio Controlador y fotocelda Matriz de LED HAMPTONBAY.COM Para recibir ayuda adicional, llame por favor al 1-855-HD-HAMPTON. - Page 20 ¿Preguntas, problemas, piezas faltantes? Antes de regresar a la tienda, llame al servicio al cliente de Hampton Bay de lunes a viernes de 8 a.m. a 7 p.m. (hora del este) y los sábados de 9 a.m. a 6 p.m. (hora del este) 1-855-HD-HAMPTON HAMPTONBAY.COM...
Need help?
Do you have a question about the PERDIDO RFSW6300L30RSPC and is the answer not in the manual?
Questions and answers